How To Enable WebGL for Elementor With Exclusive WebGL Plugin
WebGL is a web technology that enables interactive 3D graphics on websites. If you are looking to add interactive WegGL graphical effects to your website built with Elementor, Exclusive WebGL can help you with this. Here is how to enable WebGL for Elementor on your WordPress site with the Exclusive WebGL plugin.
Pre-requisite:
- Purchase Exclusive Addons Pro
- Elementor Page Builder
The Exclusive WebGL plugin comes as a combo of Exclusive Addons Pro. Therefore, you need to purchase Exclusive Addons Pro. Also, you need to have Elementor installed.
Step-1: Get the plugin
Check your email for License Key & Plugin
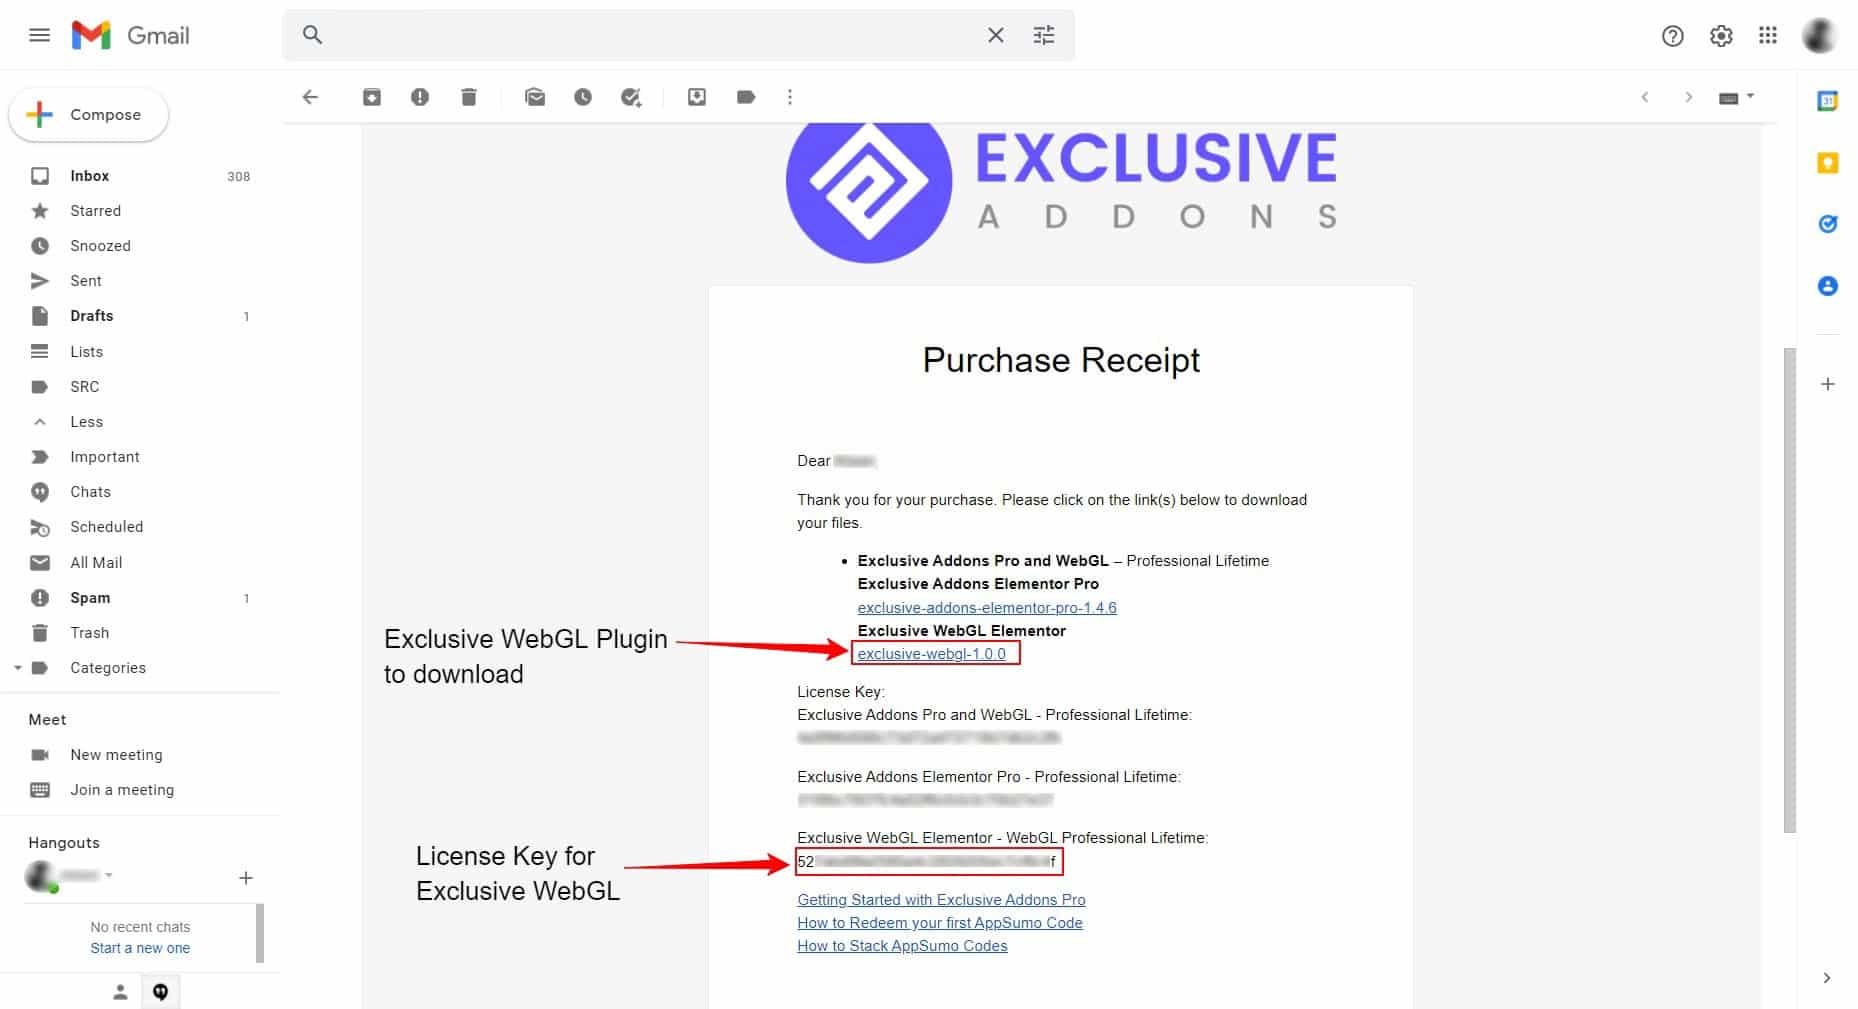
Once you complete the purchase procedure, you will receive a Purchase Receipt email. The email includes Plugin as a downloadable zip file and the License Key.
Download the zip file by clicking on exclusive-webgl-1.x.x and keep the license key for “Exclusive WebGL Elementor – WebGL Professional Lifetime” (the third one). Now proceed to the next step.
[Note: Check the spam folder if you cannot find the email in the inbox.]
Alternative way to download the plugin
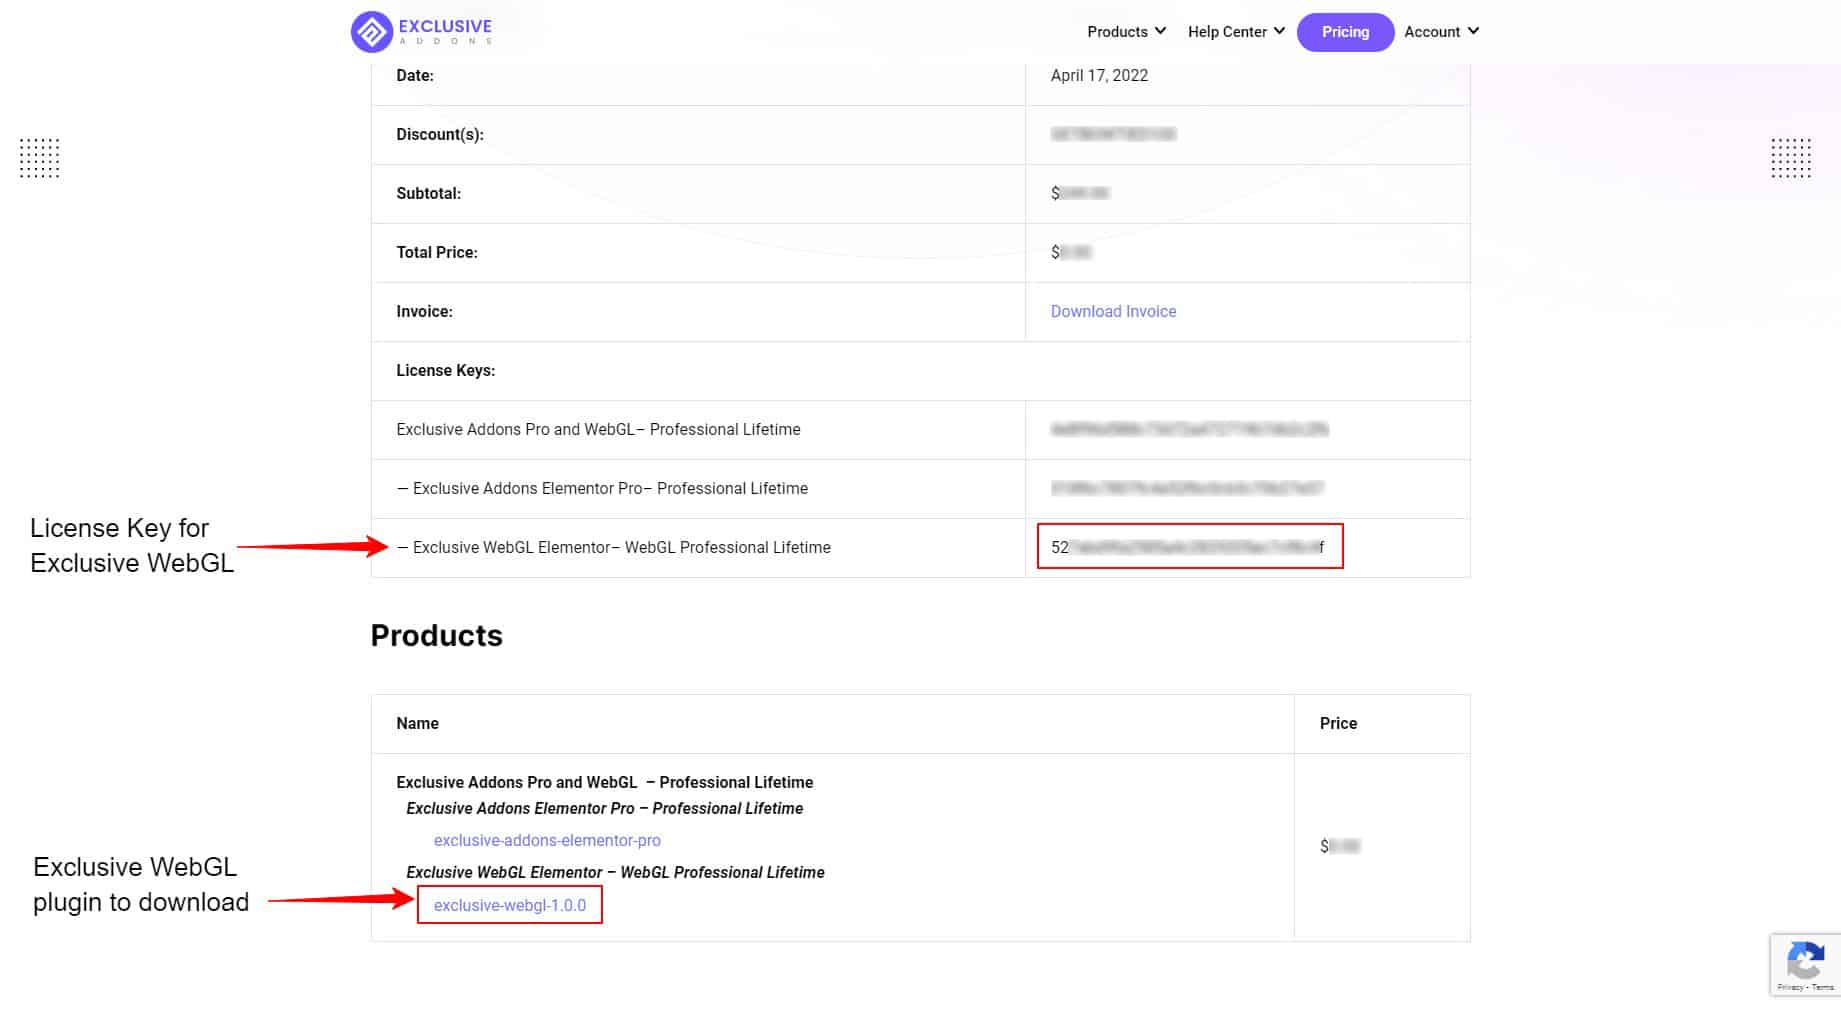
You can also download the Plugin from your account profile on Exclusive Addons.
- Login to your Exclusive Addons account.
- On the account page, switch to the Purchase History tab.
- Click to View Details and Downloads against your purchased item. It will take you to the purchase confirmation page.
- On the Purchase Confirmation page, scroll down to the Product section. You will have the downloadable Plugin zip files and the license keys.
- Download the zip file (exclusive-webgl-1.x.x) and copy the license key for Exclusive WebGL.
Step-2: Install and activate
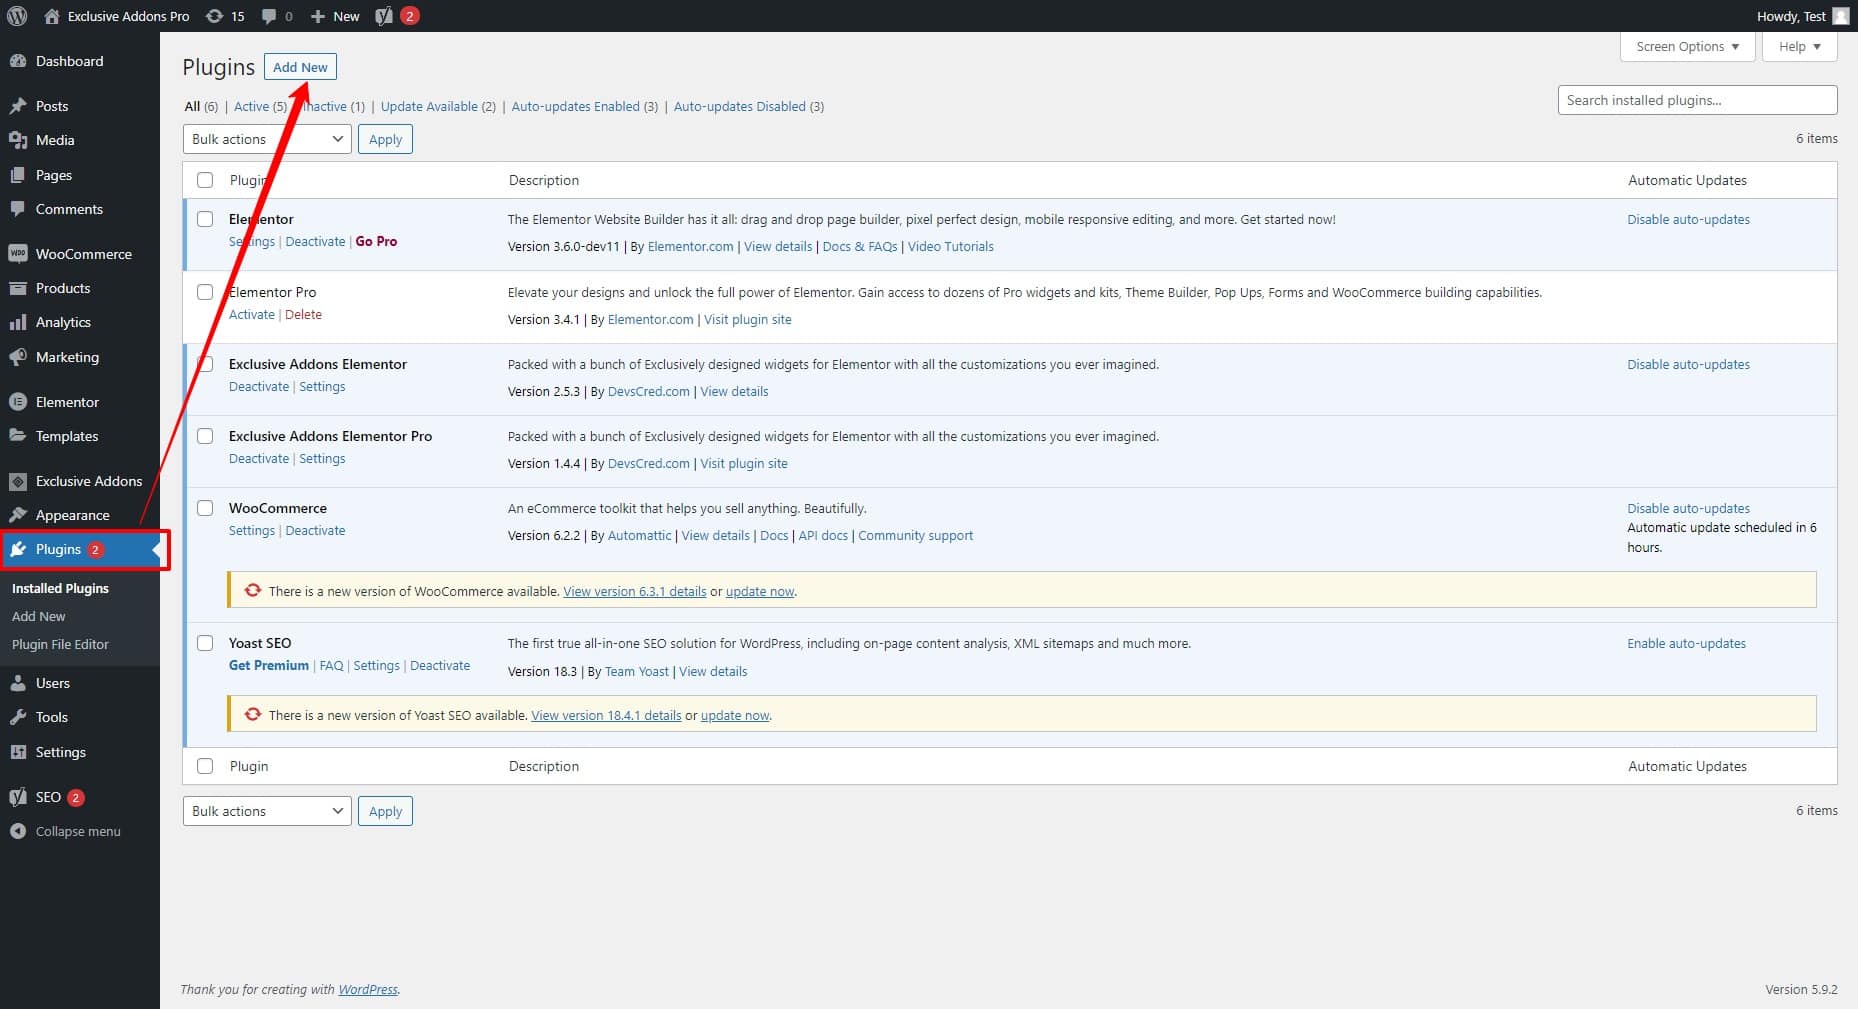
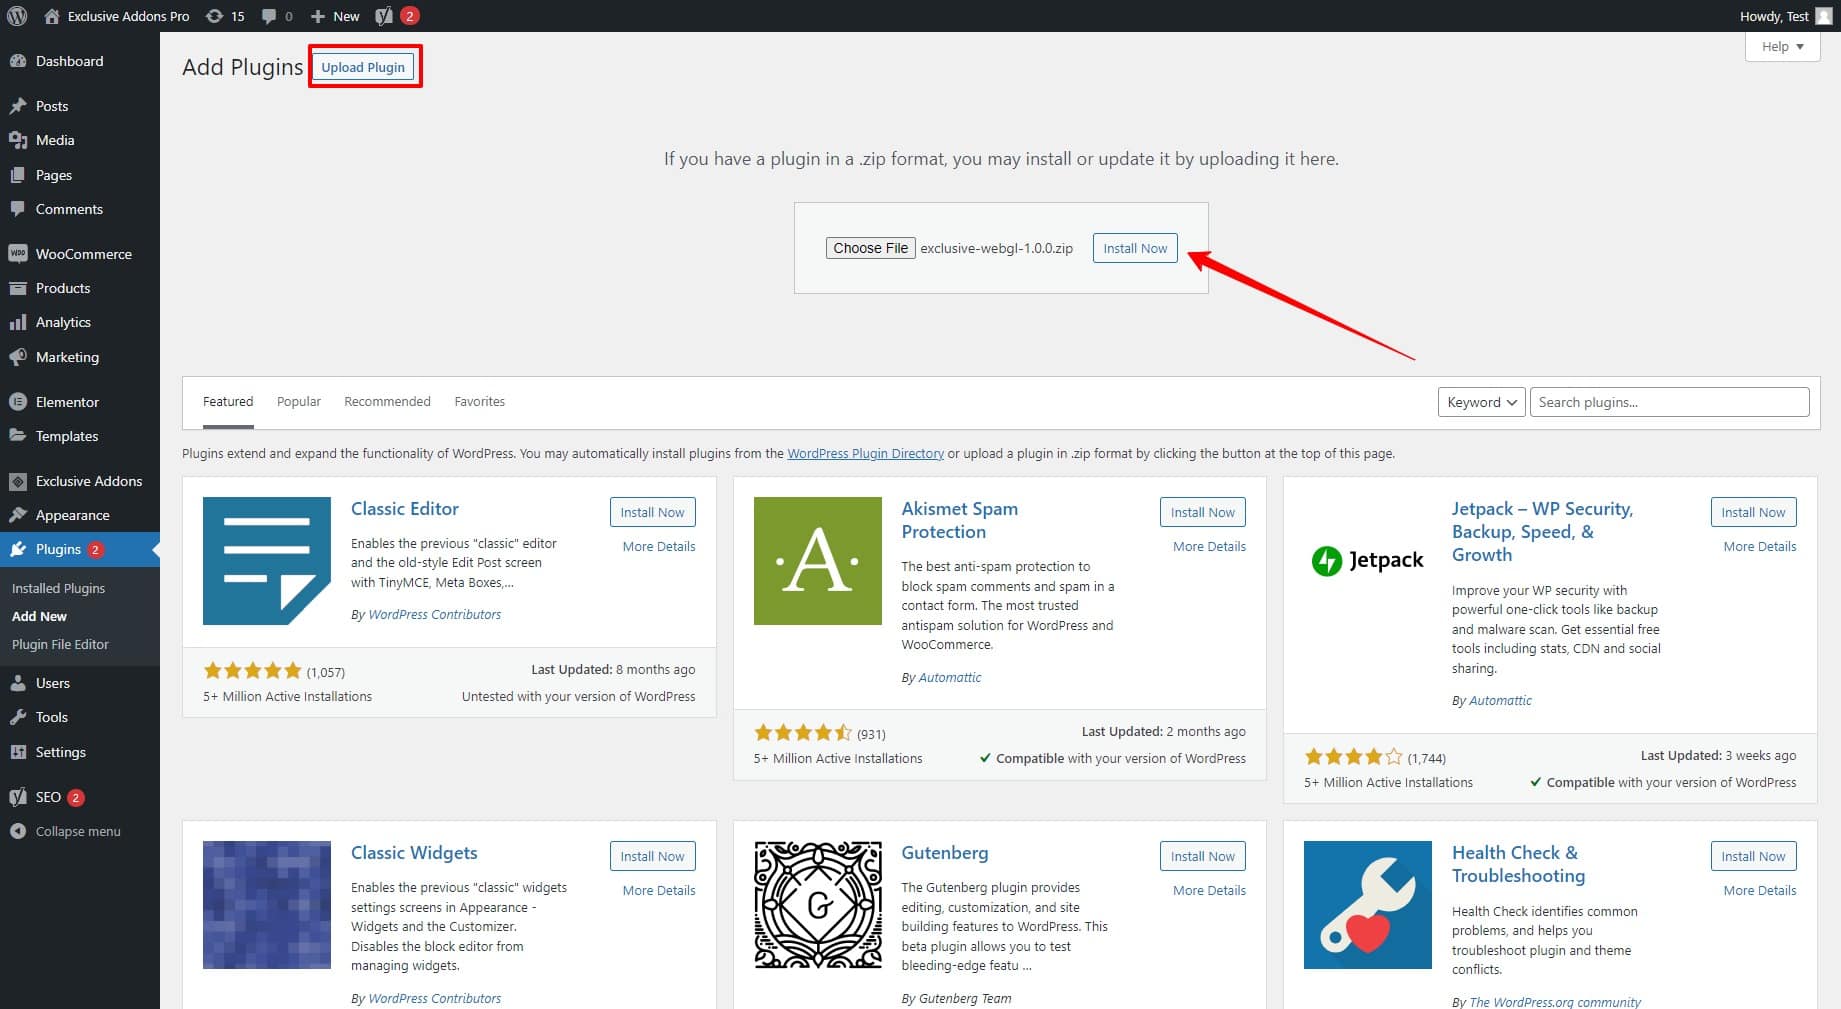
2.1 Now go to your WordPress dashboard and move to Plugins. Then click on the Add New button at the top left corner.
2.2 On the next page, click on Upload Plugin and then choose exclusive-webgl.zip to upload. Then hit the Install Now button. After that, Activate Plugin and move to the next step.
Step-3: Activate WebGL with license key
The final step is to activate your plugin with the license key.
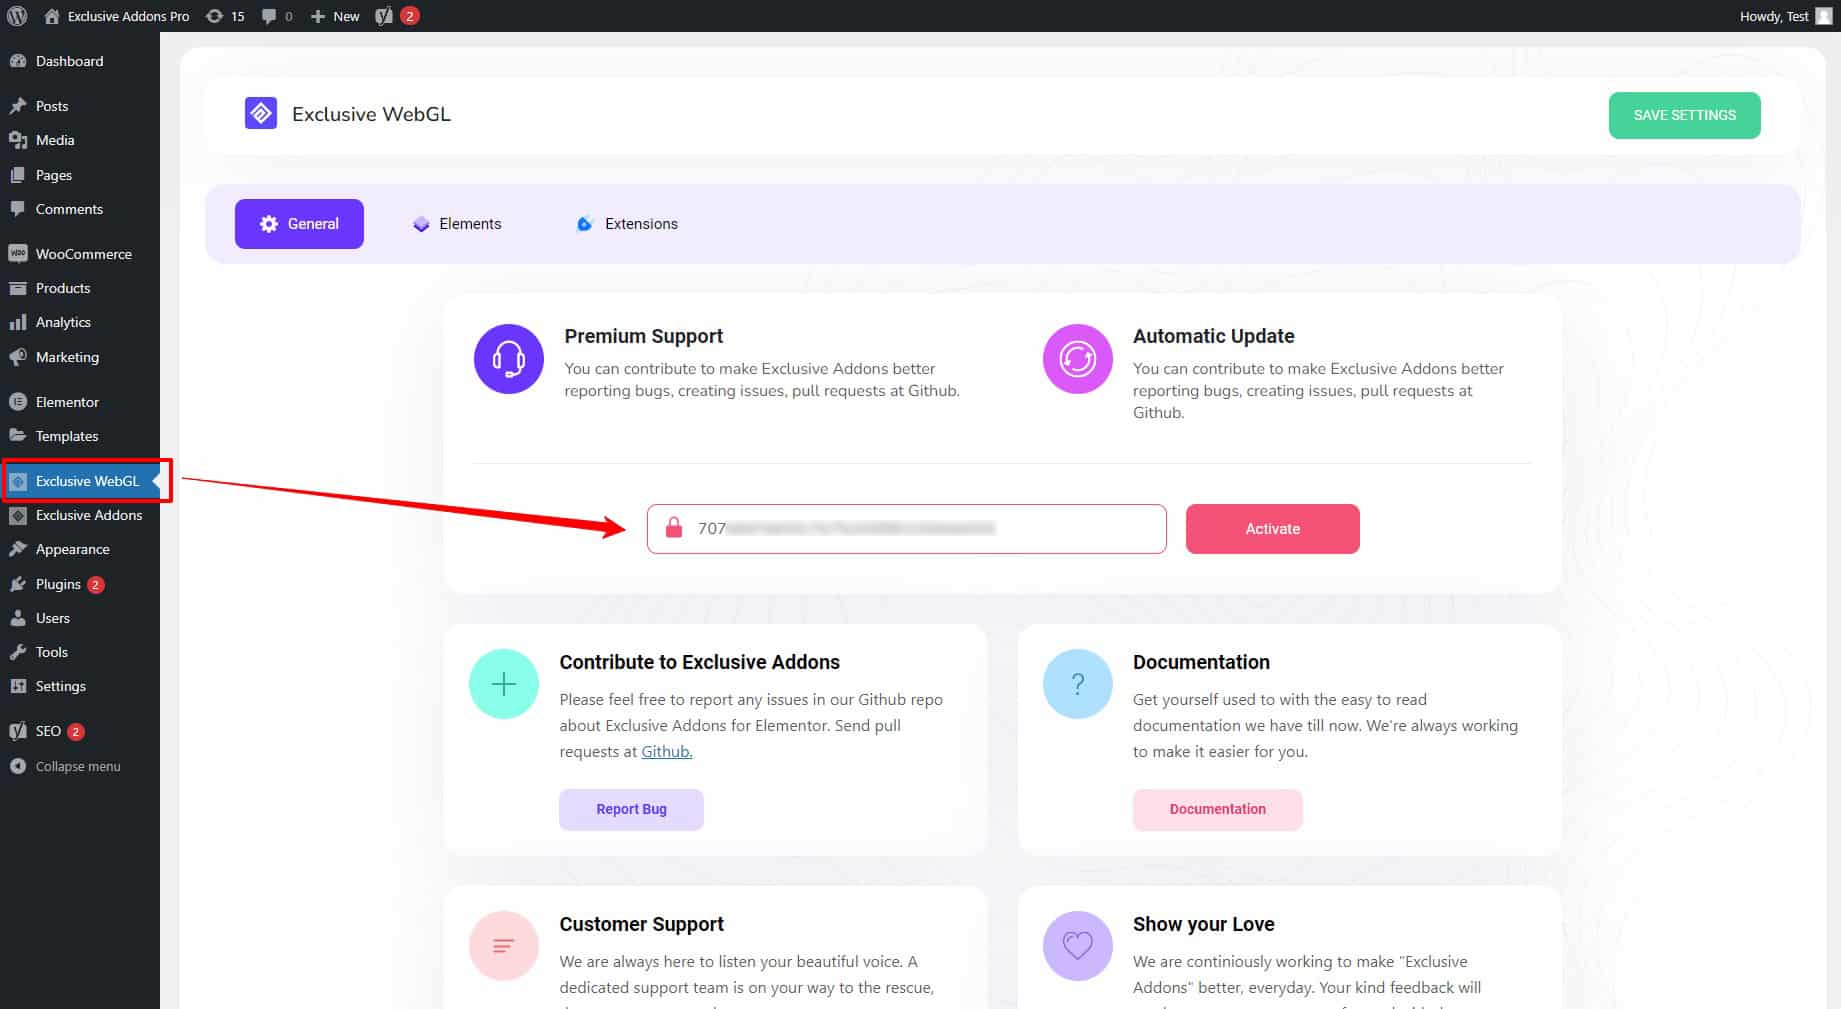
After installing the plugin, you will the WebGL section created in your WordPress dashboard. Go there and paste the license key in the required field and hit the Activate button.
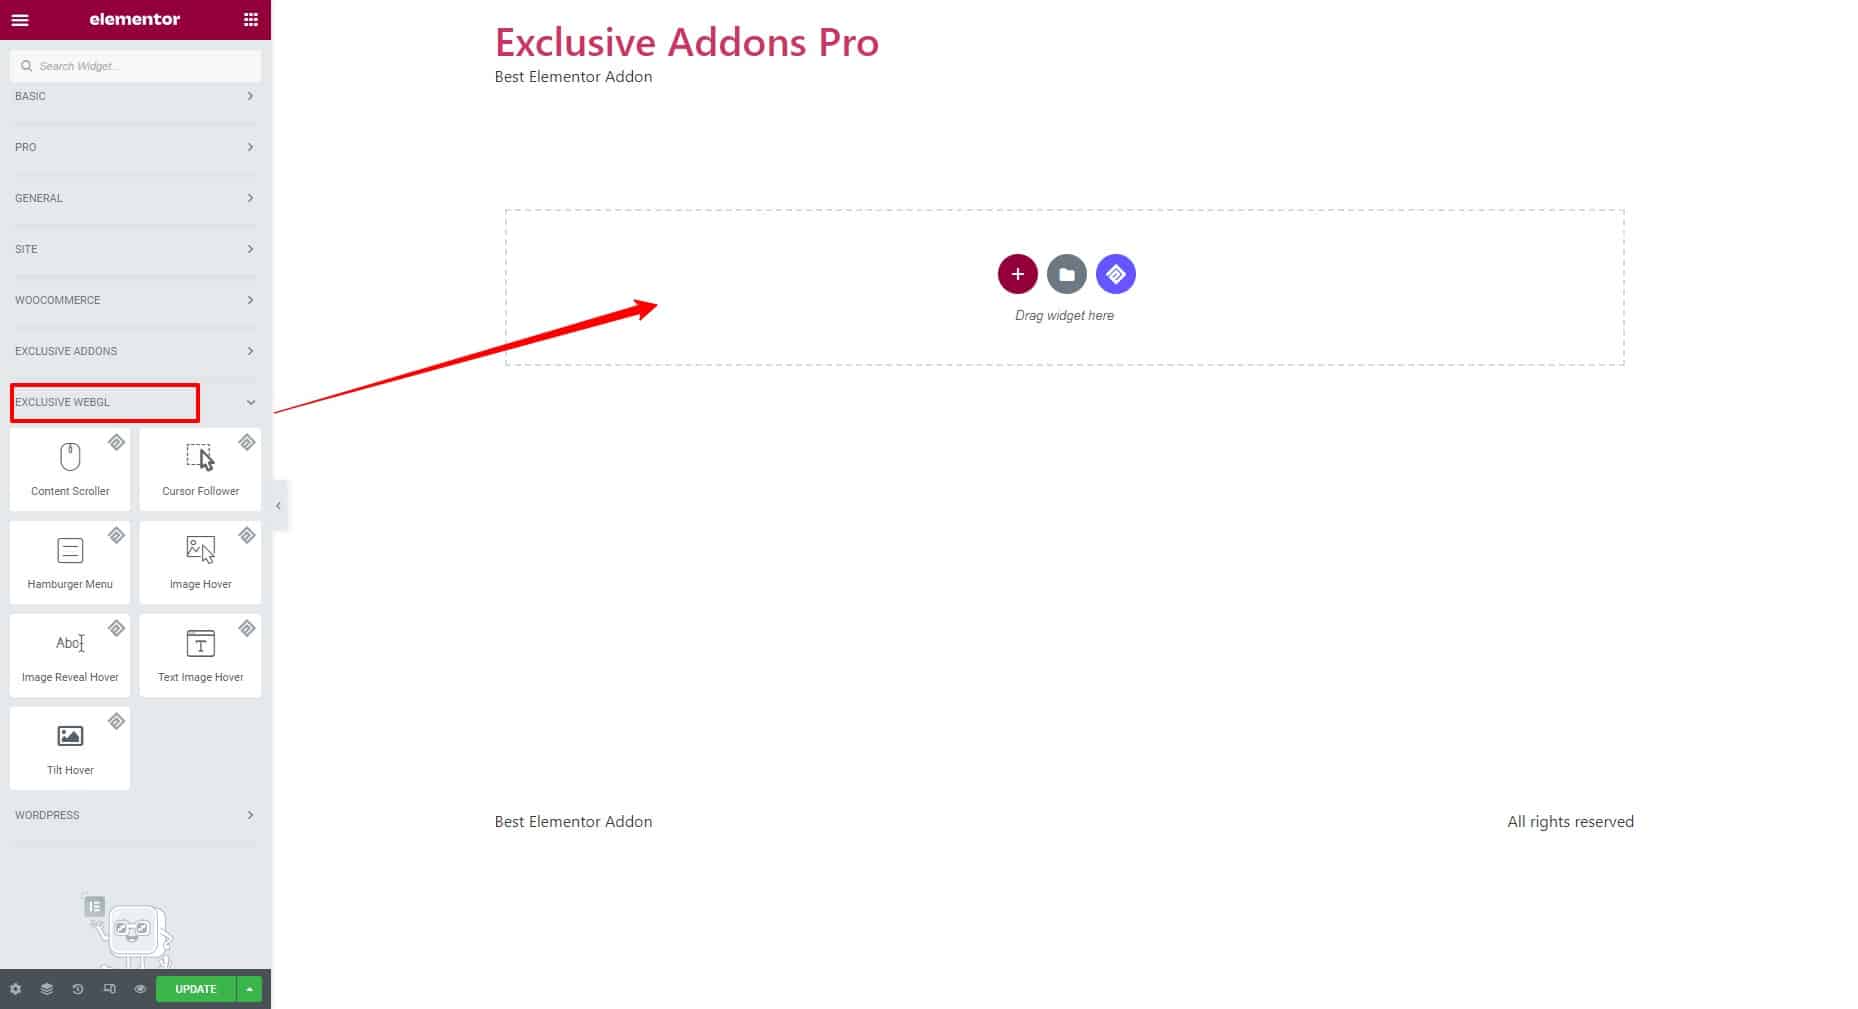
Step-4: Start using WebGL widgets
Once you activate the plugin with a license key, you will get access to the Exclusive WebGL widget. Now open the Elementor interface and start using the Exclusive WebGL widgets.