How to configure and style Elementor Woo Checkout widget.
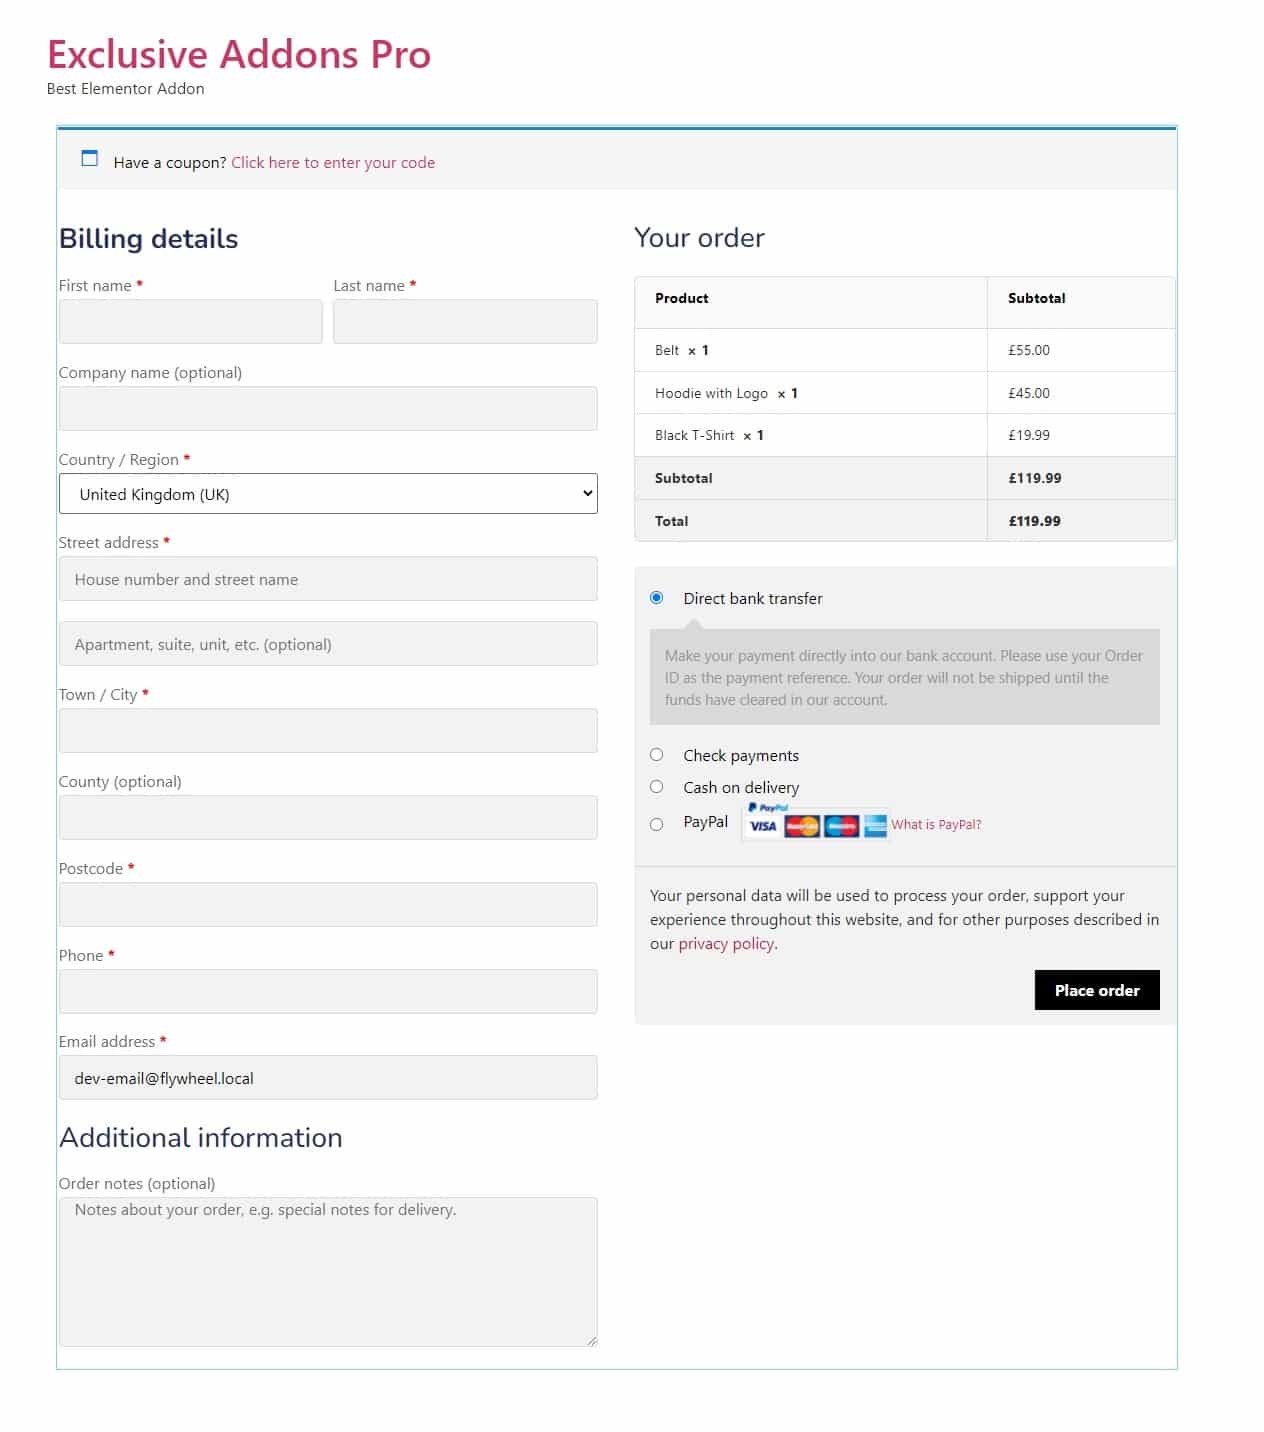
Exclusive Addons comes with a bunch of WooCommerece widgets. One of them is the Woo Checkout widget. The widget lets you design the Checkout page for your eCommerce site with the highest number of customizable options. Go through the documentation to learn how to configure and style the Checkout Widget for Elementor.
STEP 1:
Before start designing the checkout site, there are some prerequisites you need to execute.
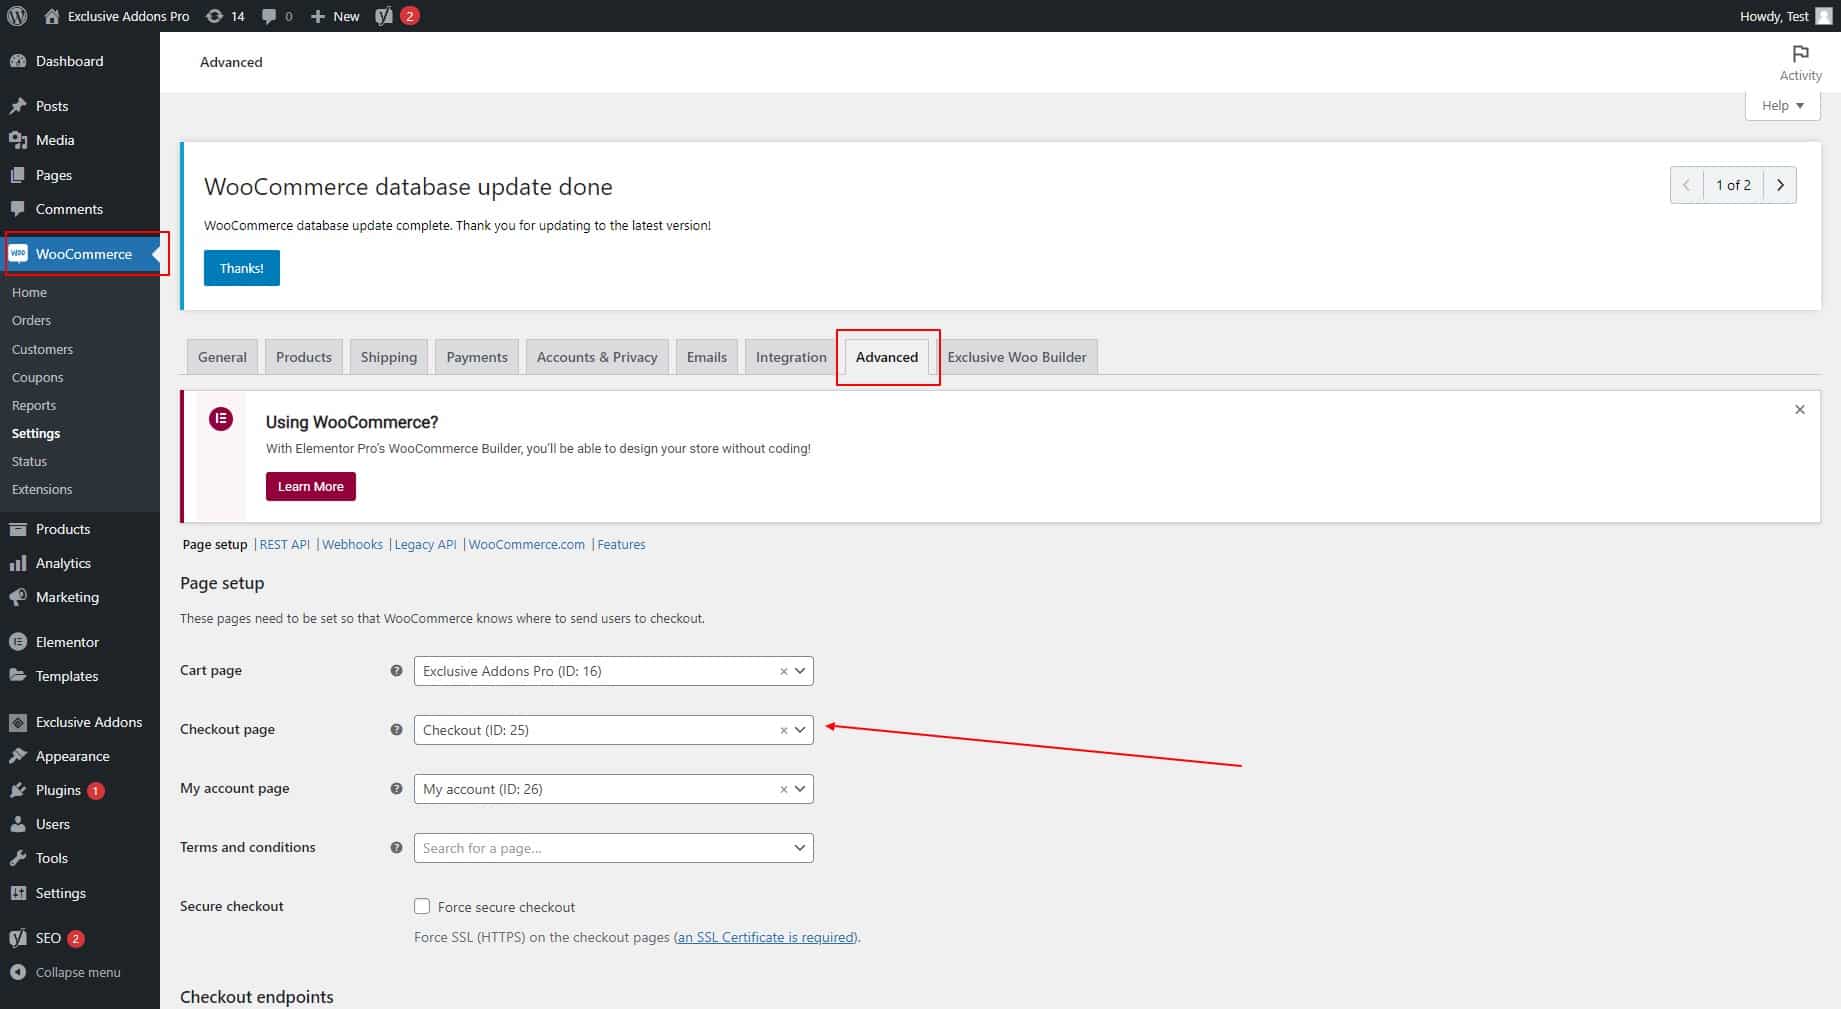
1.1 First, go to WooCoomerce from your WordPress dashboard and switch to the Advanced tab. In the tab, select the Checkout Page for your site.
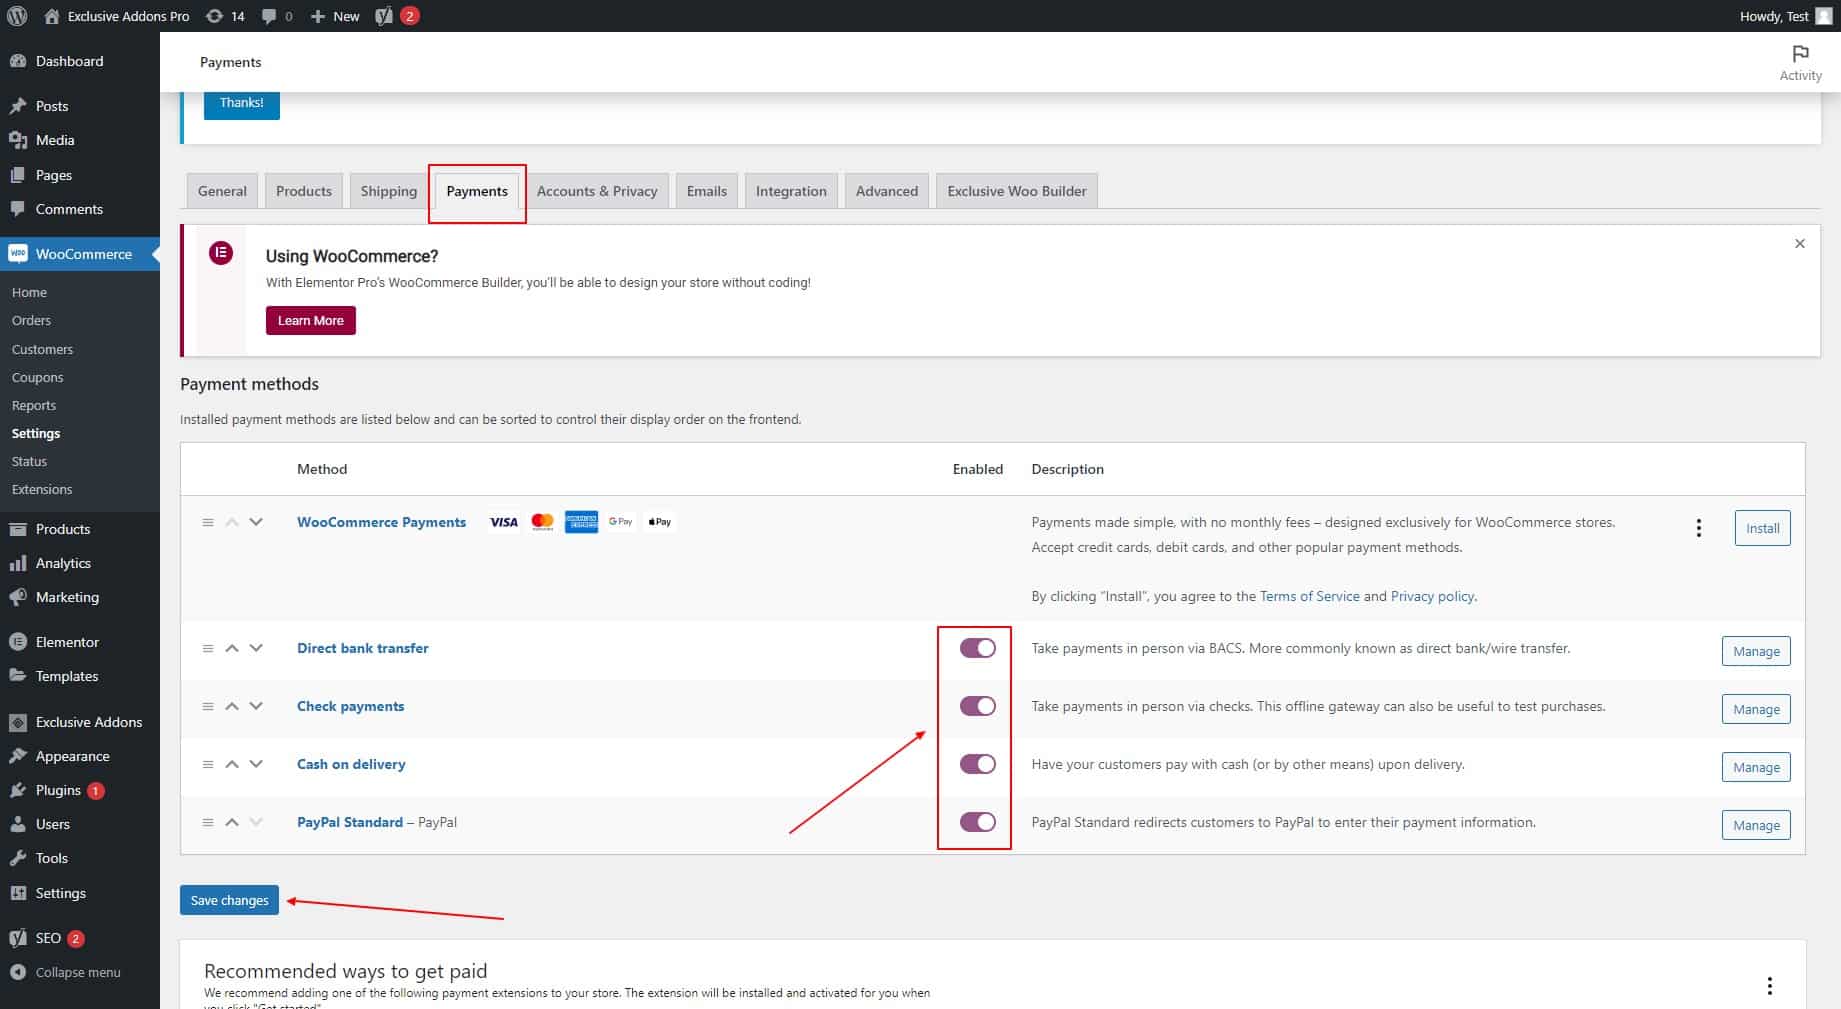
1.2 After that, switch to the Payment tab and enable the payment methods. Then hit the Save Changes button.
STEP 2:
Select the “Woo Checkout” widget from Elementor panel. Then drag and drop it in the selected area.

STEP 3:
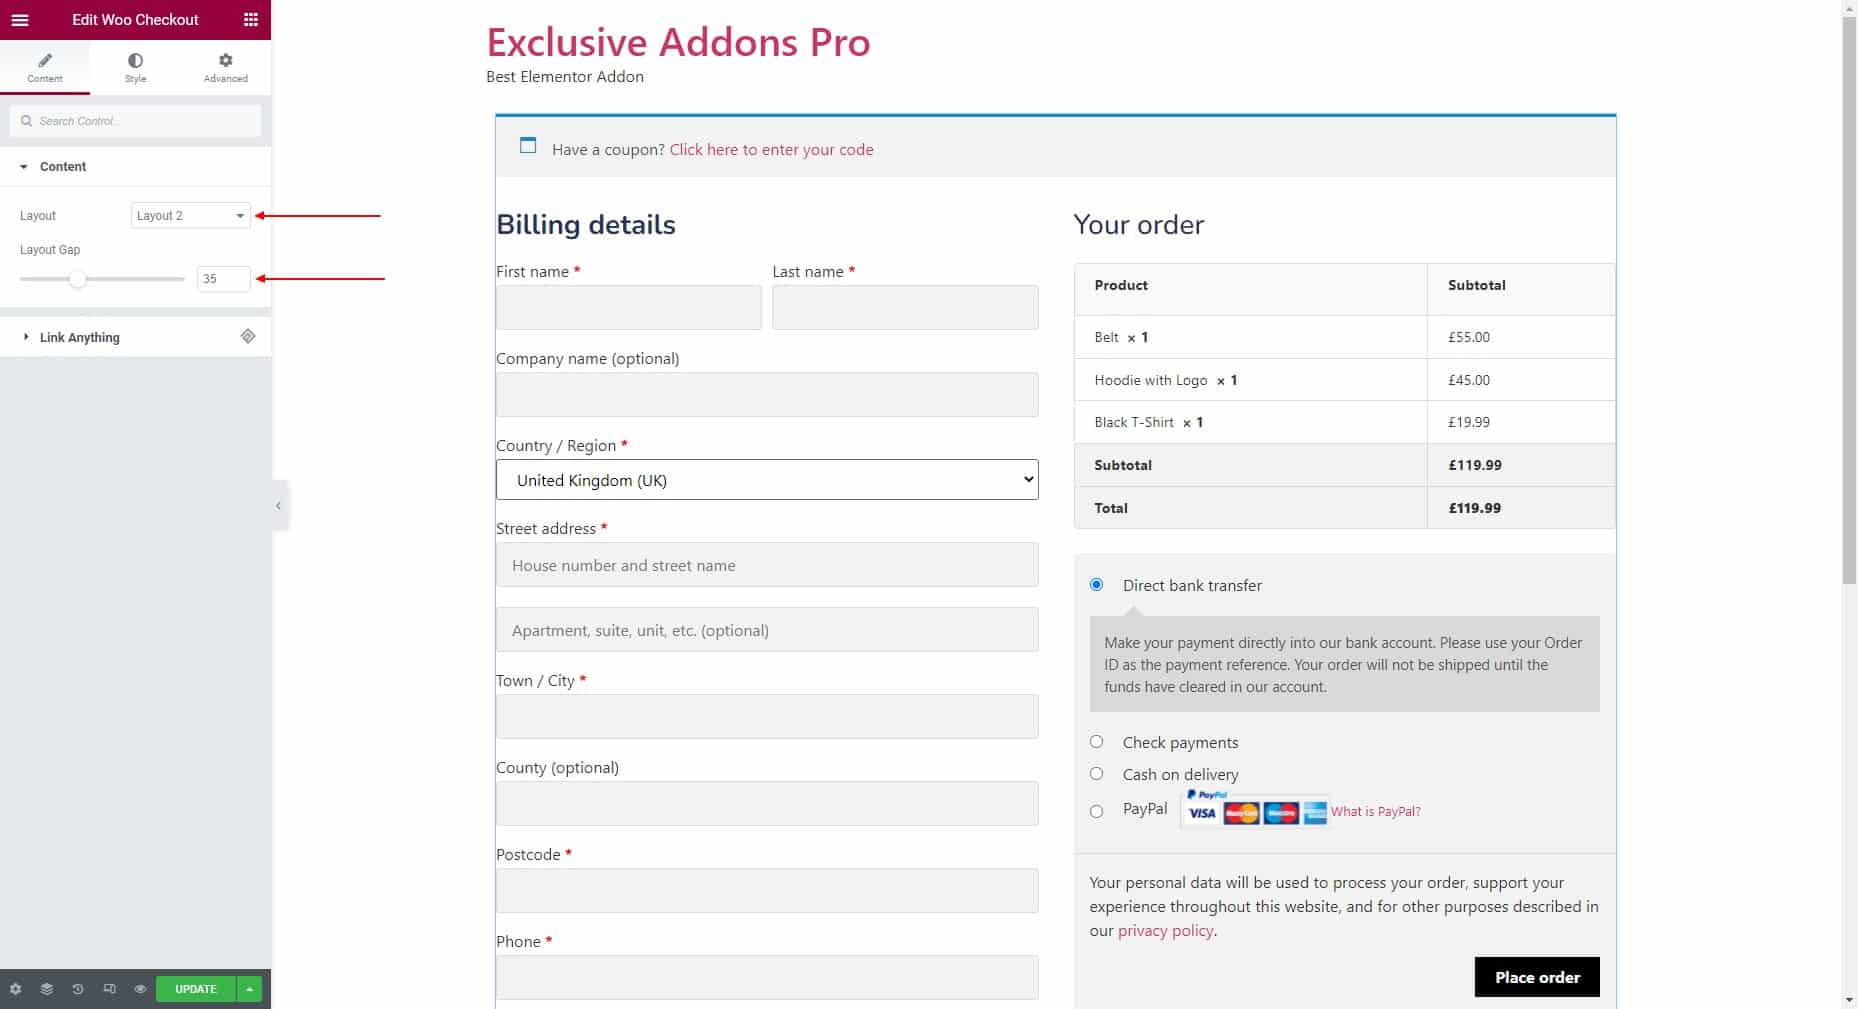
In the Content tab, you can configure the layout of the checkout page. You can choose the Layout and adjust the Layout Gap here.
STEP 4:
The Style tab allows you to customize the checkout page design.
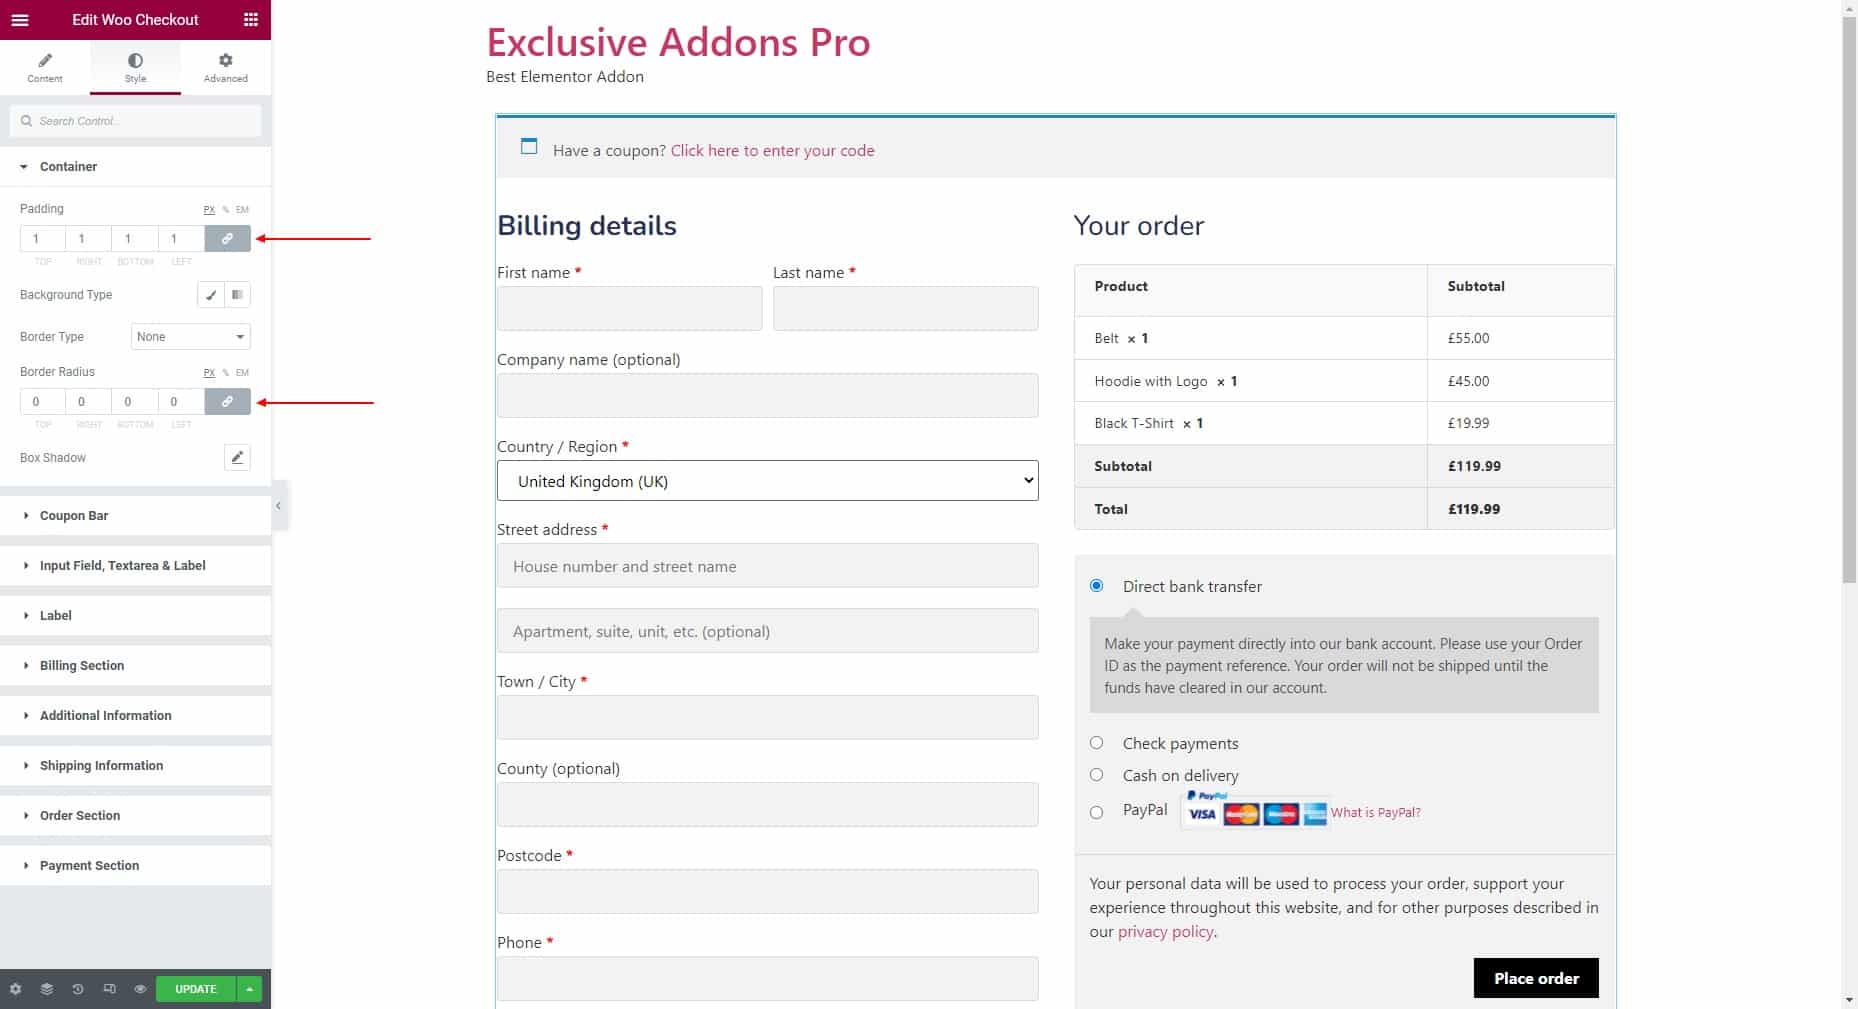
4.1 In the Container section, you can set the Padding, Background Type, Border Type, Border Radius, and Box Shadow.
4.2 In the Coupon Box section you can customize the Coupon Box, Coupon Form, Coupon Form Label, Coupon Form Input field, and Apply Coupon Button styles individually.
For the Coupon Box, you can set Padding, then select Background Type, Typography, Text Color, Icon Color, Link Color, Link Hover Color, Border Type, and Border Radius.
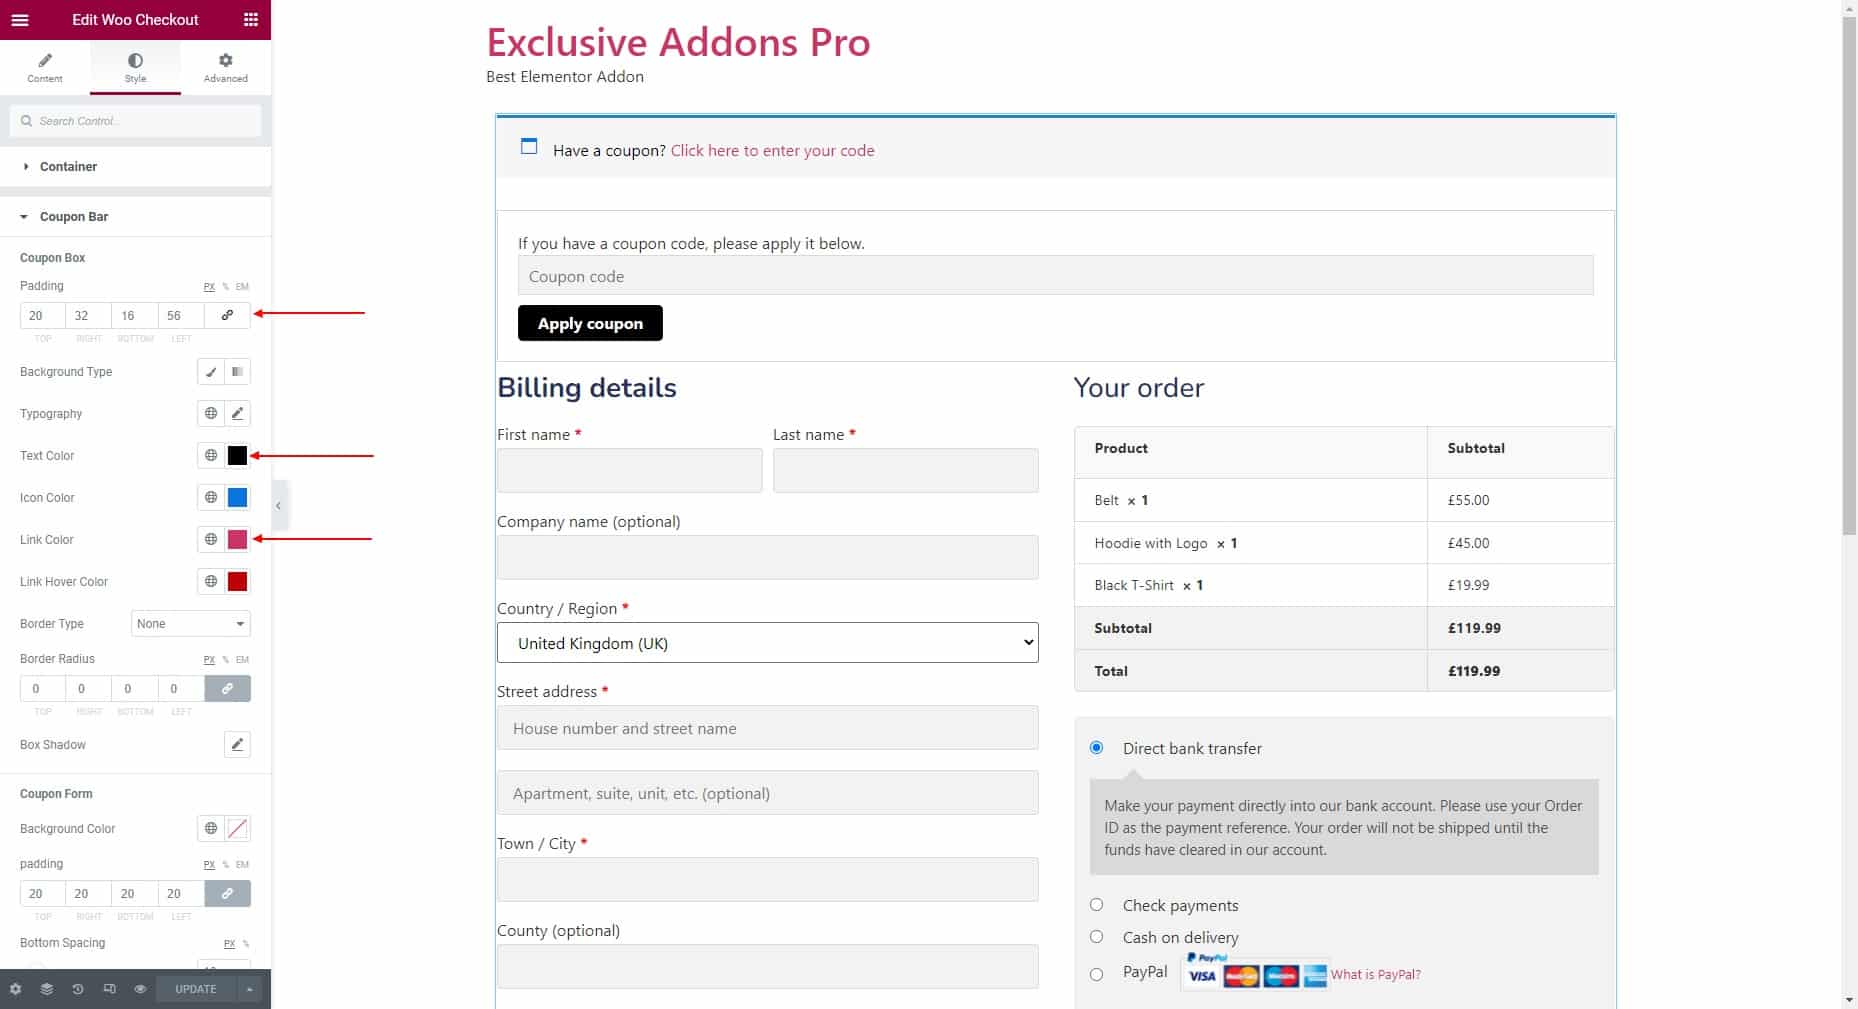
When you click on the link, a field will appear to enter the coupon code. In the Coupon Form section, set the Background Color, Padding, Border Type, Border Radius and, adjust Bottom Spacing.

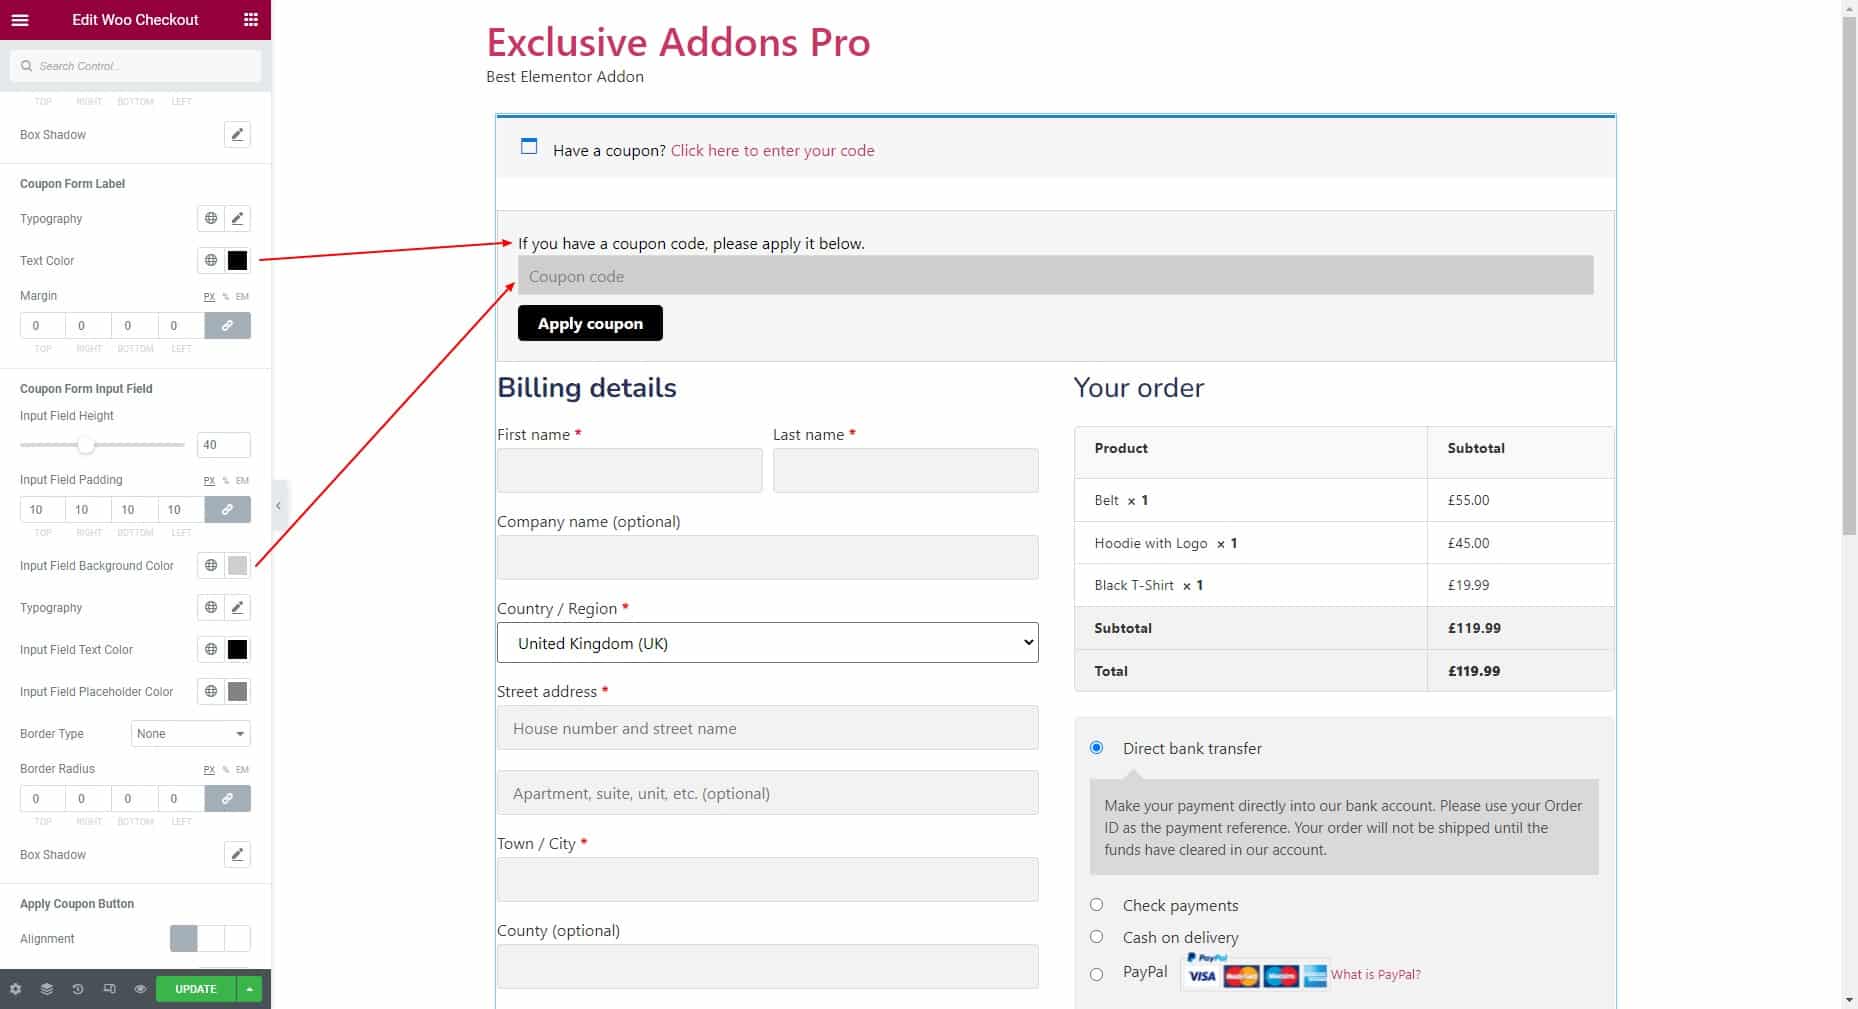
In the Coupon Form Label section, you get to set the Typography, Text Color, and Margin of the label. Then moving on to the Coupon Form Input Field adjust Input Field Height, Input Field Padding, Input Field Background Color, Typography, Input Field Text Color, and Border Type.
For the Apply Coupon Button, you can set the Alignment to Left, Right, or Center. Then set Typography, Padding, Margin, and Border Radius. Also, choose the Background Color, Text Color, and Border Type for Normal and Hover state individually.

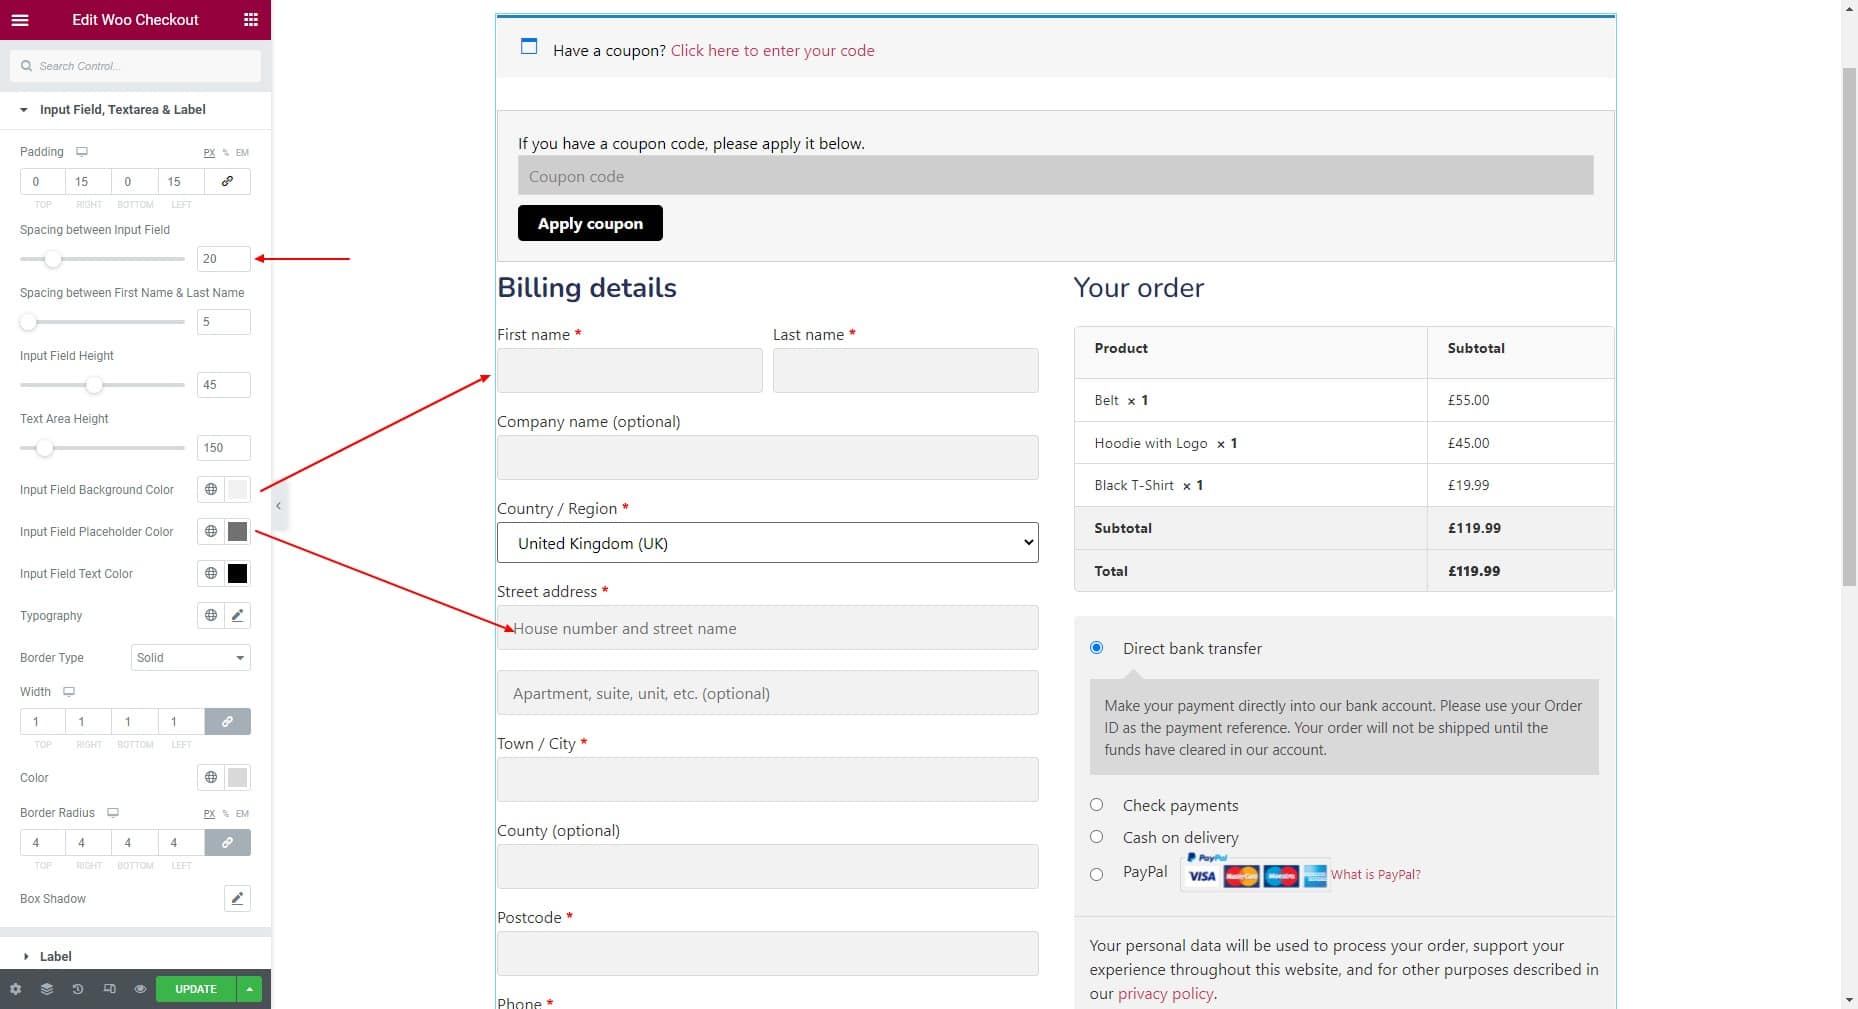
4.3 Then comes to customizing Input Field, Textarea & Label styles. In this section, you can set the Spacing between Input Field, Spacing between Input Field, Input Field Height, and Input Field Height. Then set the Padding, Input Field Background Color, Input Field Placeholder Color, Input Field Text Color, Typography, and Border Type.
4.4 For the Label, you can choose the Label Color, Typography, and adjust Label Bottom Spacing.

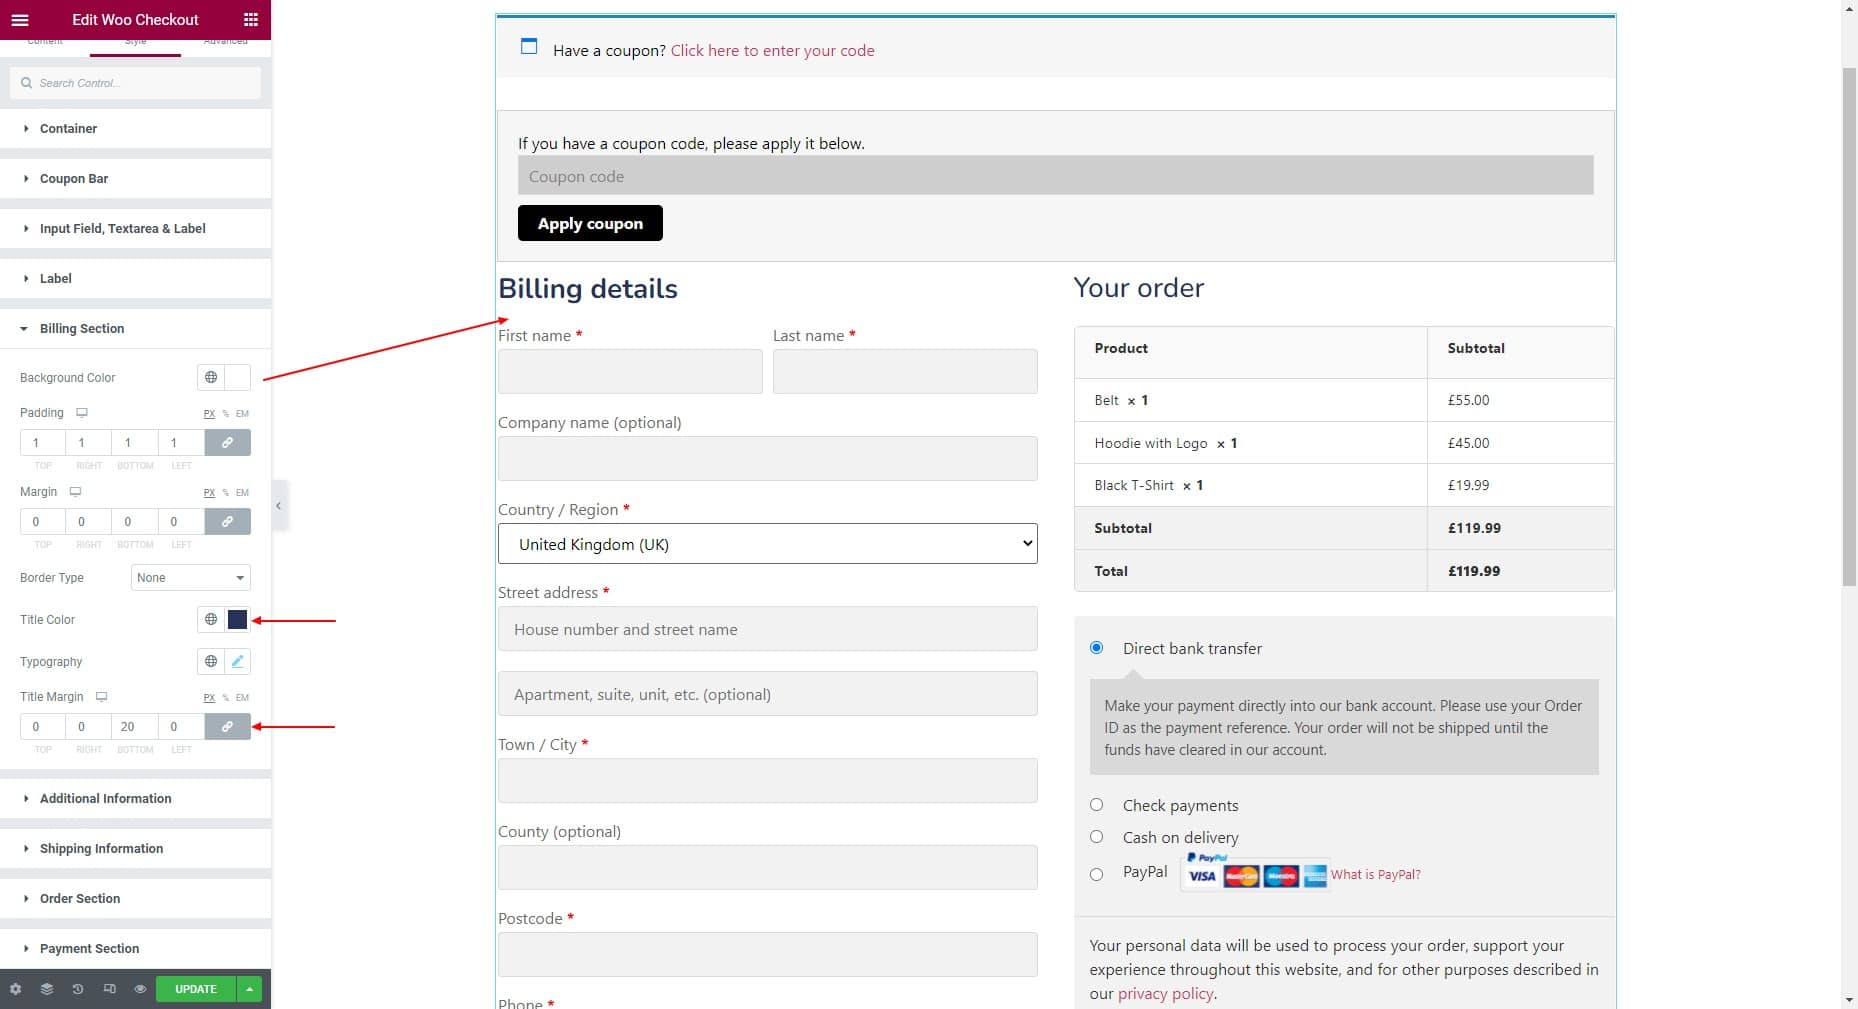
4.5 In the Billing Section, select the Background Color, Padding, Margin, Border Type, Title Color, and Typography.
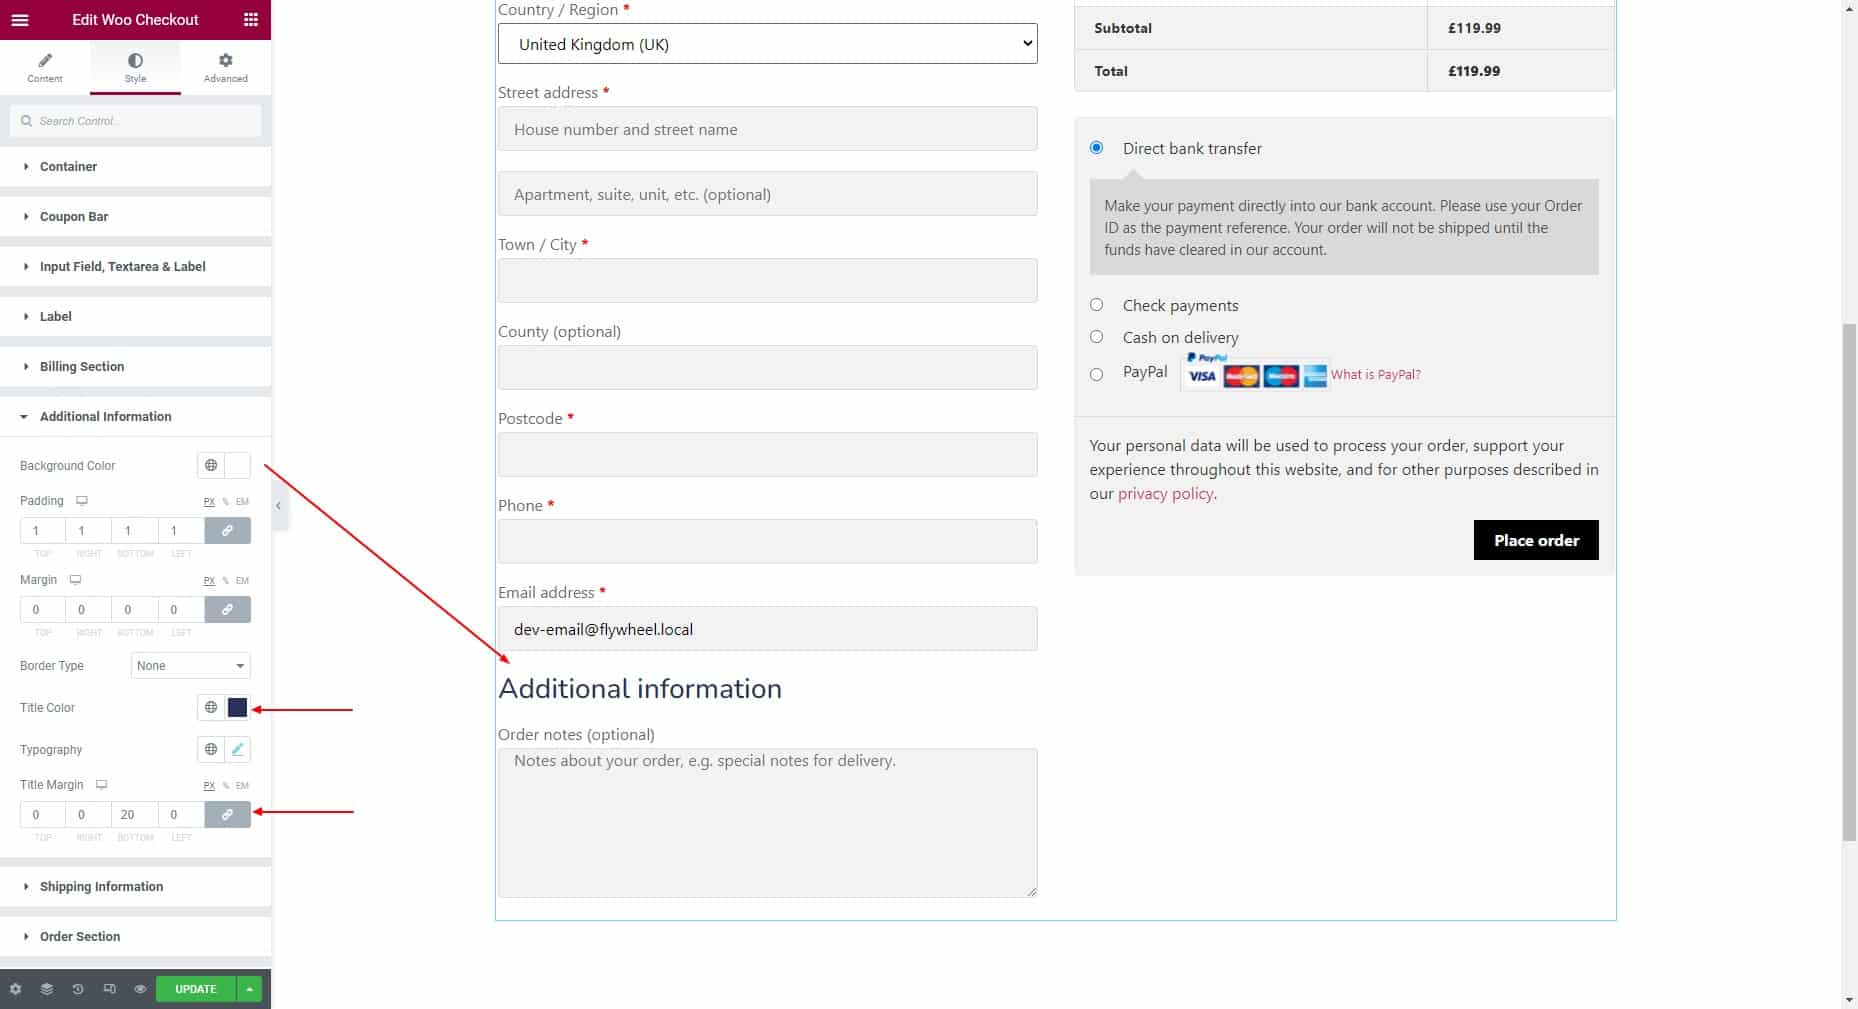
4.6 In the Additional Information section, select the Background Color, Padding, Margin, Border Type, Title Color, and Typography.
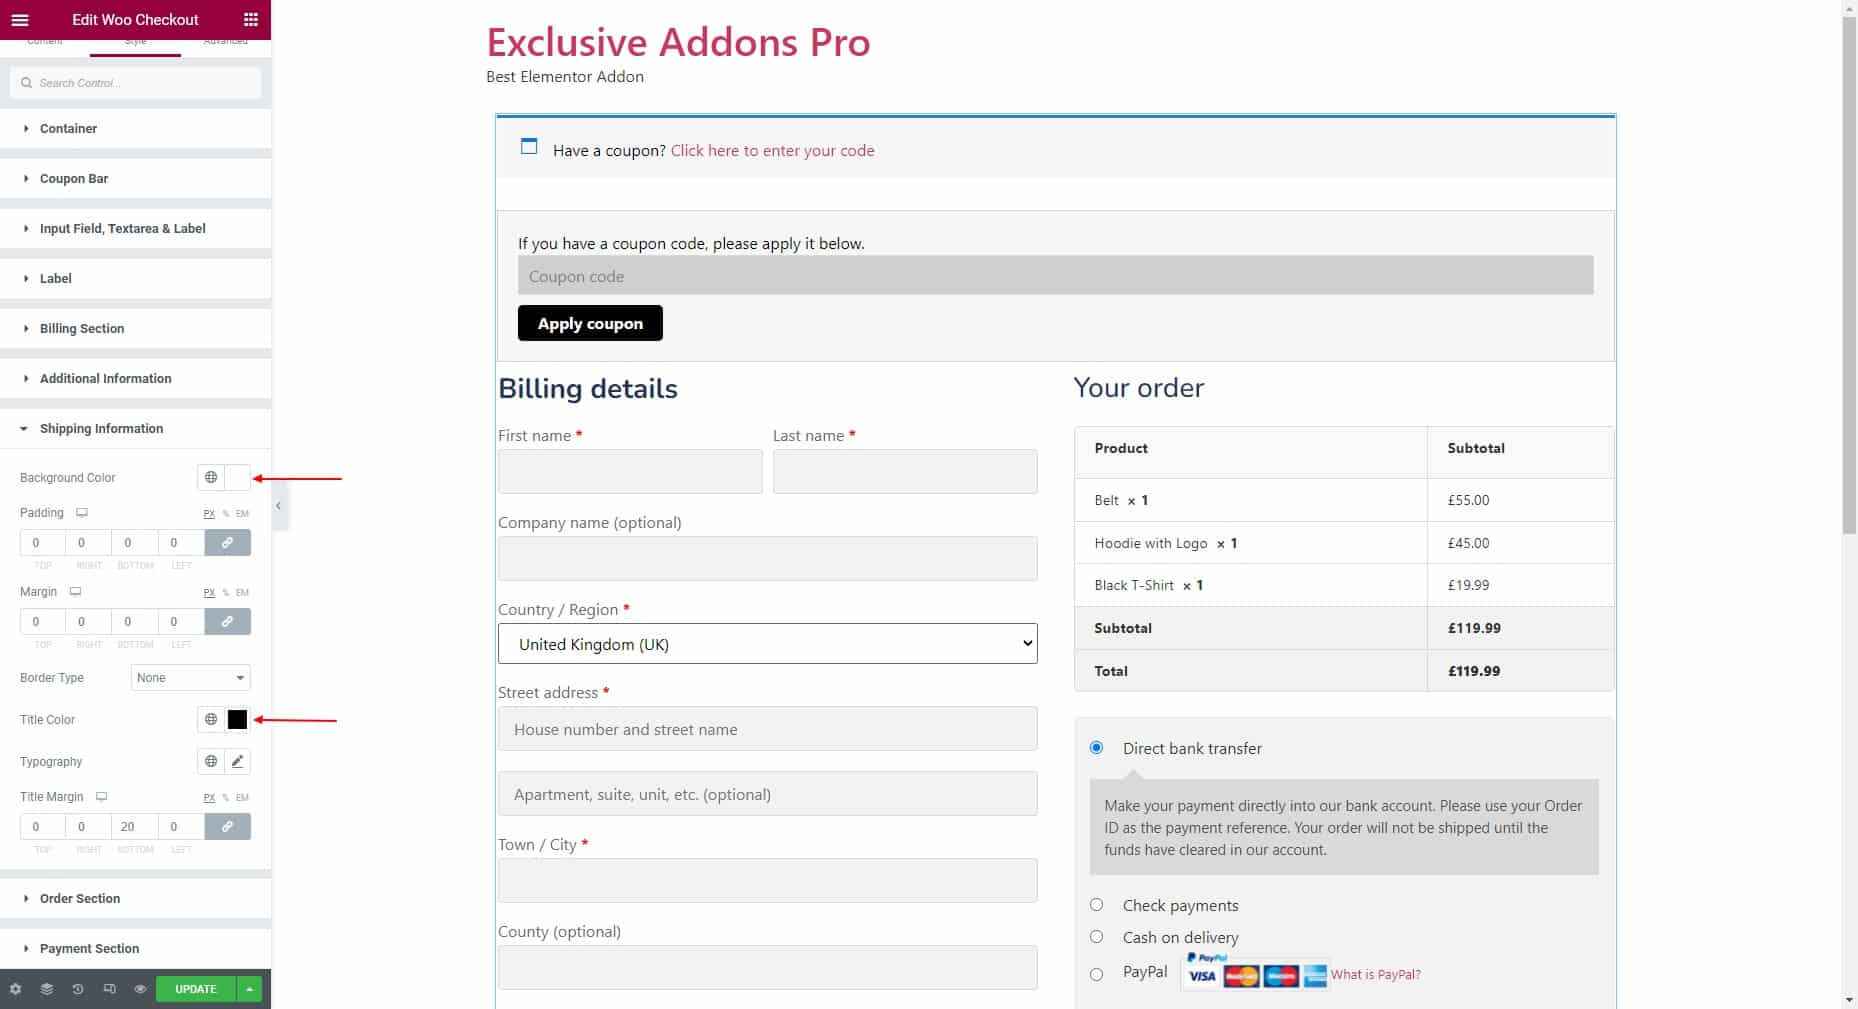
4.7 In the Shipping Information section, select the Background Color, Padding, Margin, Border Type, Title Color, and Typography.
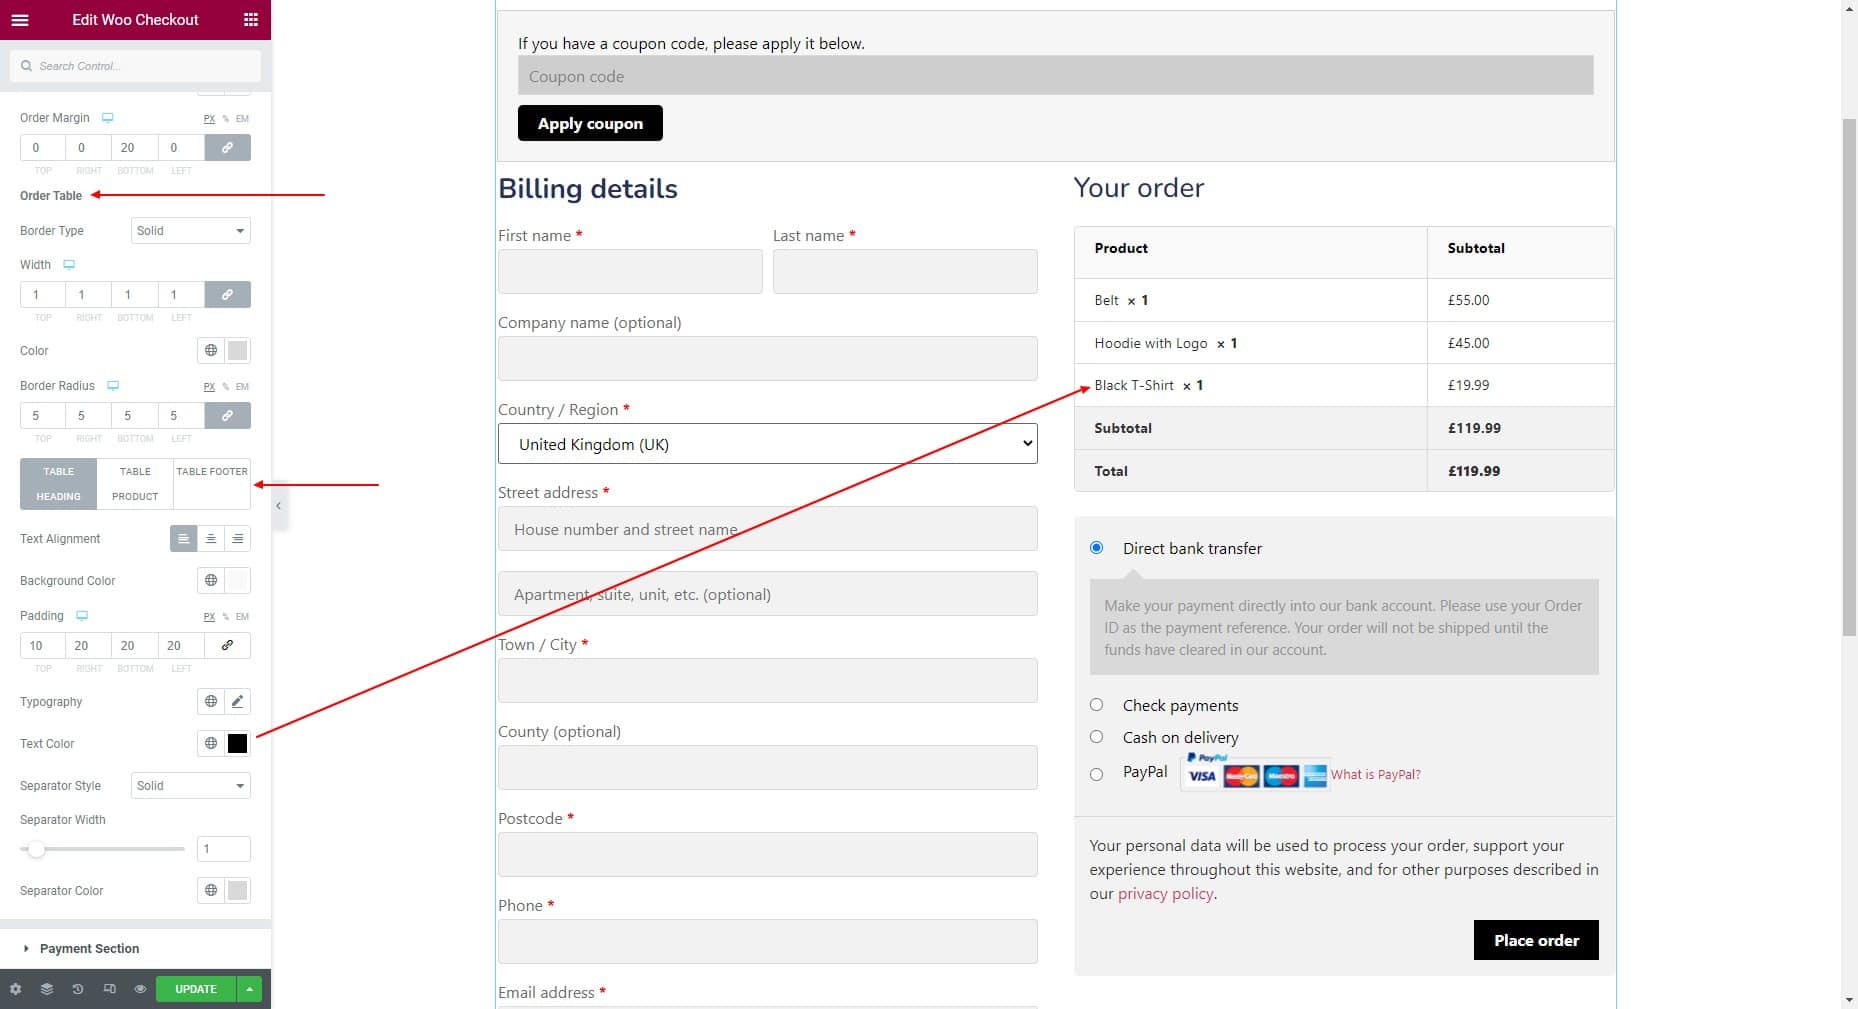
4.8 In Order Section, you can customize Order Heading and Order Table styles. For Order Heading, choose the Typography, Text Color, and Order Margin.

As for the Order Table, select the Border Type, Width, and Color also set Border Radius. You can set Text Alignment, Background Color, Padding, Typography, Text Color, Separator Style, Separator Width, and Separator Color individually for Tabel Heading, Table Product, and Table Footer.
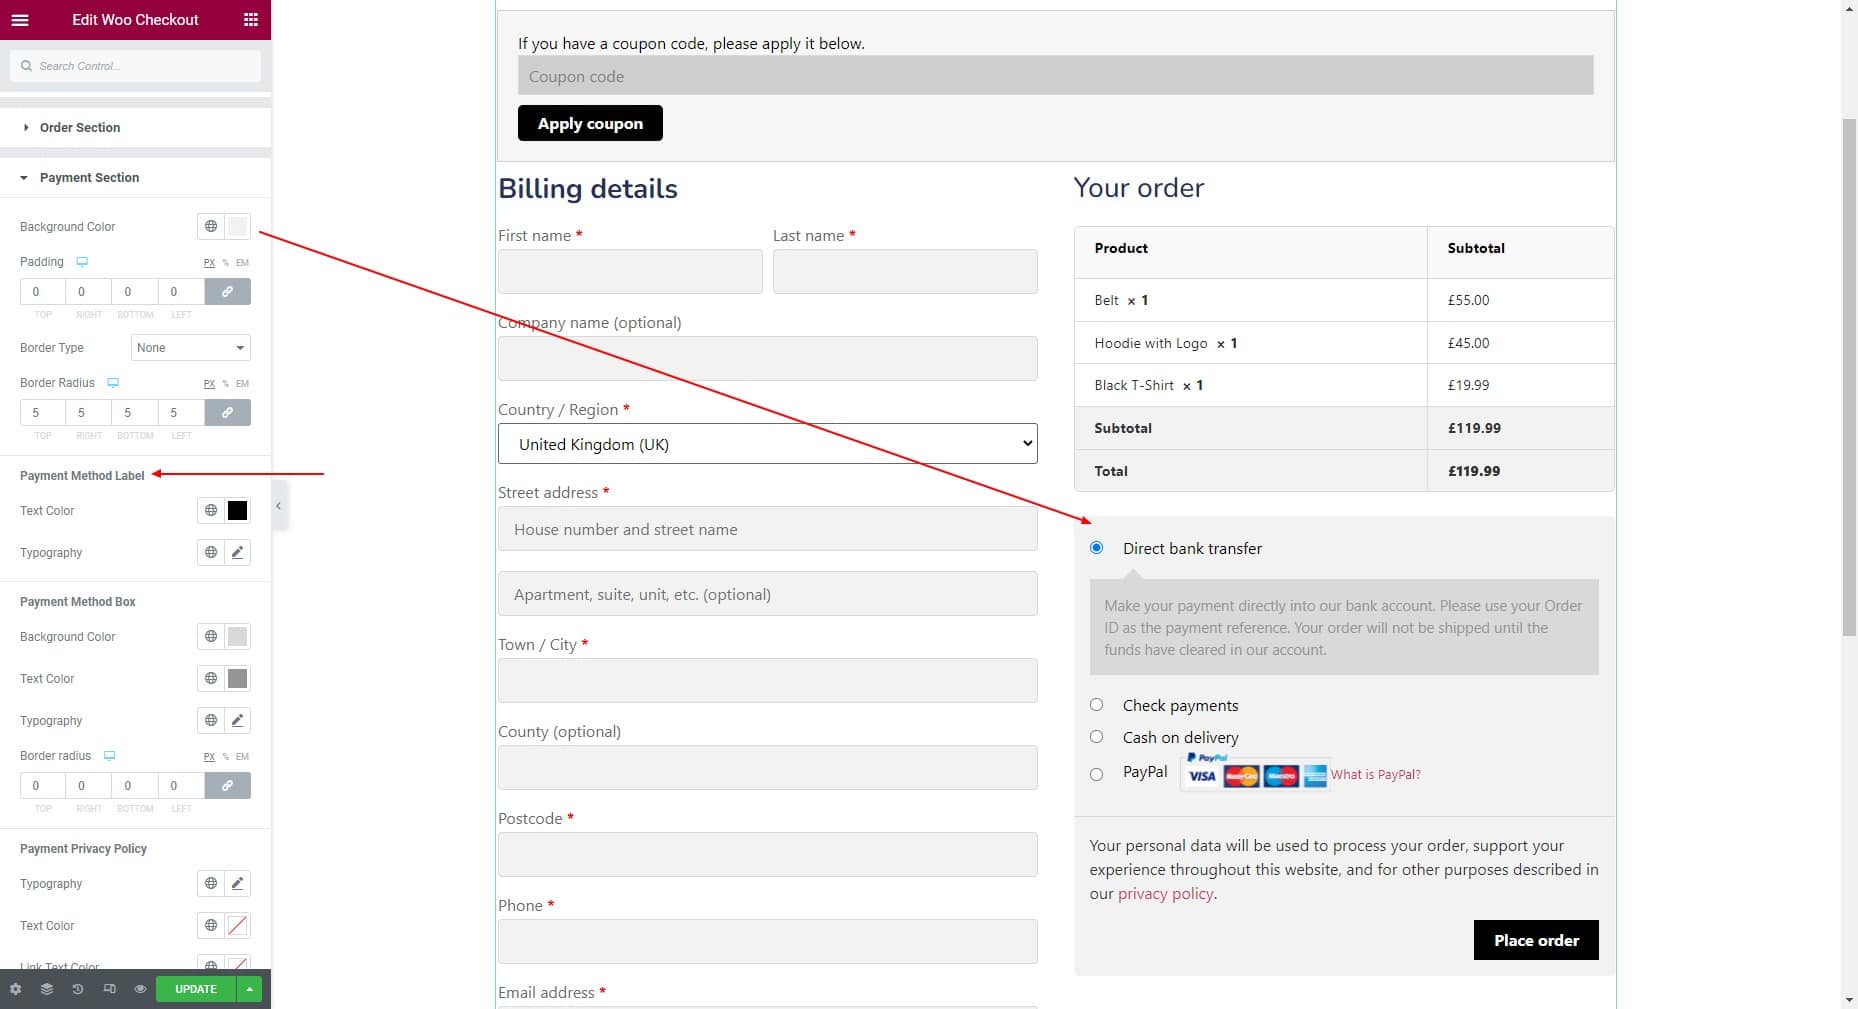
4.9 For the Payment Section, you have the option to choose Background Color, Padding, Border Type, and Border Radius. You can also customize the Payment Method Label by changing its Text Color and Typography.
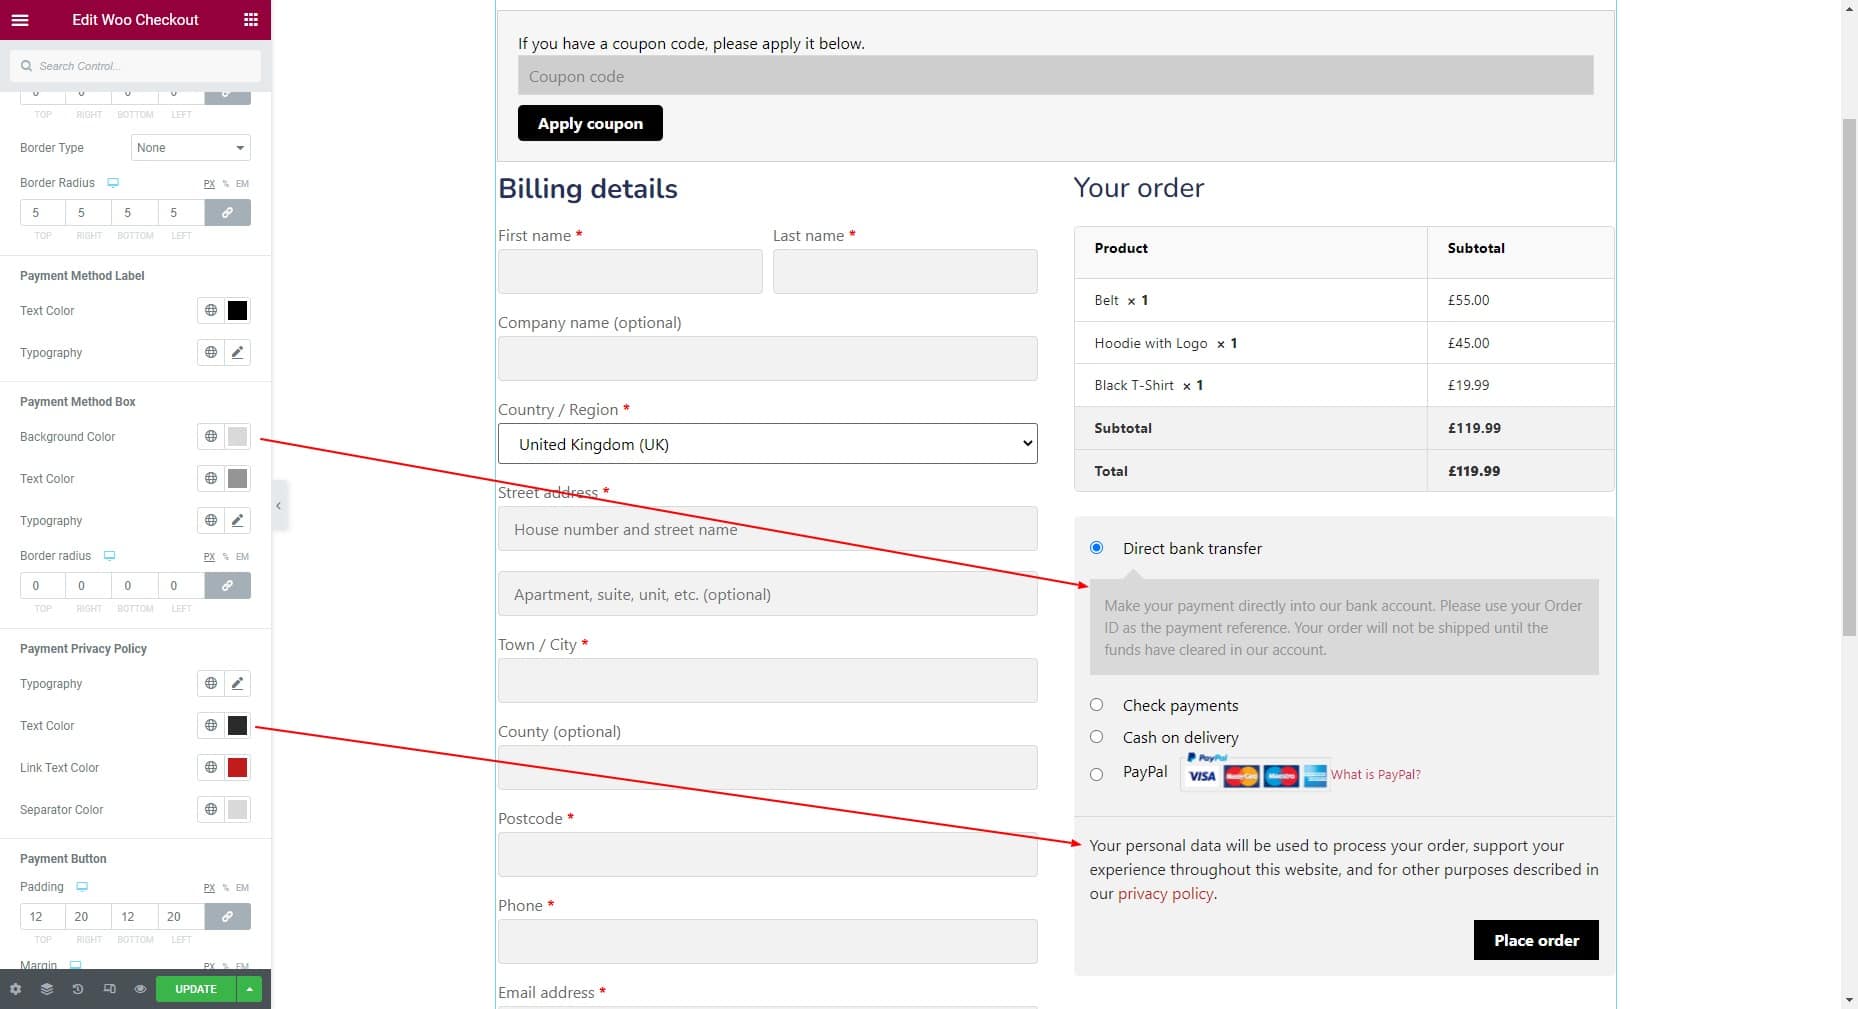
For the Payment Method Box, you can change the Background Color, Text Color, Typography, and Border Radius. Then for the Payment Privacy Policy options to change Typography, Text Color, Link Text Color, and Separator Color is available too.
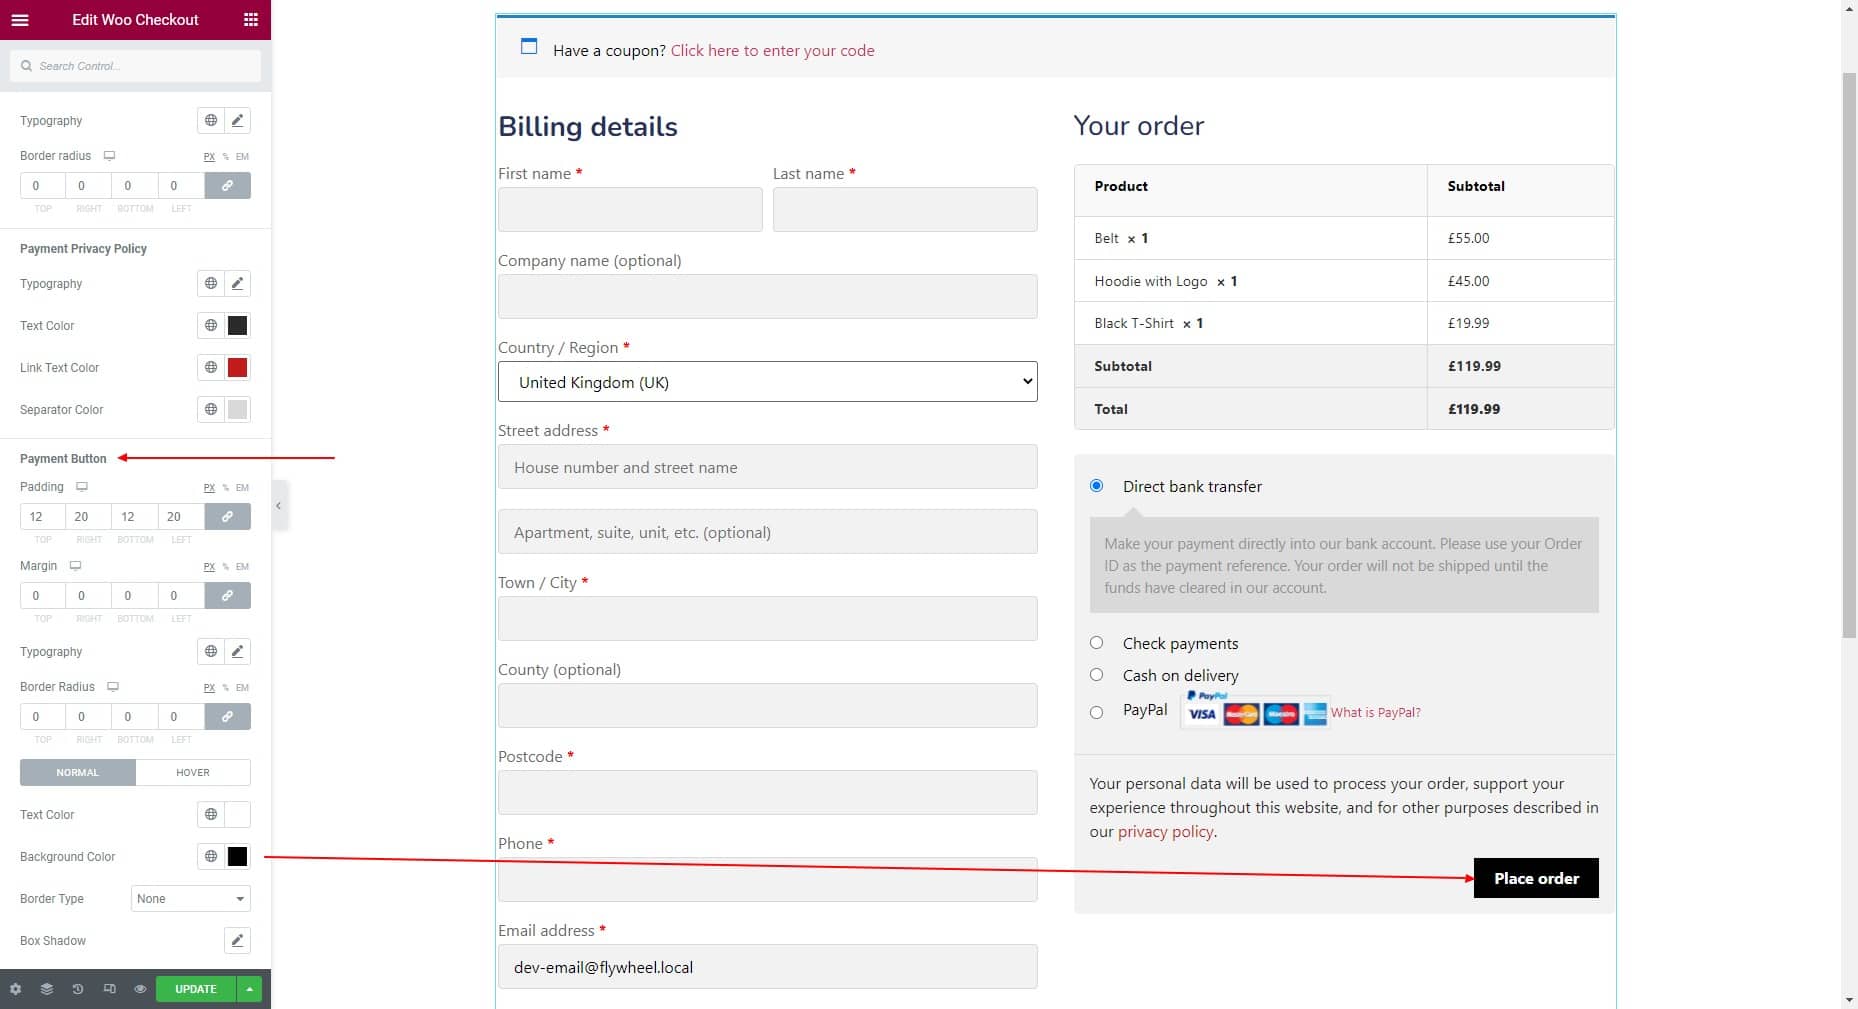
To customize the Payment Button, you can set Padding, Margin, Typography, Border Radius, and choose individual Text Color, Background Color, and Border Type for Normal and Hover state.
STEP 5:
Finally, hit the Update button, and include a stylish Woo Checkout widget on your WordPress site.