How To Enable WebGL for Elementor With Exclusive WebGL Plugin (For Existing Users)
WebGL lets you add interactive 3D graphics to websites. If you are already using Exclusive Addons, you can use the Exclusive WebGL plugin for free. Here is how to enable WebGL for Elementor for the existing users of Exclusive Addons.
STEP 1: Get the plugin
Download the WebGL plugin from the following link: https://www.dropbox.com/s/9haxiserztsluuk/exclusive-webgl-1.0.0.zip?dl=0

STEP 2: Install and activate
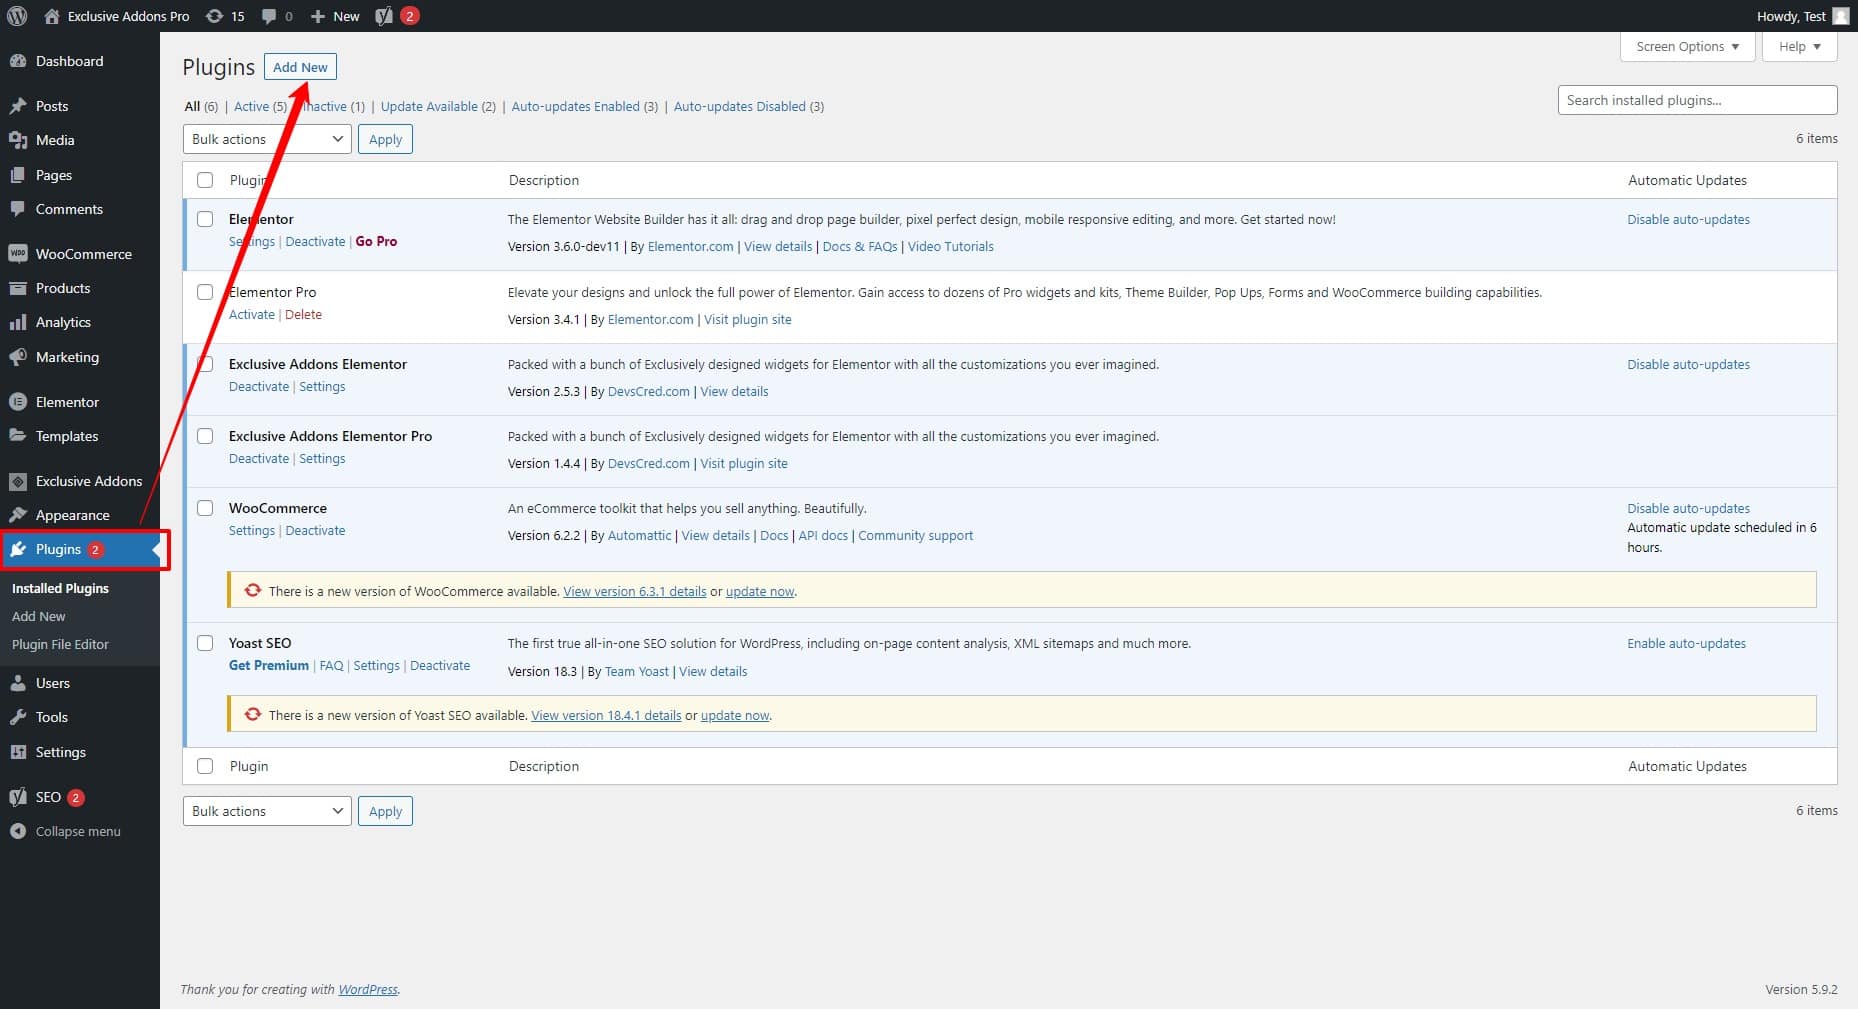
2.1 Now go to your WordPress dashboard and move to Plugins. Then click on the Add New button at the top left corner.
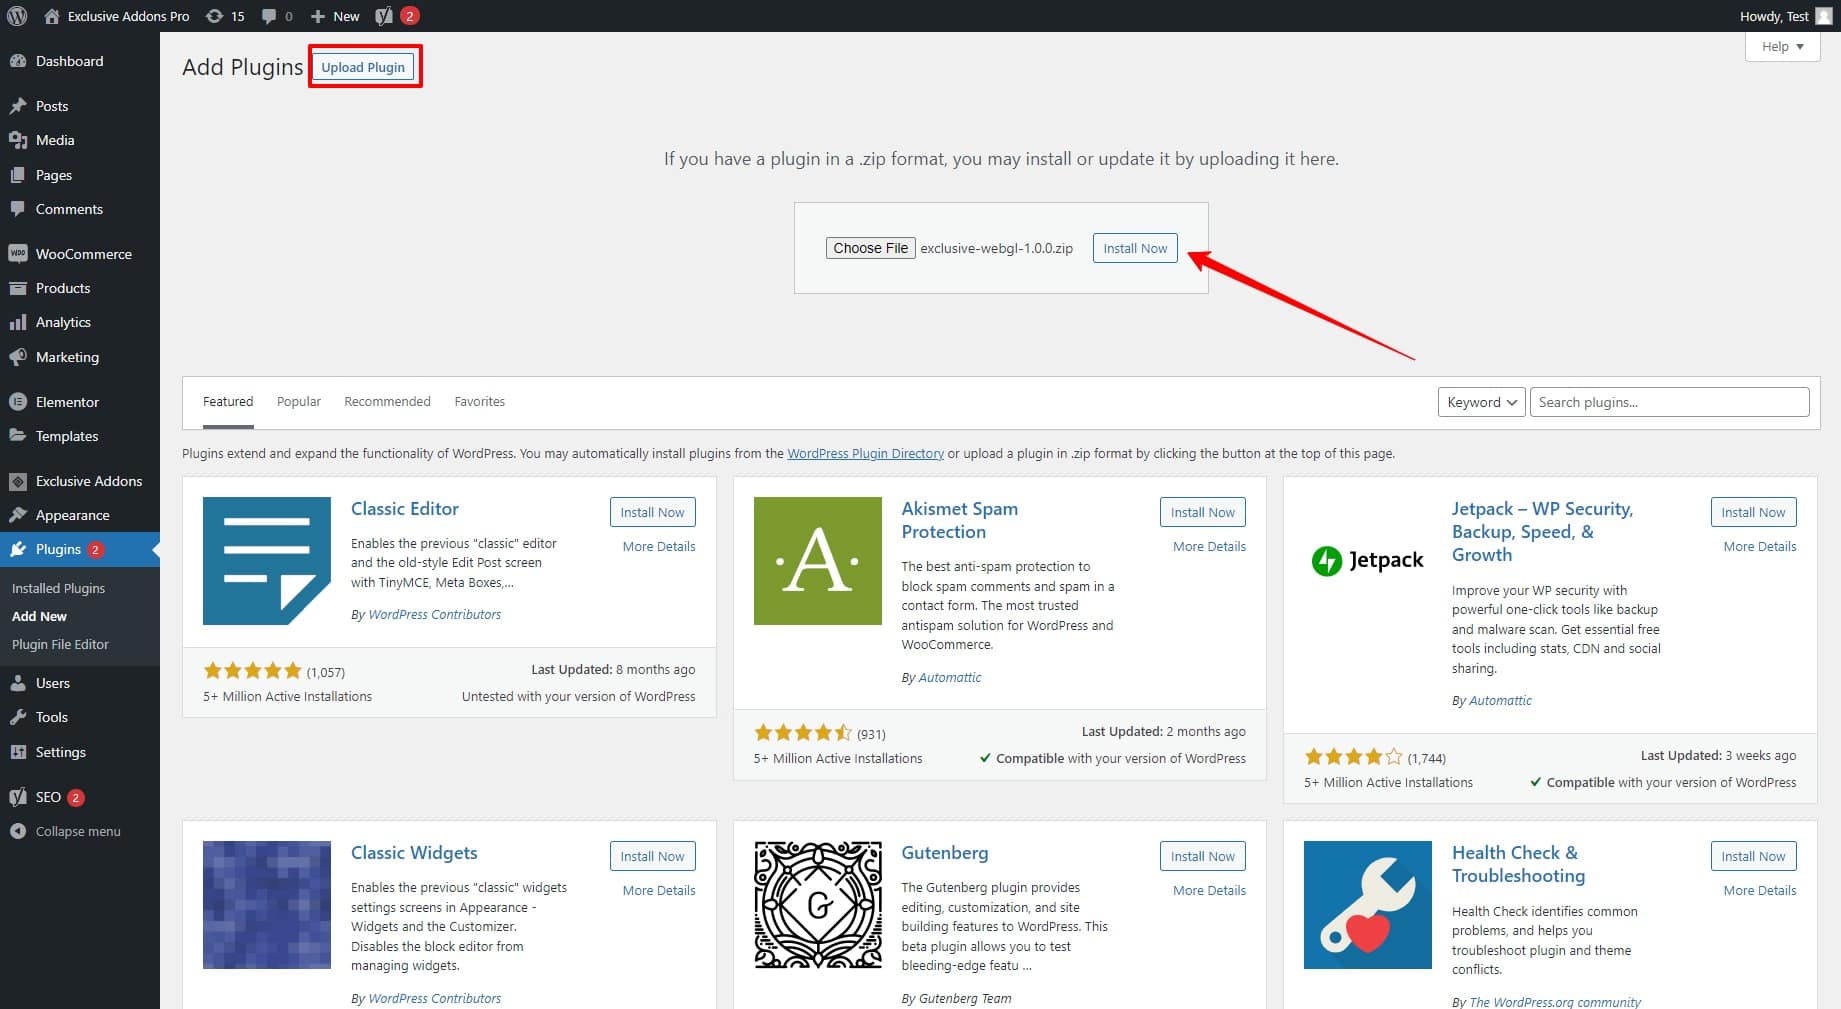
2.2 On the next page, click to Upload Plugin and then choose exclusive-webgl.zip to upload. Then hit the Install Now button. After that, Activate Plugin and move to the next step.
STEP 3: Activate WebGL with license key
The final step is to activate your plugin with the license key.
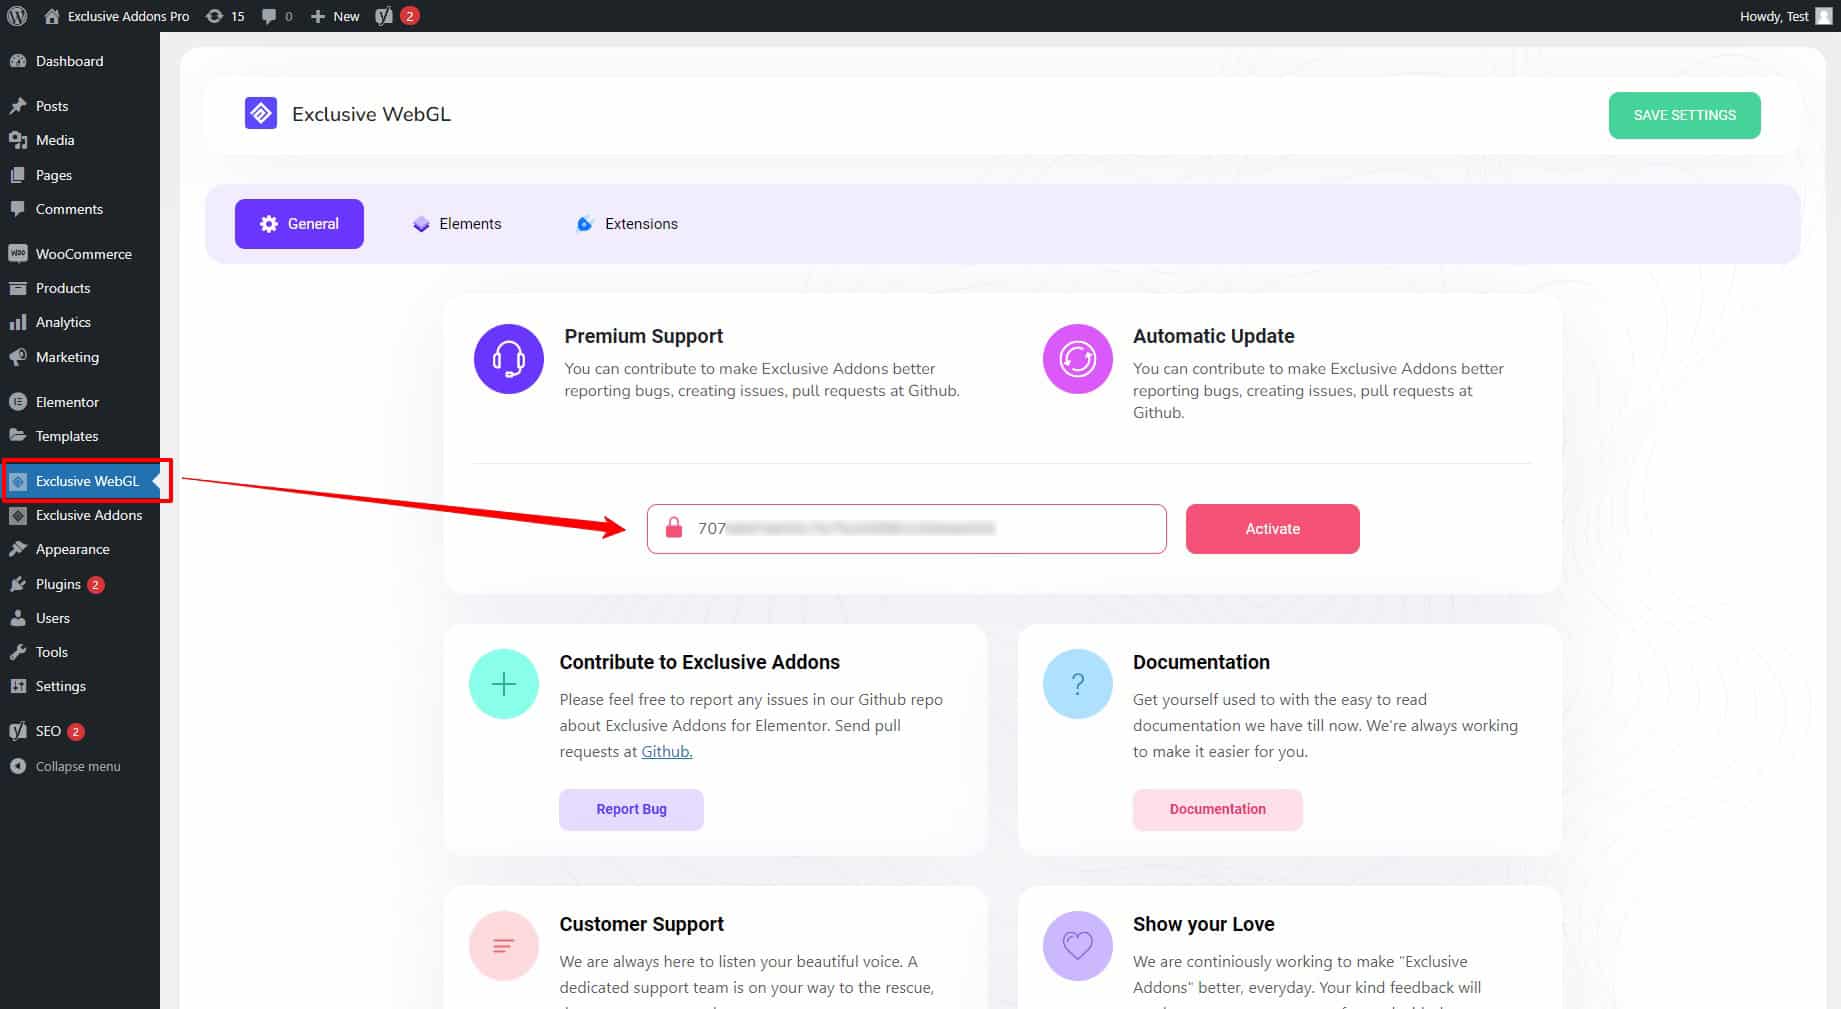
After installing the plugin, you will the WebGL section created in your WordPress dashboard. Go there and paste the license key in the required field and hit the Activate button.
Note that, you don’t need any individual license key for the WebGL plugin. Use the same Exclusive Addons Pro license key to activate the Exclusive WebGL.
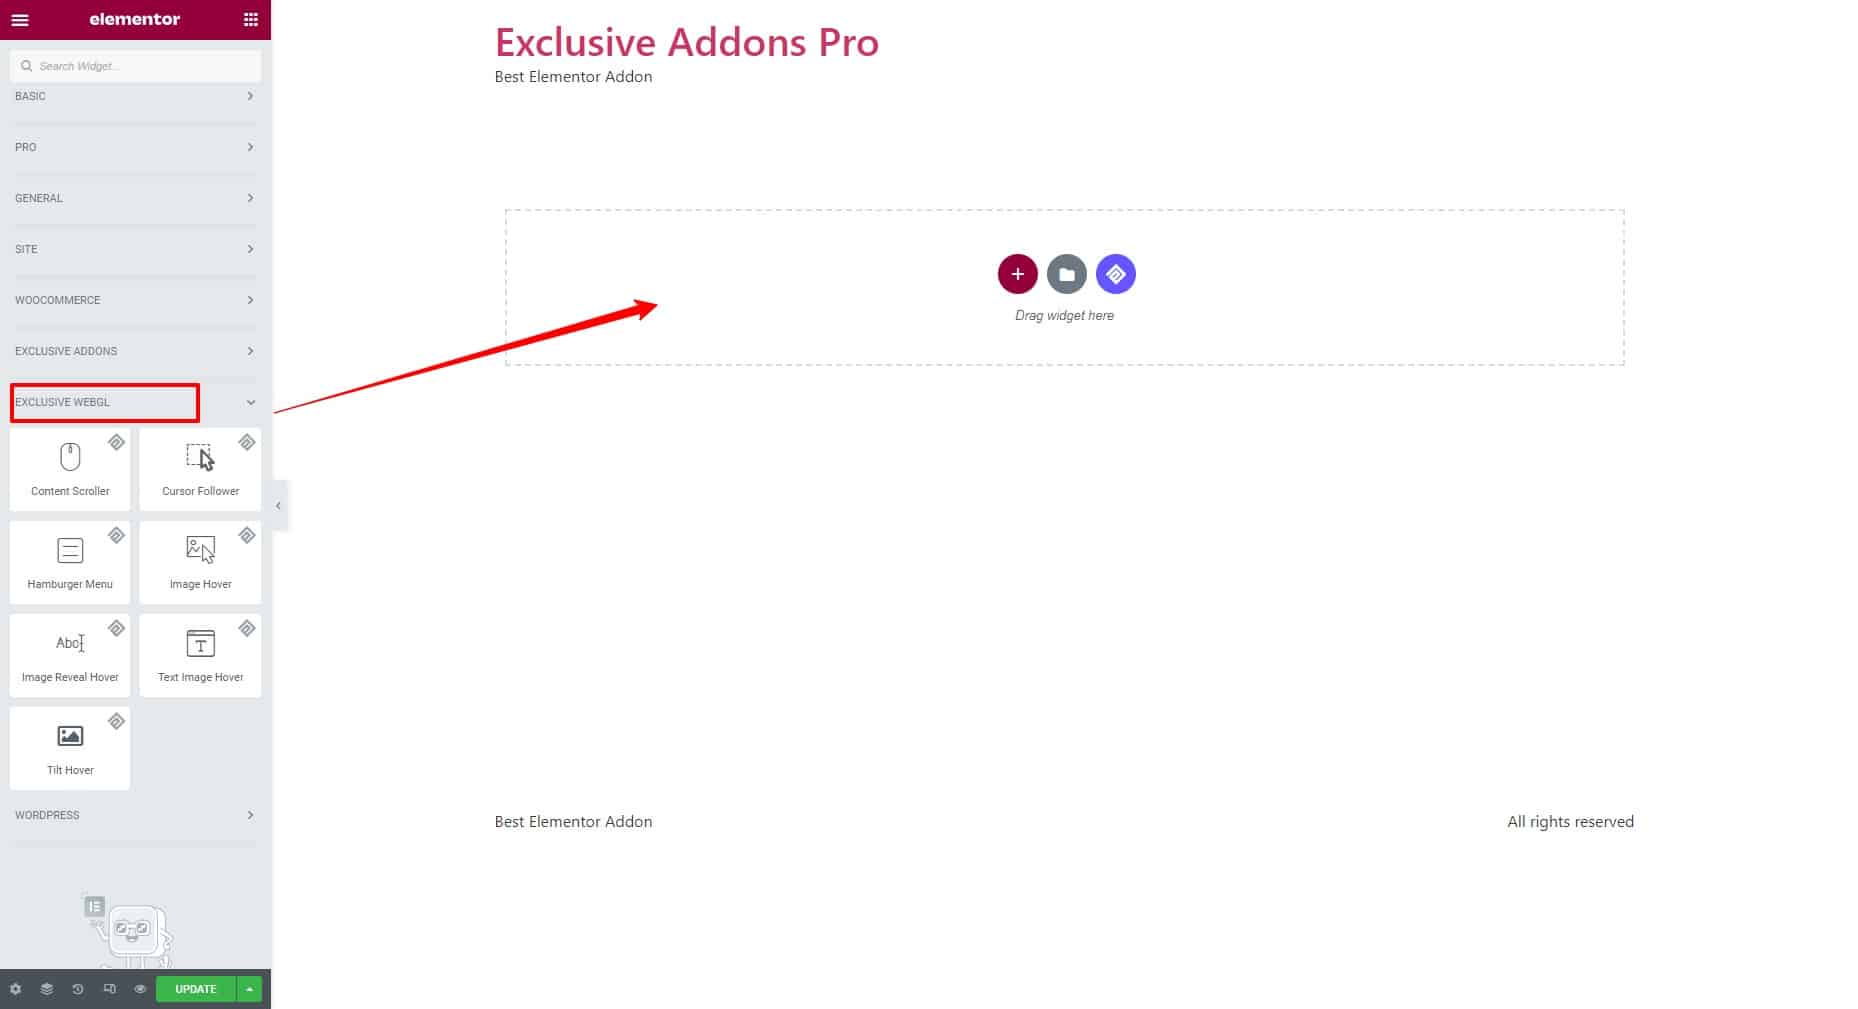
STEP 4: Start using WebGL widgets
Once you activate the plugin with a license key, you will get access to the Exclusive WebGL widgets. Now open the Elementor interface and start using the Exclusive WebGL widgets.