How to configure and style Elementor Campaign Widget
Promote offers, or products in a creative way on your wordpress site. Design a promotional box with countdown timer, MailChimp, and dozens more customizable contents using Campaign Widget of Exclusive Addons Elementor.
STEP 1:
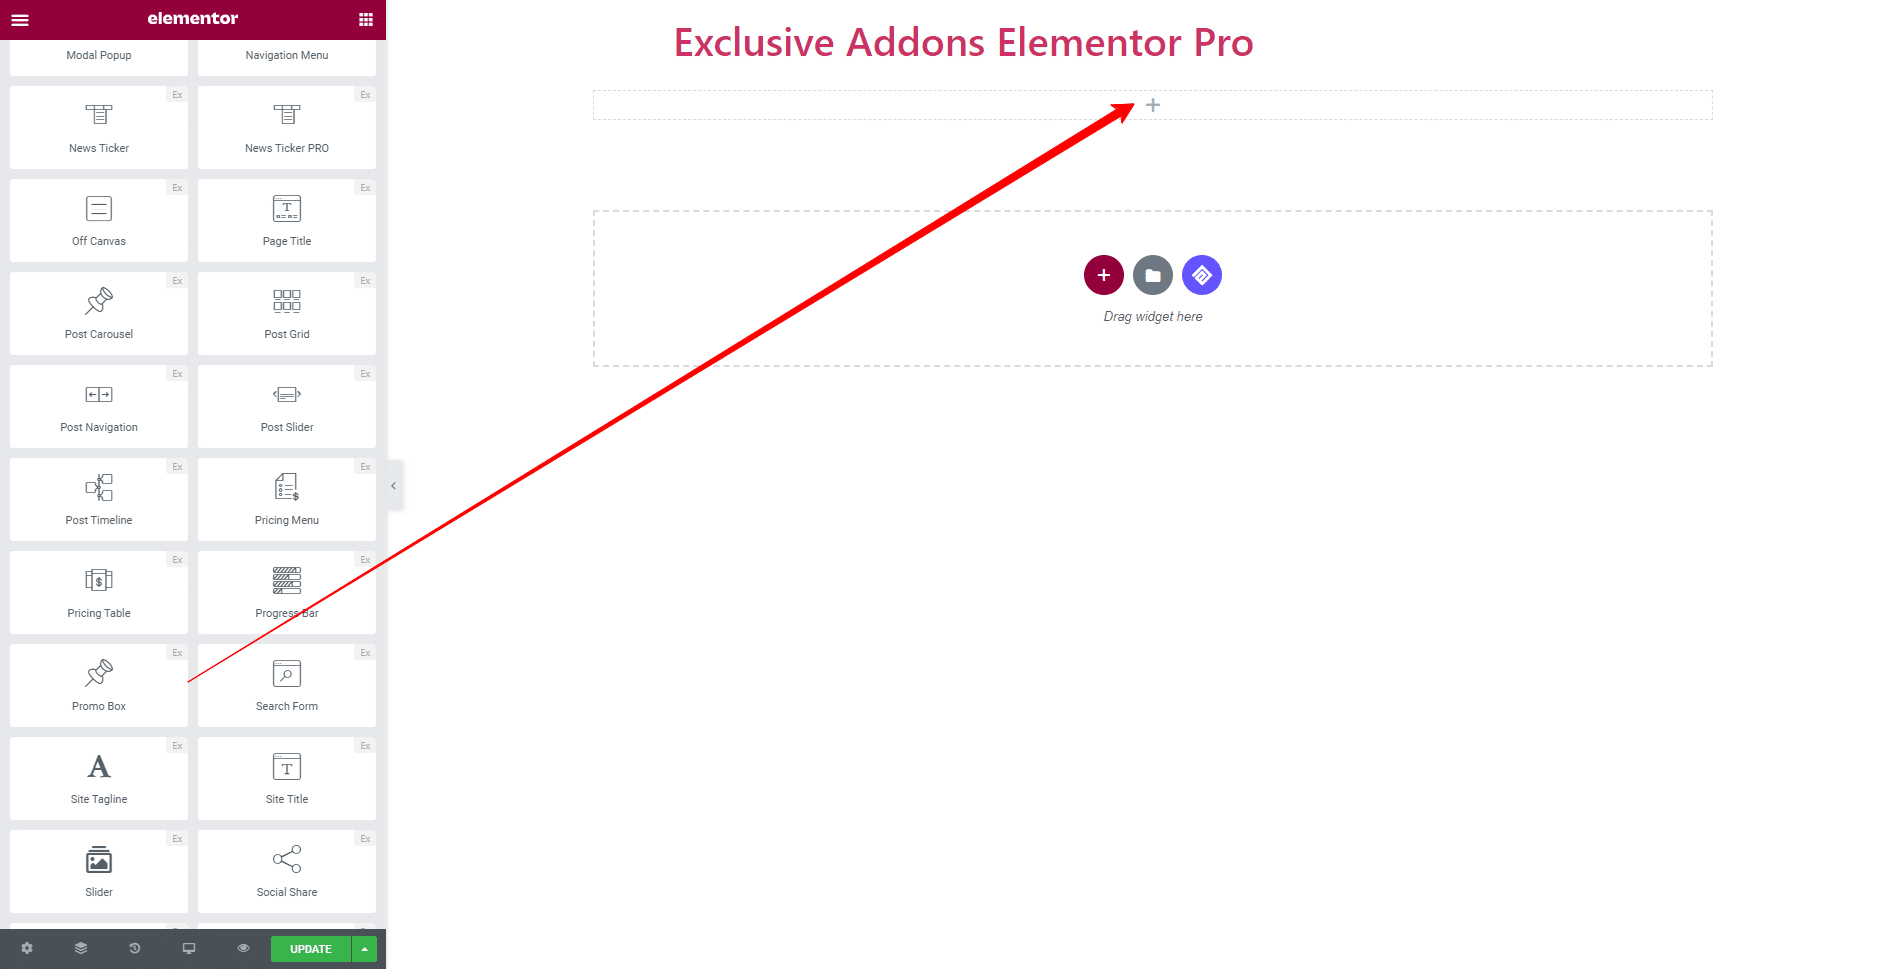
Select ‘Campaign Widget‘ from Elementor panel. Then drag and drop it in the selected area.
STEP 2:
The Content tab allows you to configure Setting, Image, Content, Count Down, and Button section of the widget.
2.1 In Setting section, you can Enable Image, Content, Countdown, Mailchimp, Promo Button, and Close Icon.
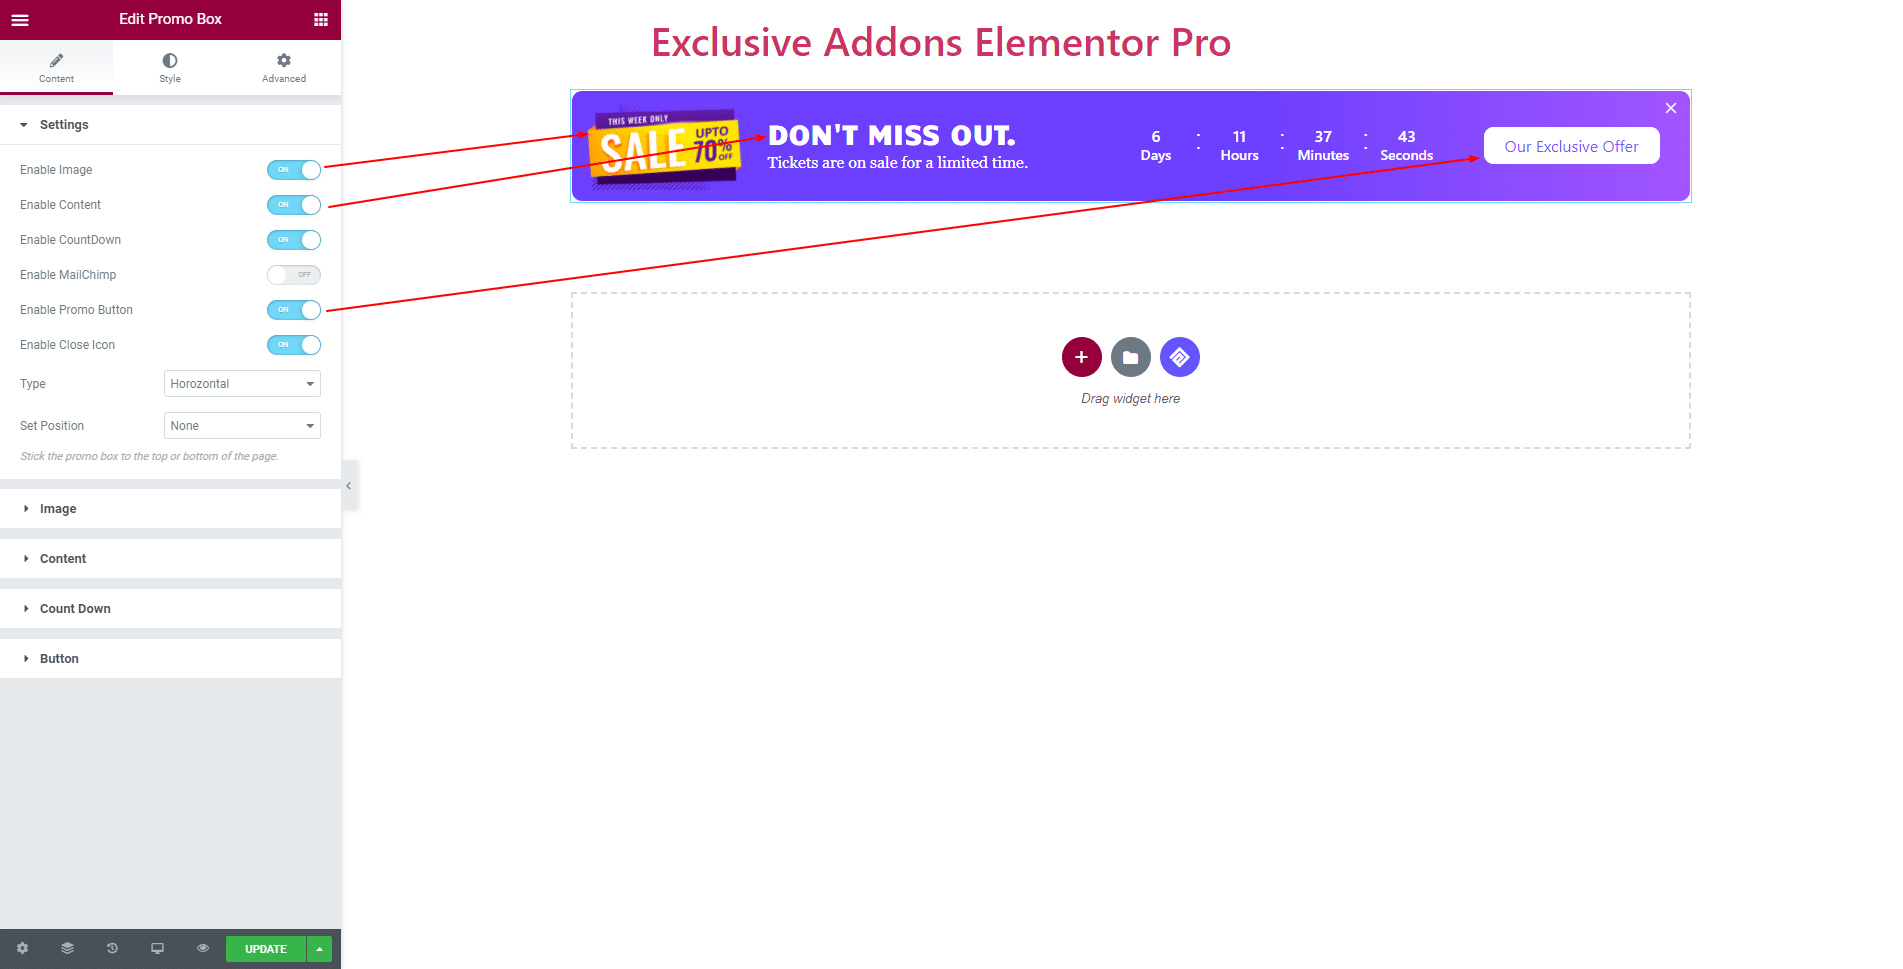
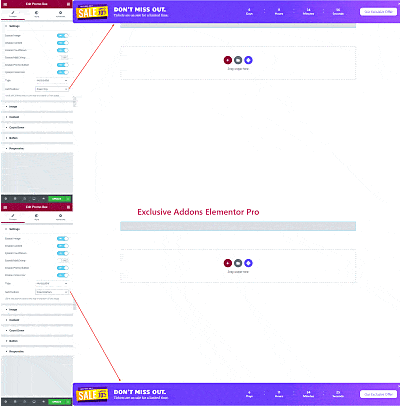
Choose the Orientation Type between ‘Horizontal’ and ‘Vertical’.
Also, have the option to Set Position to ‘Fixed Top’ or ‘Fixed Bottom’.
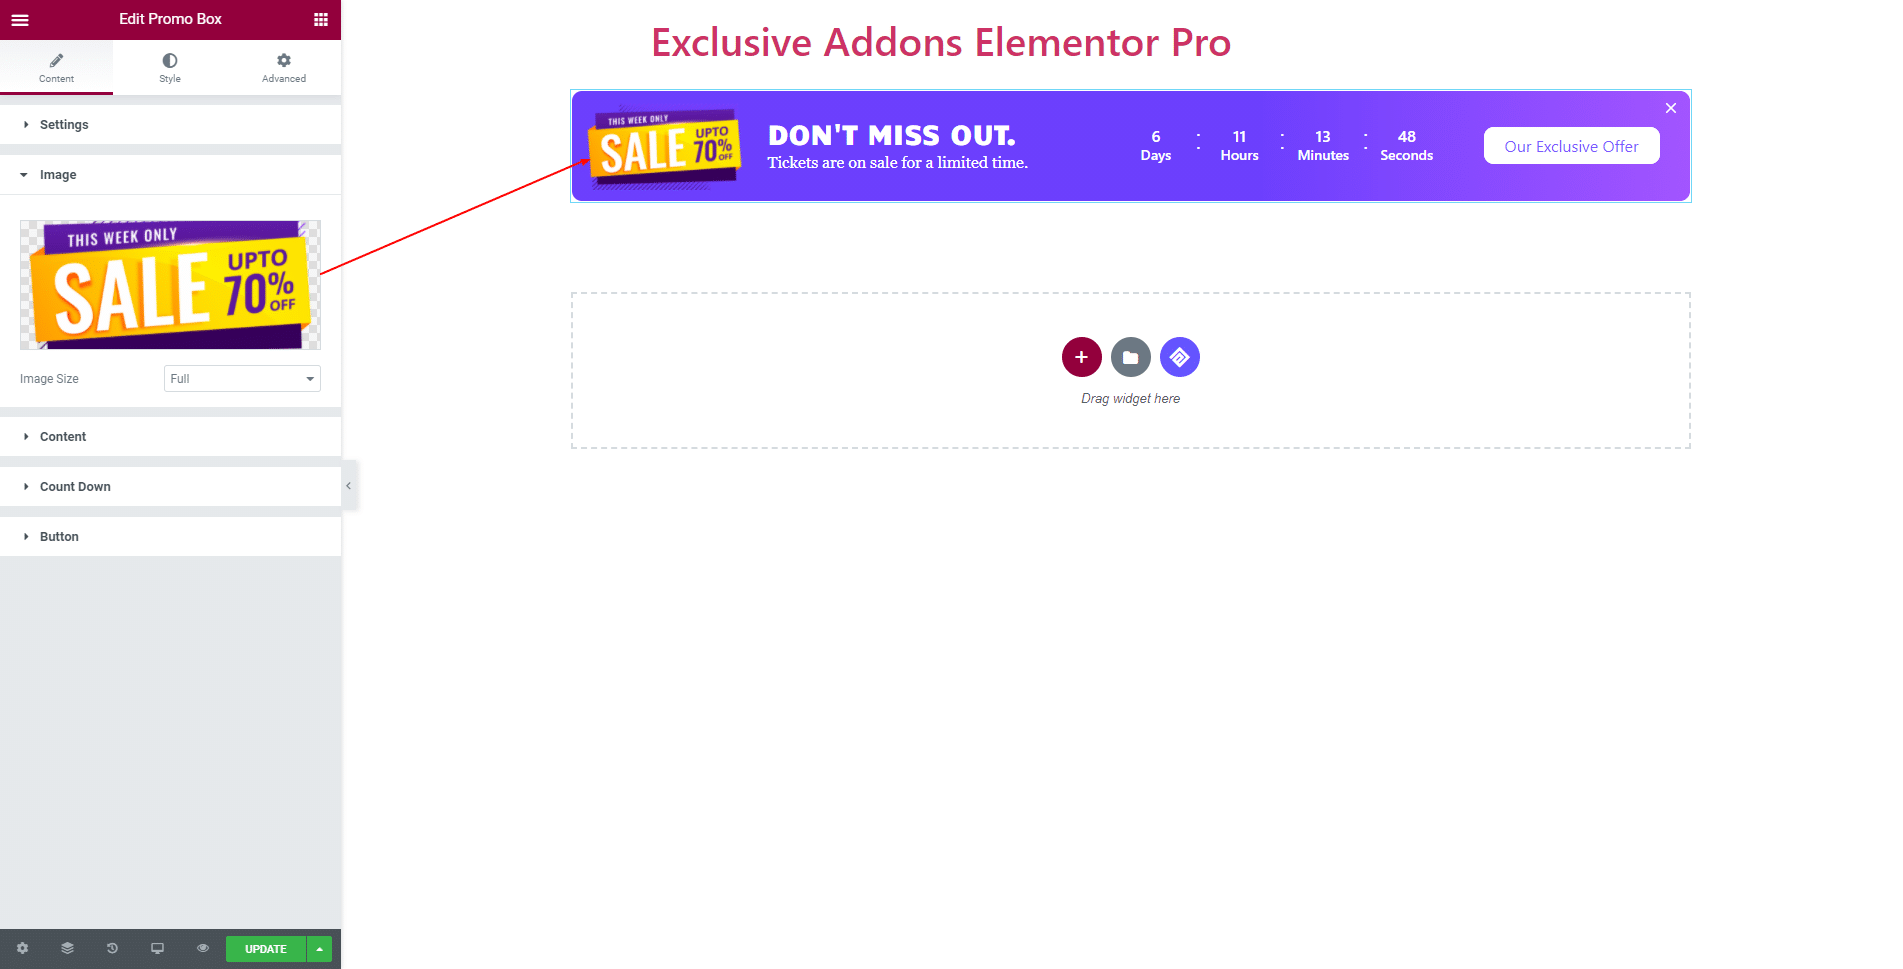
2.2 In Image section, you can choose any image from media library or upload one from your storage and set the Image Size.
2.3 For Content section, set Heading text as well as Details text.
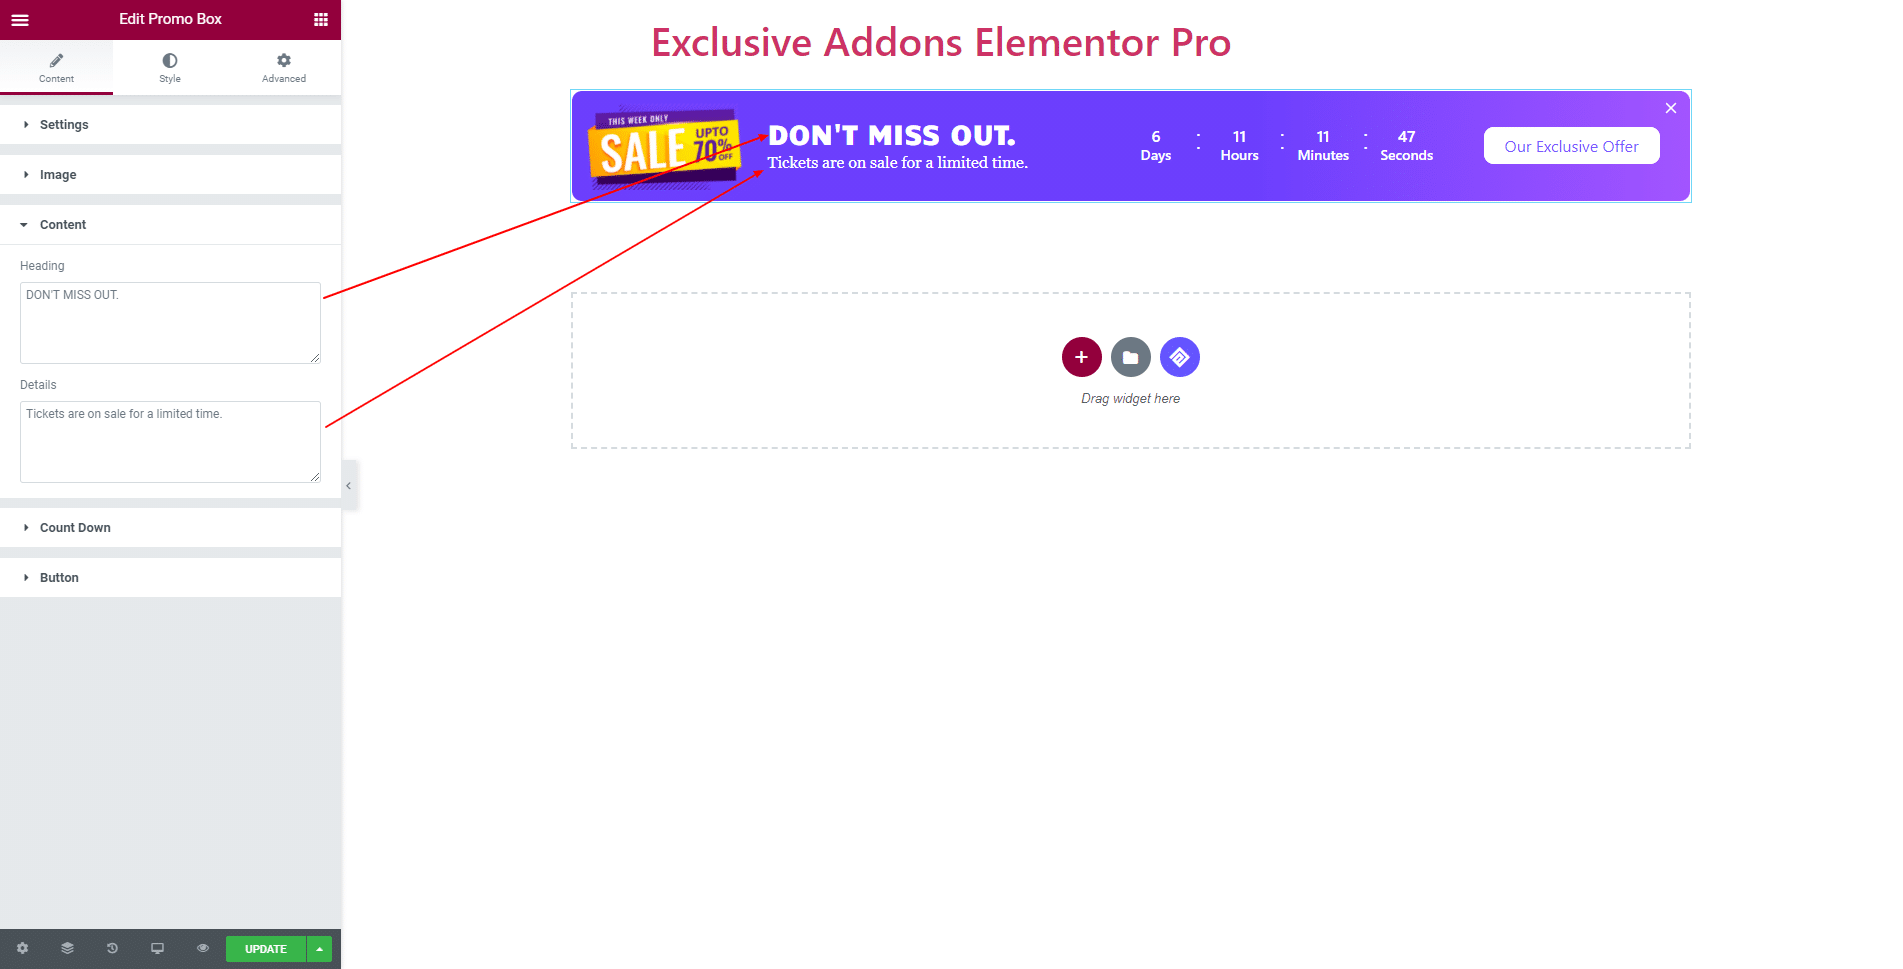
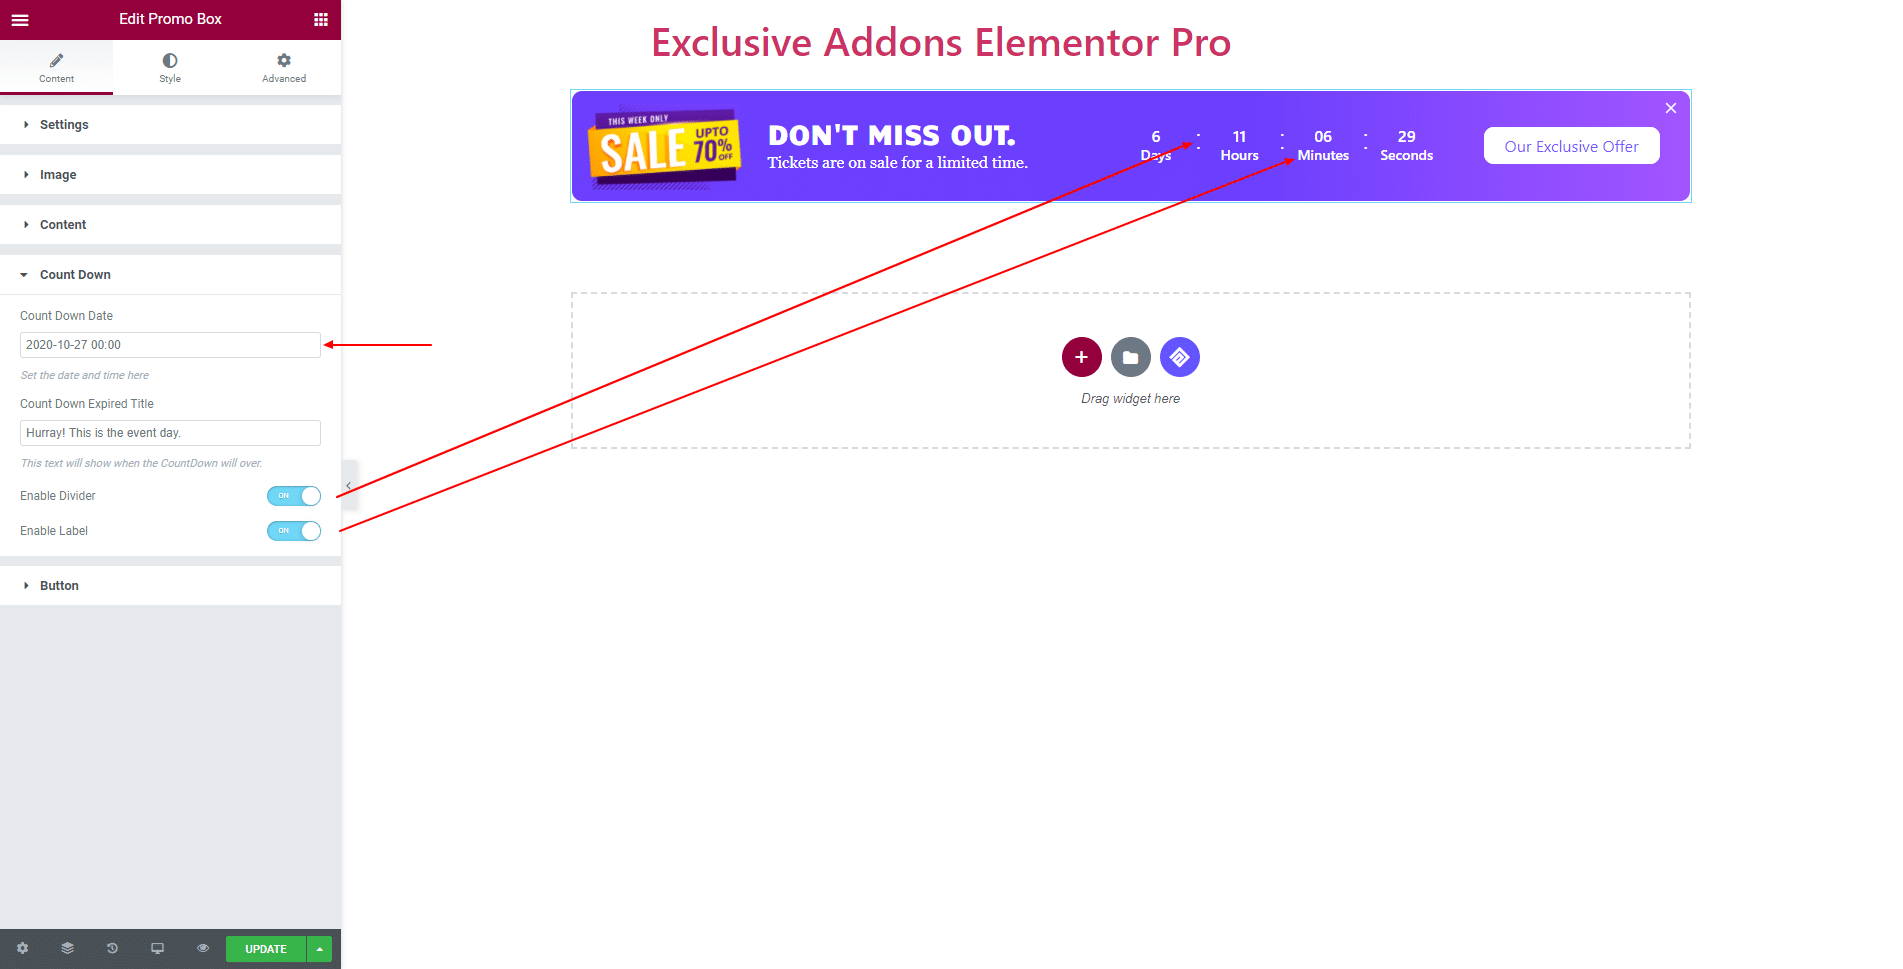
2.4 In Count Down section, decide when the countdown is to end by setting the Count Down Date and set text for Count Down Expired Title. Also, You can ‘turn on’ or ‘turn off’ the Enable Divider and Enable Label features.
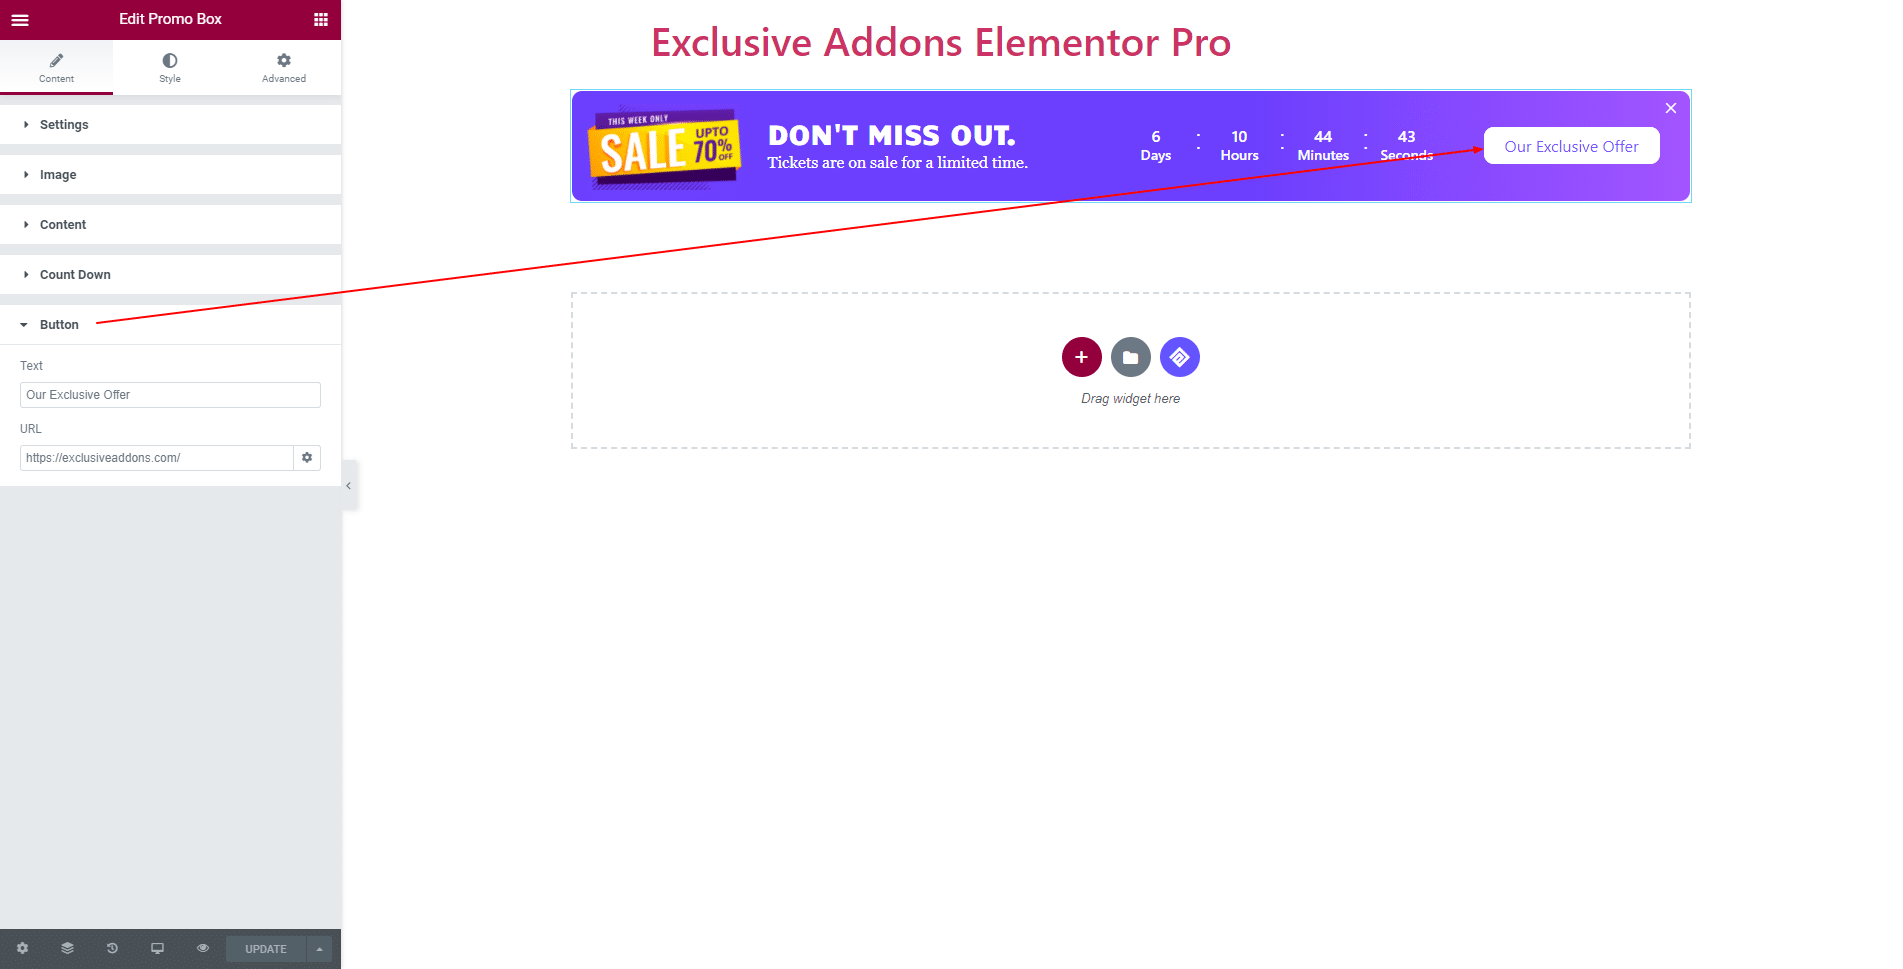
2.5 In terms of Button, options to set button Text and URL is available.
STEP 3:
Style tab allows you to customize design for Container, Image, Content, Count Down, Button, and Close Icon.
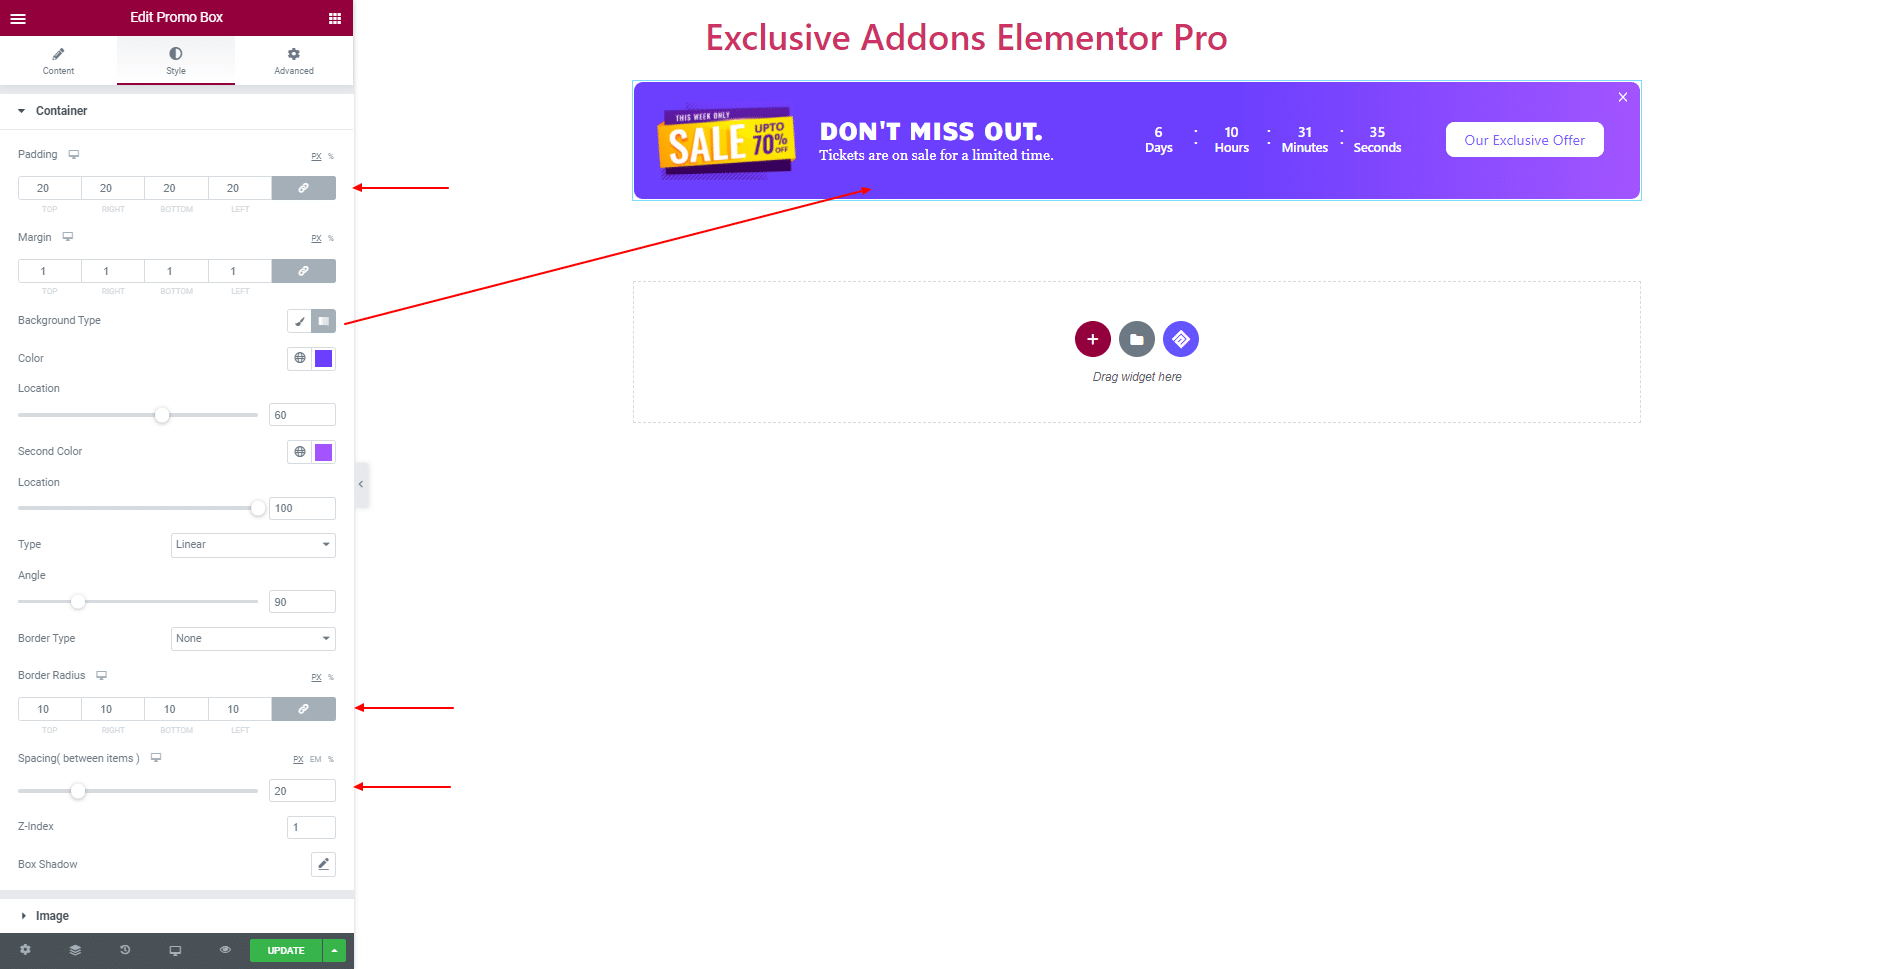
3.1 In Container section, set Padding, Margin, Border Type, Border Radius as well as Spacing between items and Z-Index. Choose Background Type to ‘Classic’ or ‘Gradient’ and select the color.
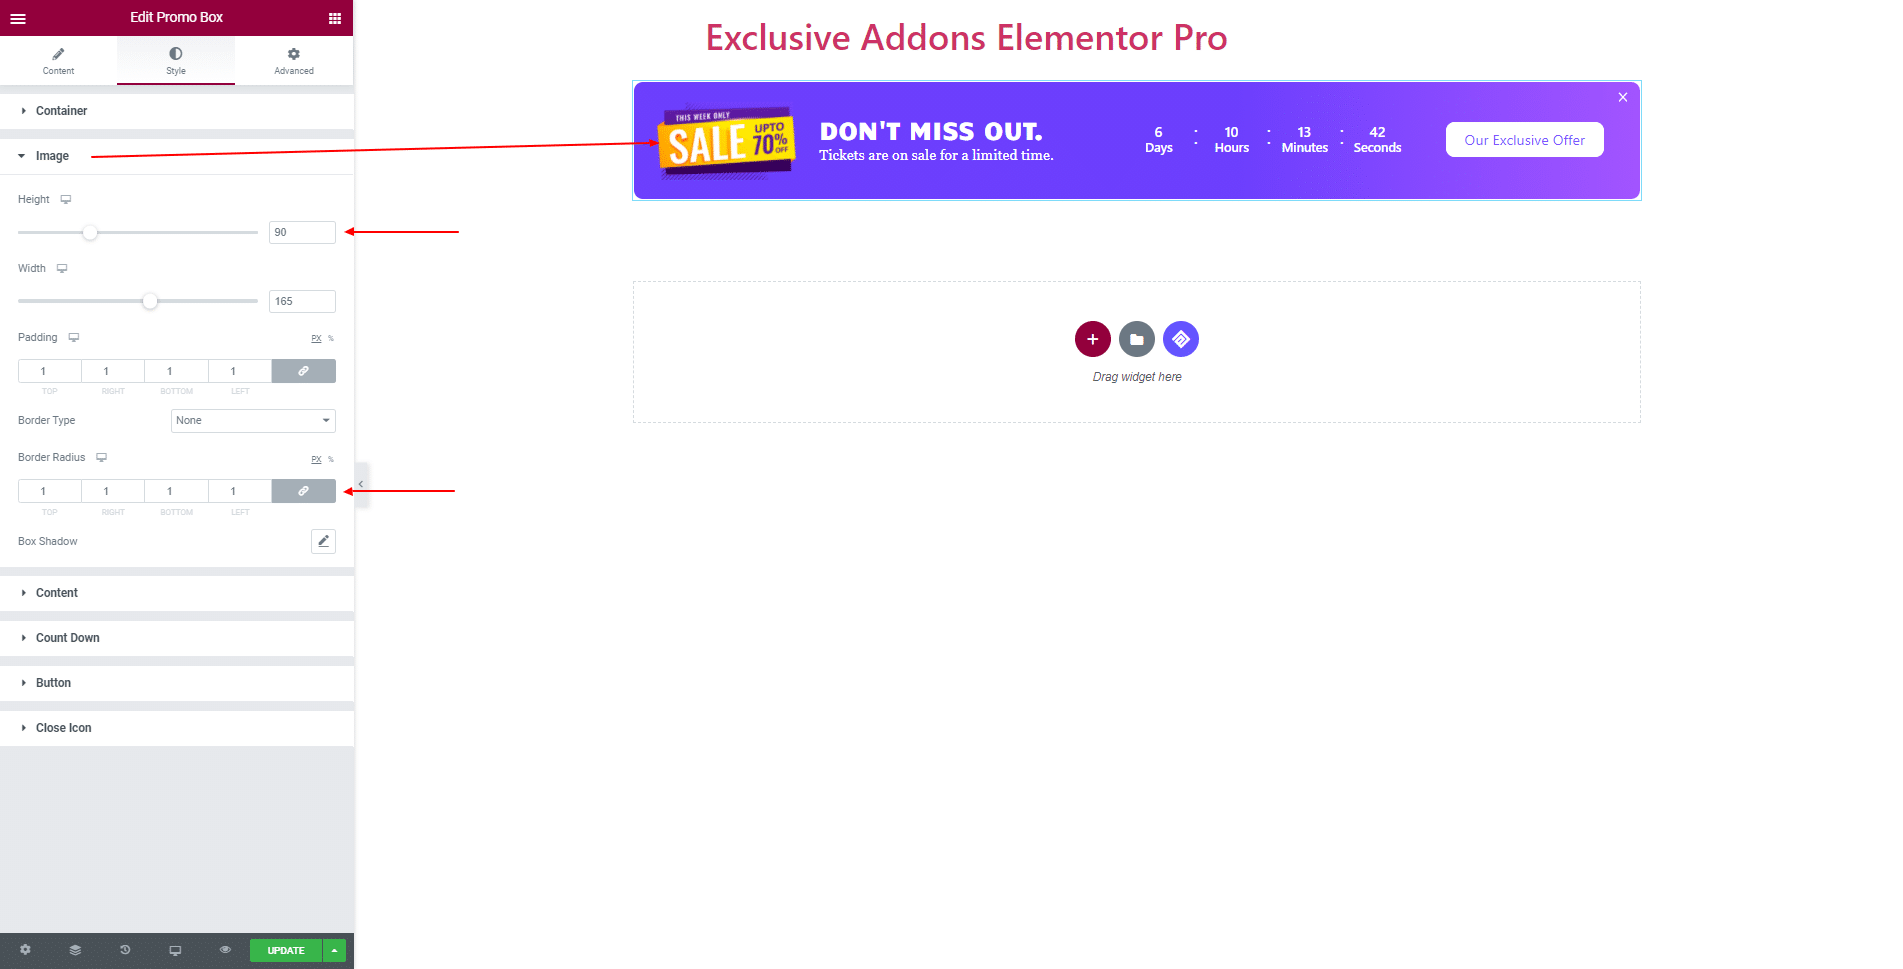
3.2 For Image, you can adjust Height, Width, Padding, Border Type, Box Shadow, and Border Radius for the section.
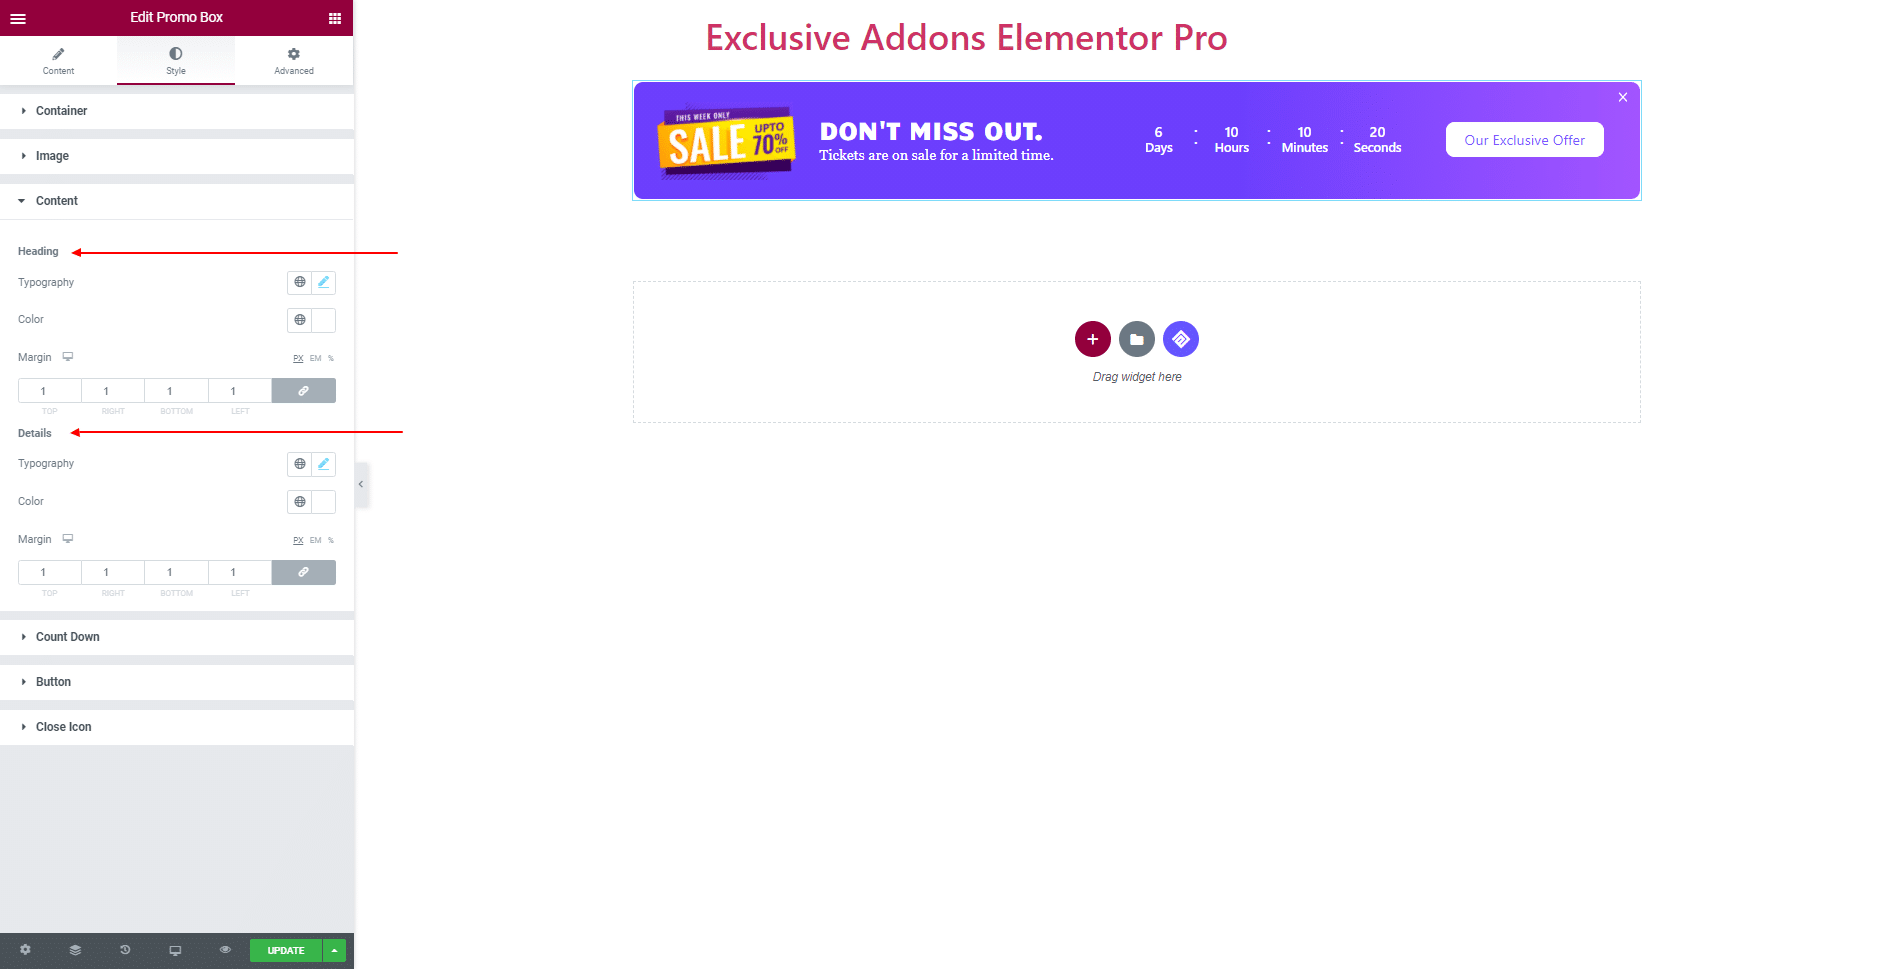
3.3 In Content section, set Typography, Color, and Margin individually for both ‘Heading‘ and ‘Details‘.
3.4 In Count Down section, you can change Spacing Between Items, and select Background Type, Border Type, Box Shadow Border Radius, and Padding of the ‘Items’.
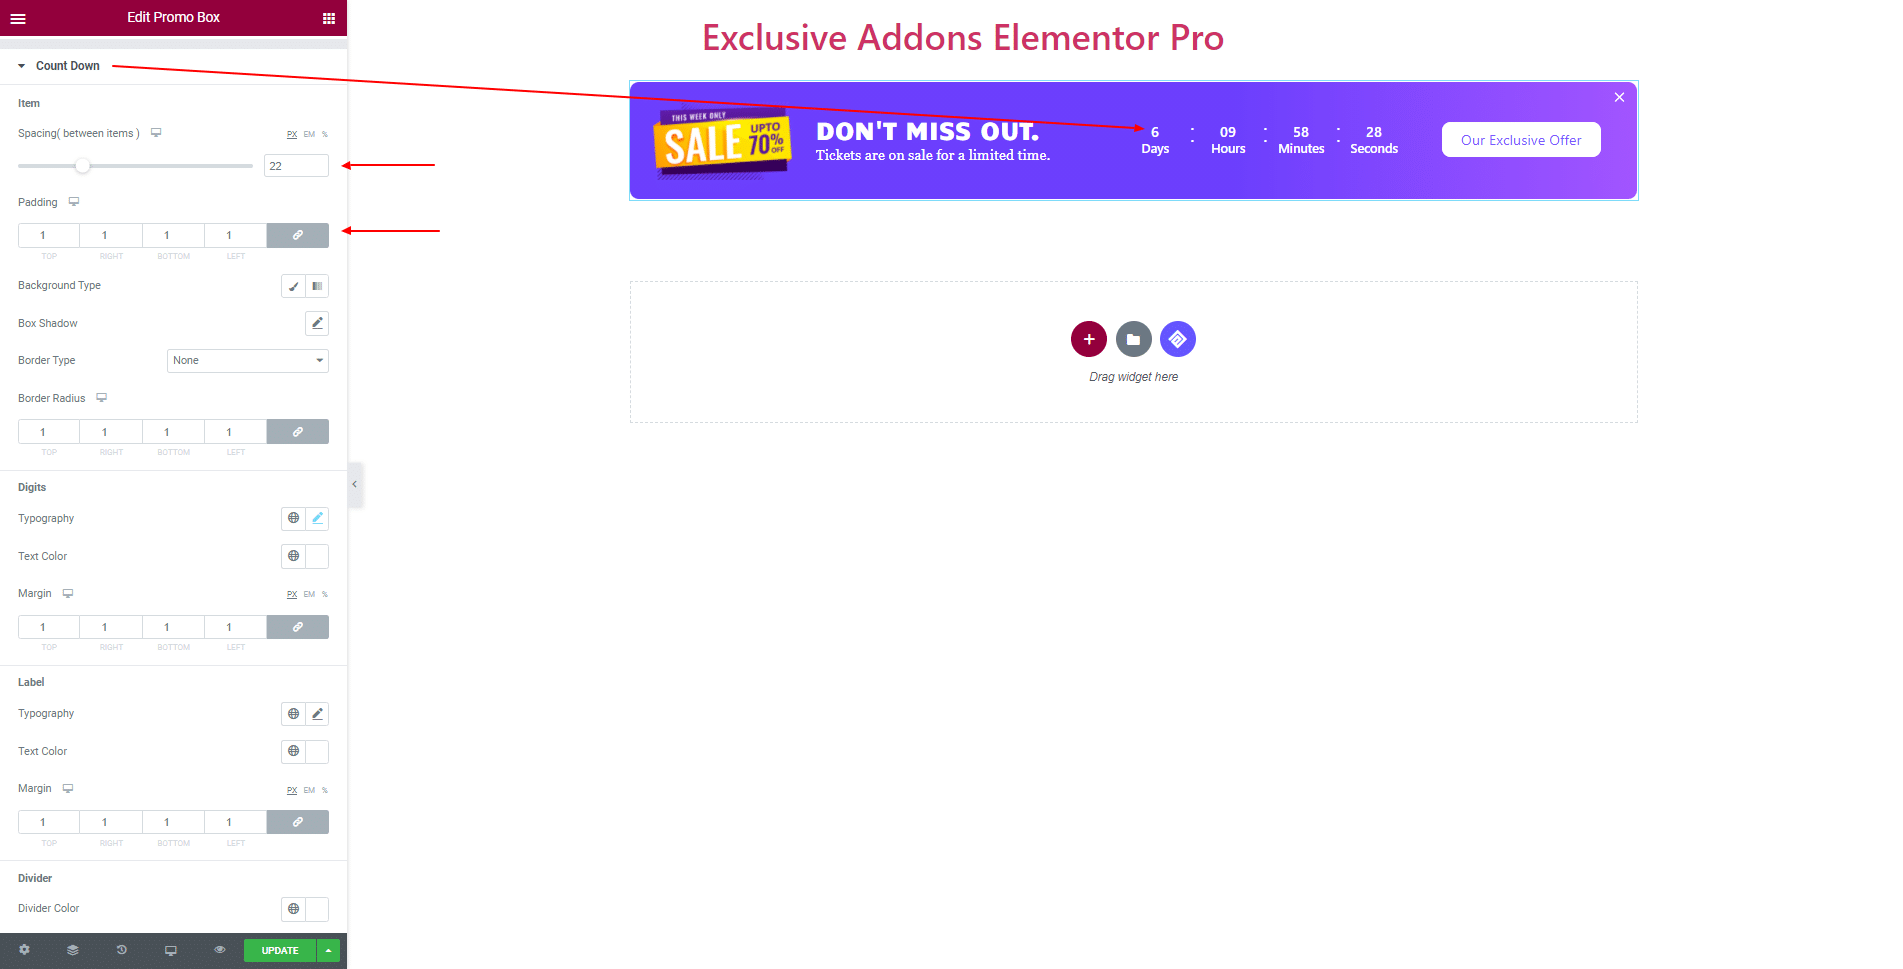
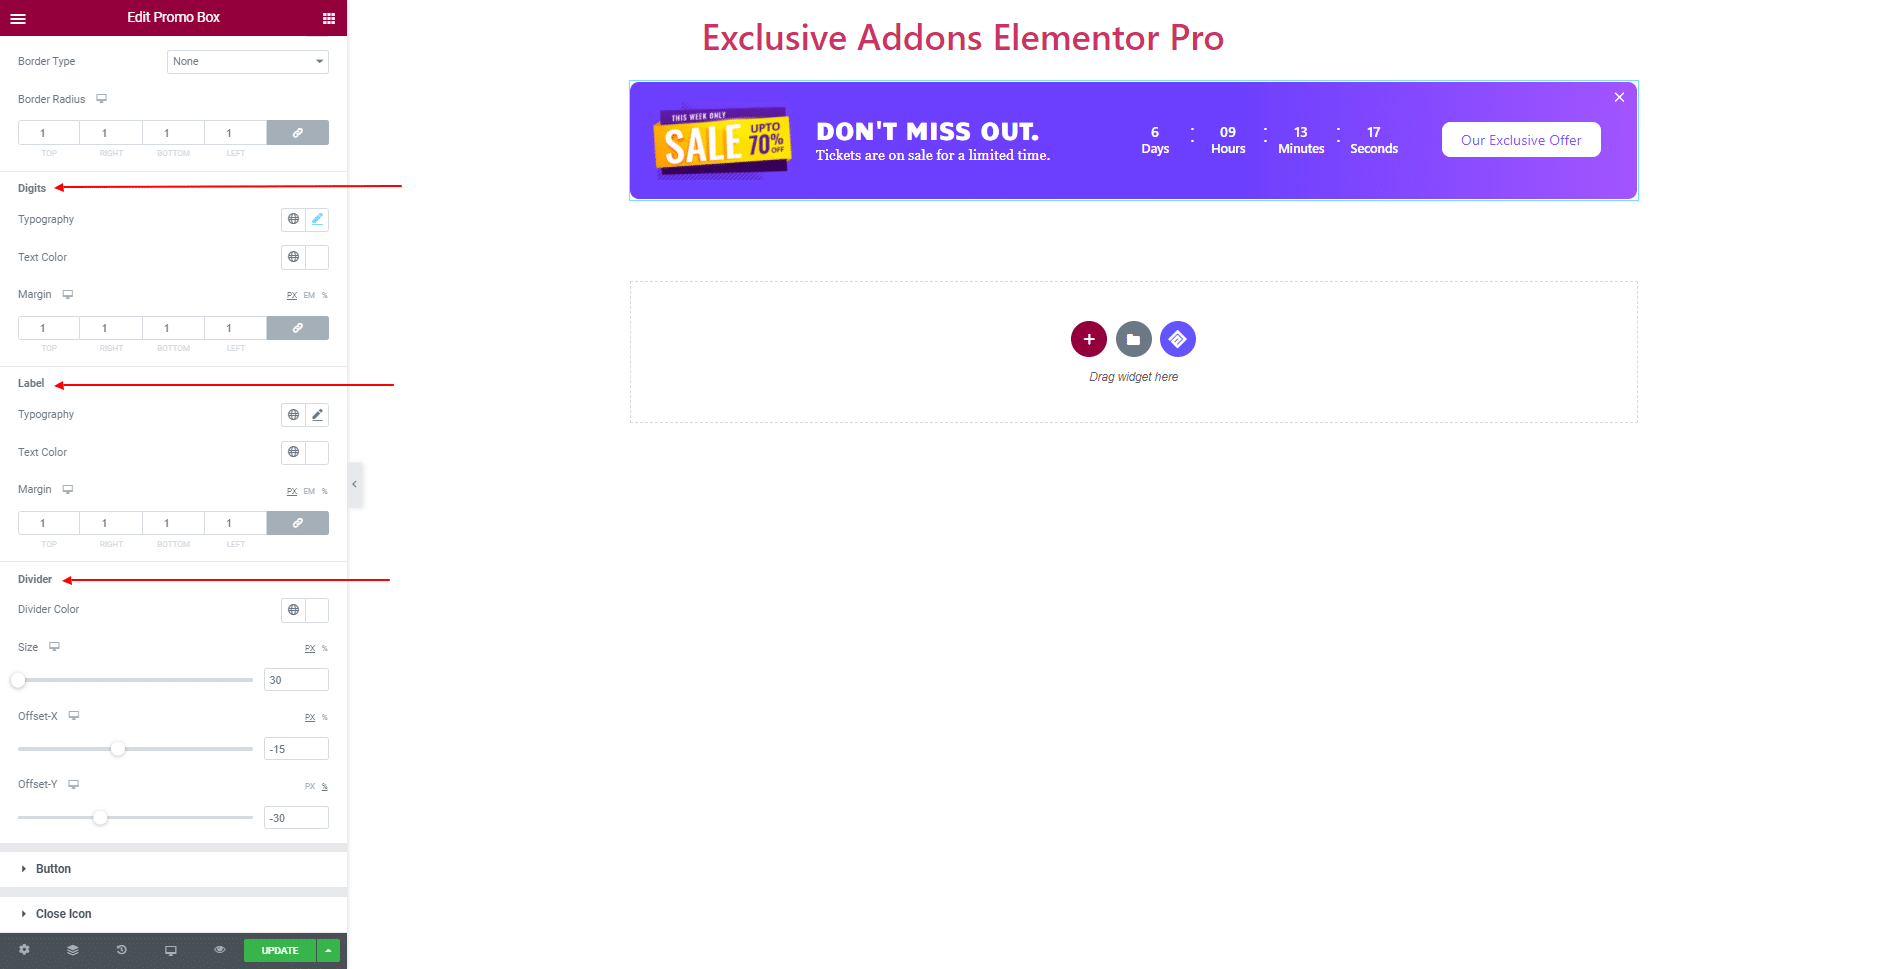
Moreover, choose individual Typography, Text Color, and Margin for ‘Digits’ and ‘Label’. And for ‘Divider’, change Size, Offset-X, Offset-Y value, and select Divider Color.
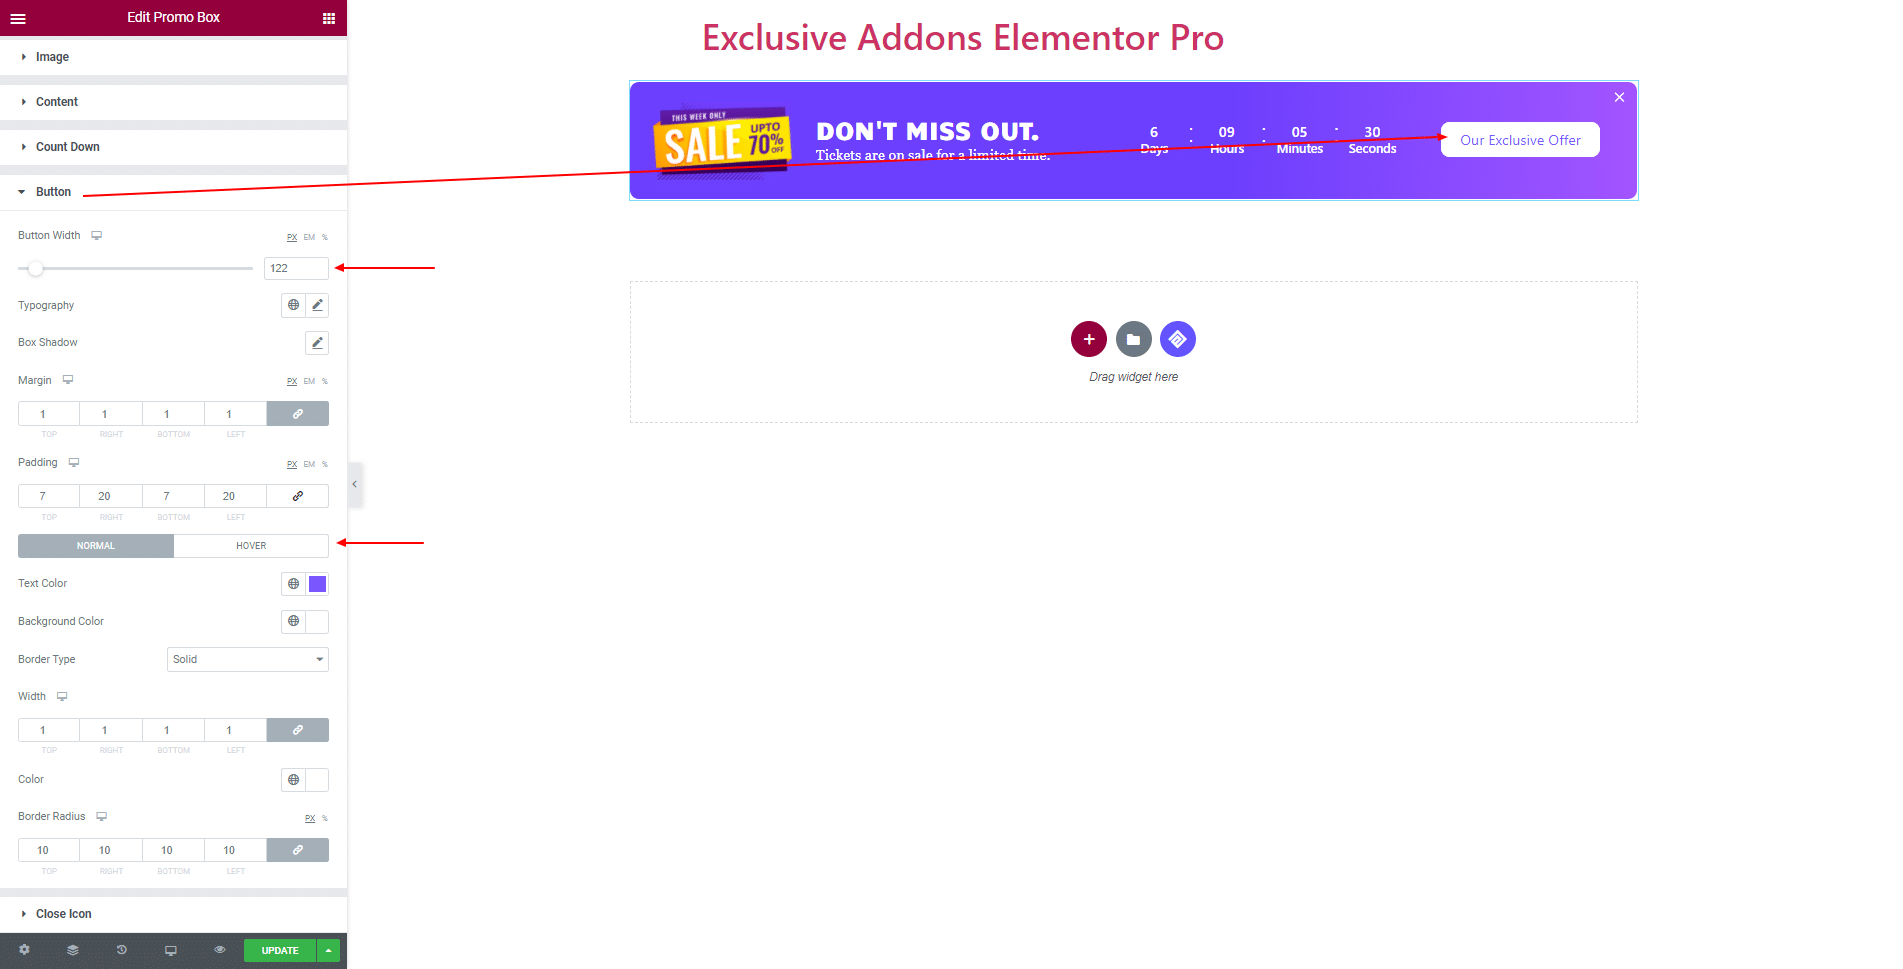
3.5 For Button, set Button Width, Typography, Box Shadow, Margin, and Padding. Also choose individual Text Color, Background Color, Border Color, and Border Radius for both ‘Normal’ and ‘Hover’ state.
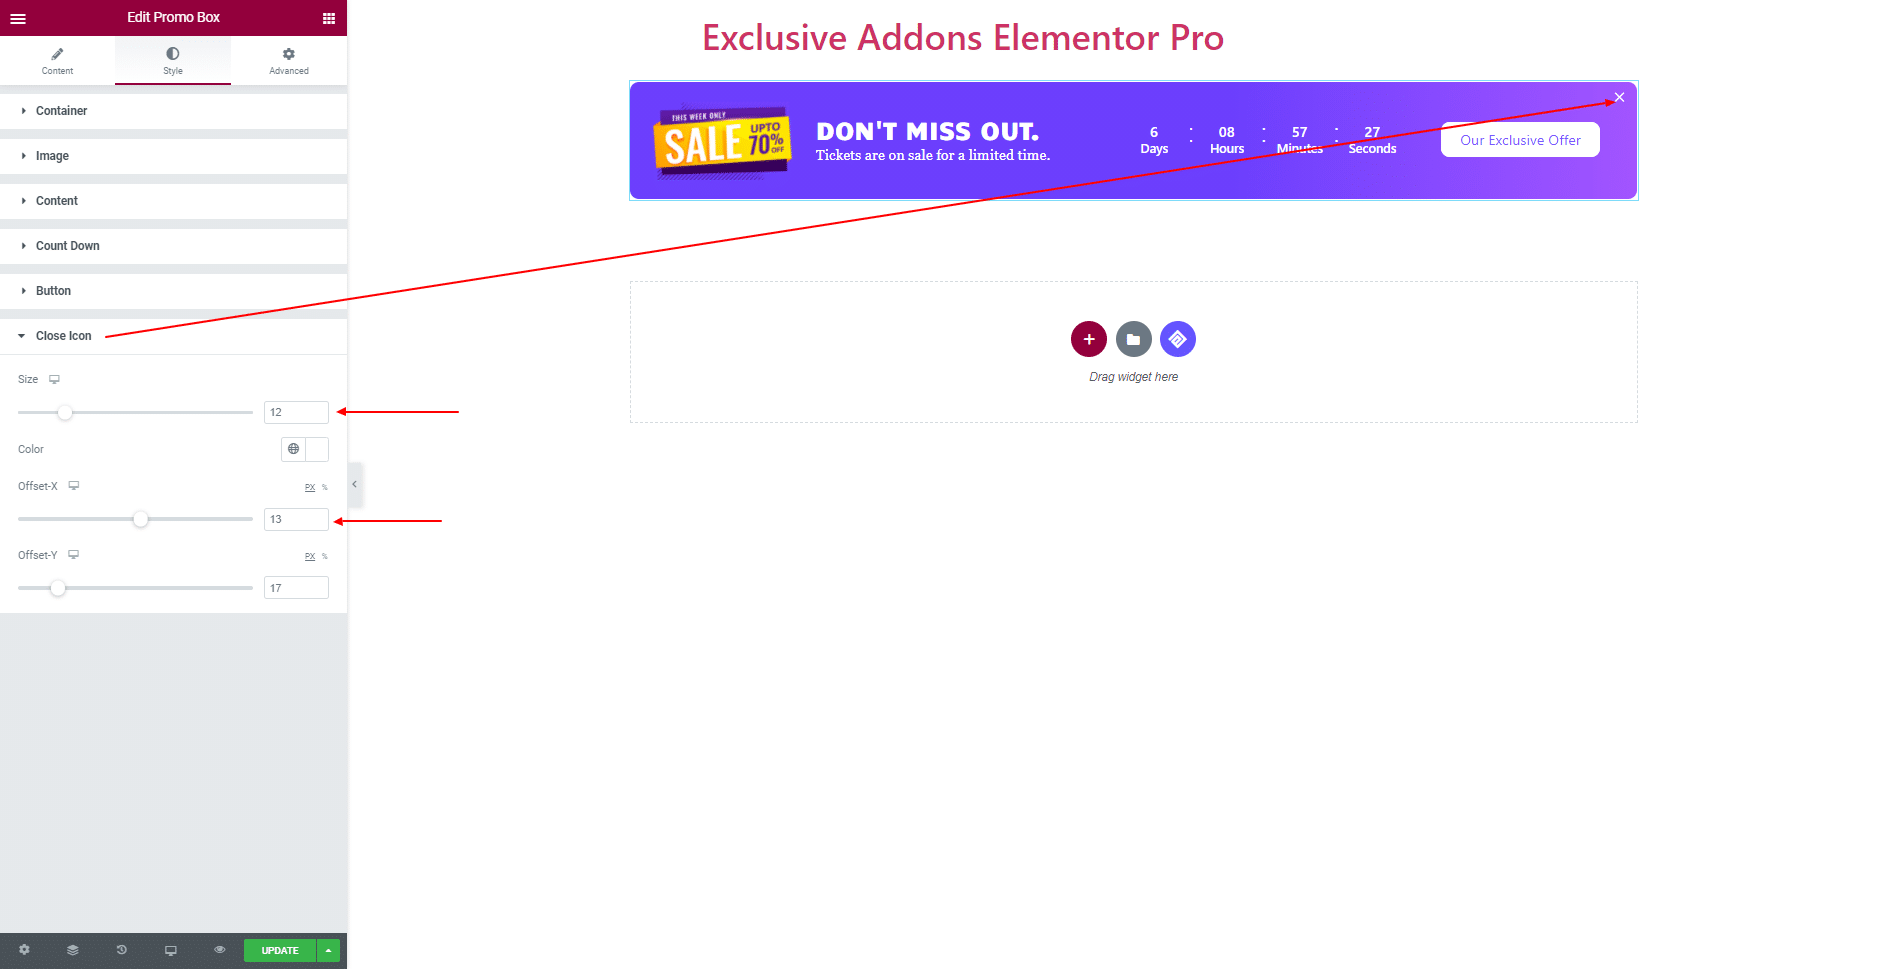
3.6 For Close Icon, you can decide over its Size, Color, Offset-X, and Offset-Y value.
STEP 4:
Finally, hit Update button, and include a stylish Campaign Widget on your Wordpress site.
