How to configure and style Elementor Mailchimp Widget
Mailchimp Wordpress plugin is a great way to run your email campaign. Integrate Mailchimp to your WordPress site easily using Mailchimp Widget of Exclusive Addons Elementor.
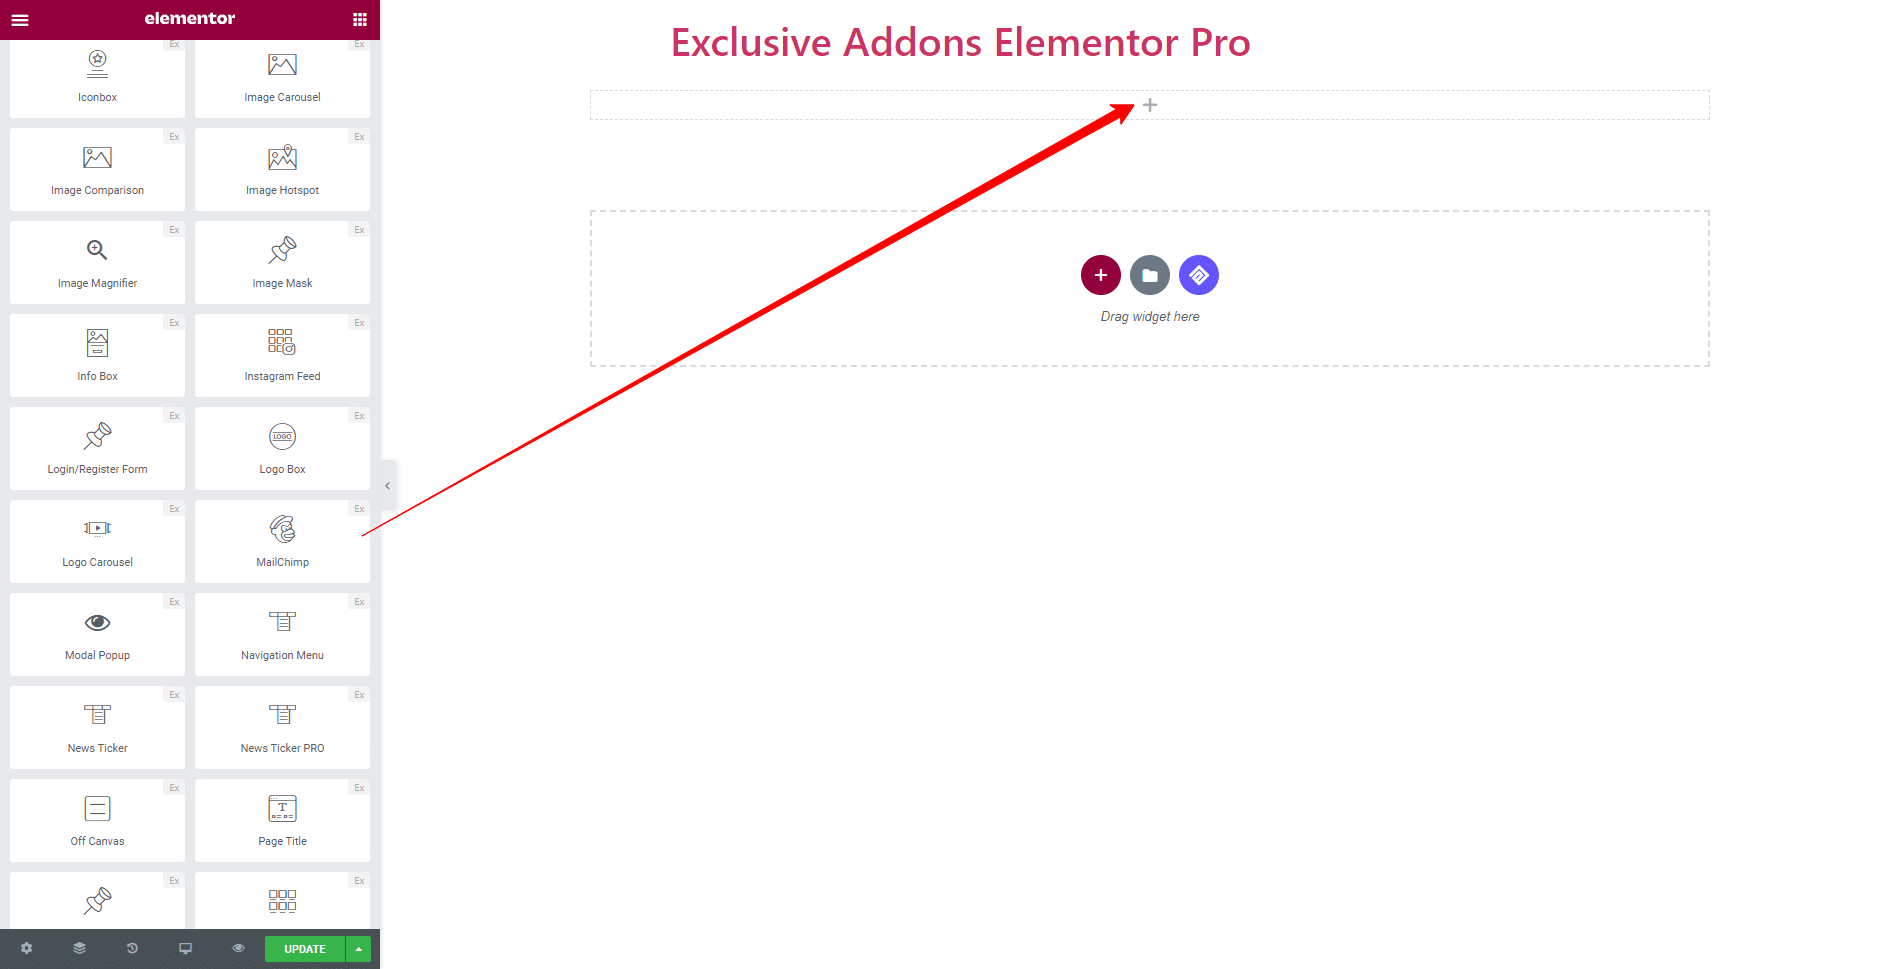
STEP 1:
Select the ‘Mailchimp‘ Widget from Elementor panel. Then drag and drop it in the selected area.
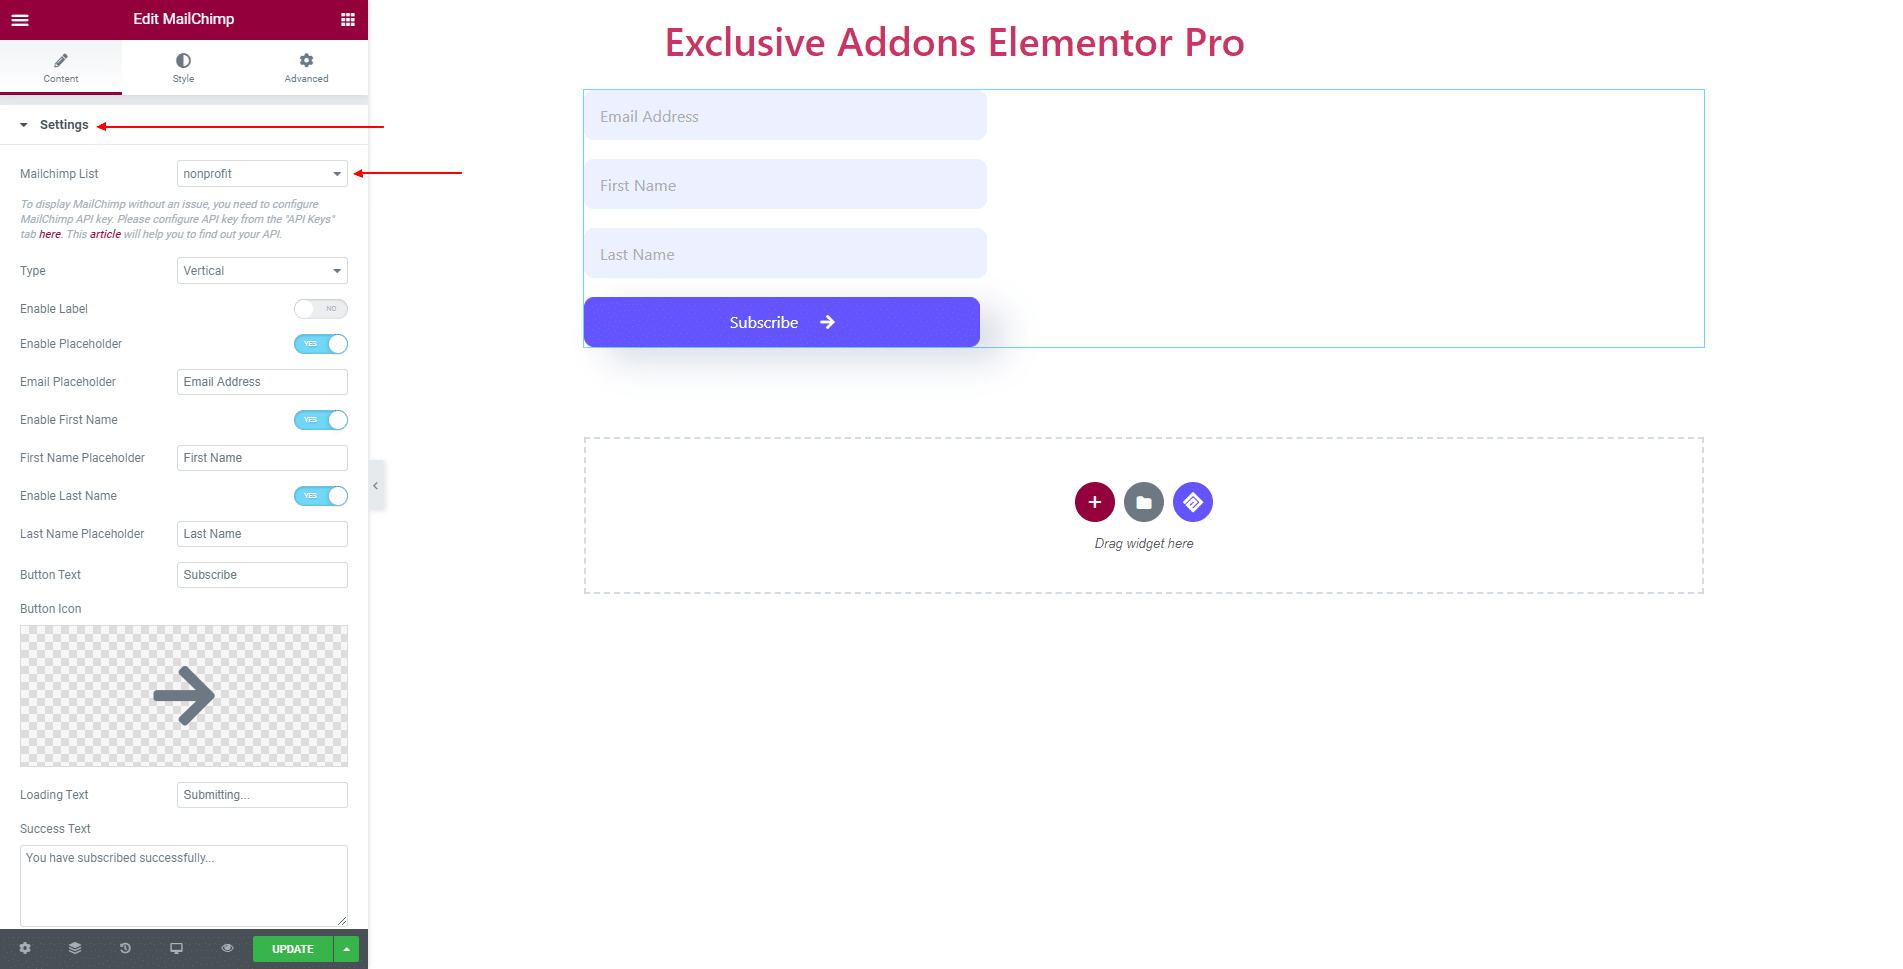
STEP 2:
Content tab allows you to configure the Settings of Mailchimp.
First, need to configure MailChimp API key.
This article (https://rudrastyh.com/mailchimp-api/subscription.html#api) will help you find your API key. After that select the Mailchimp List.
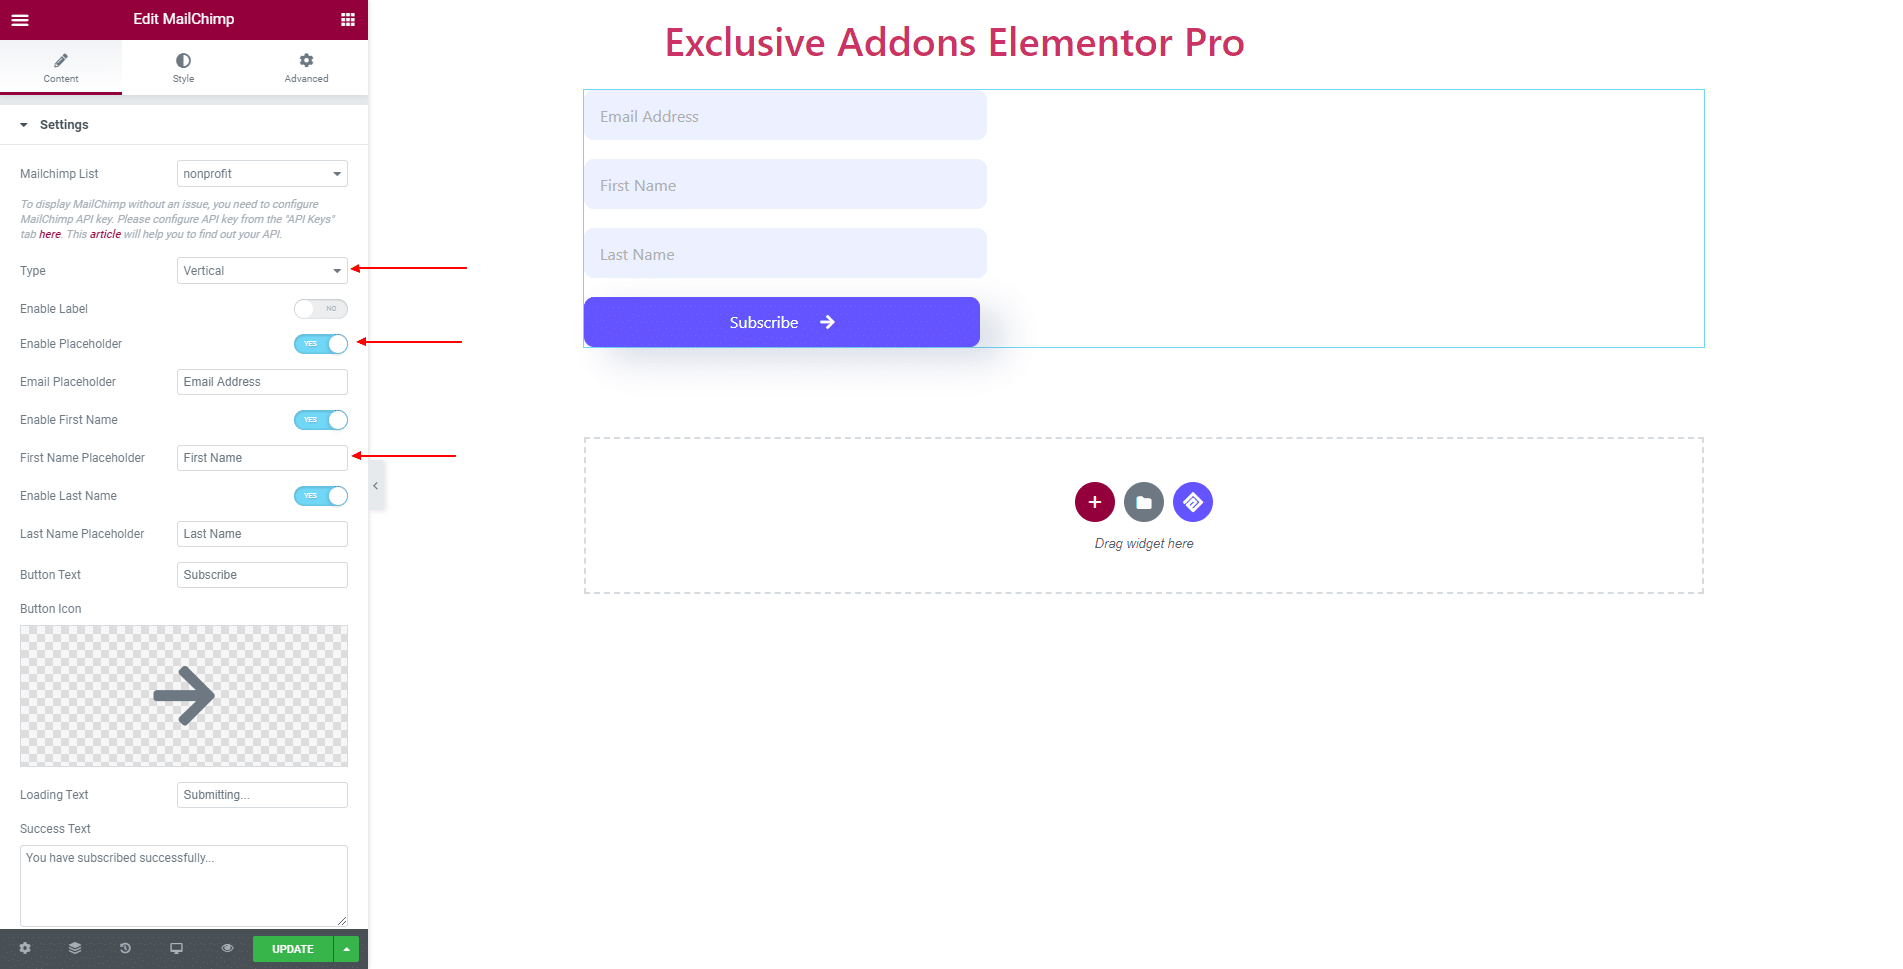
In the Setting section, you can Enable Label and select the form Type to ‘Horizontal’ and ‘Vertical’. Also can Enable Placeholder, First Name, Last Name, and set their text.
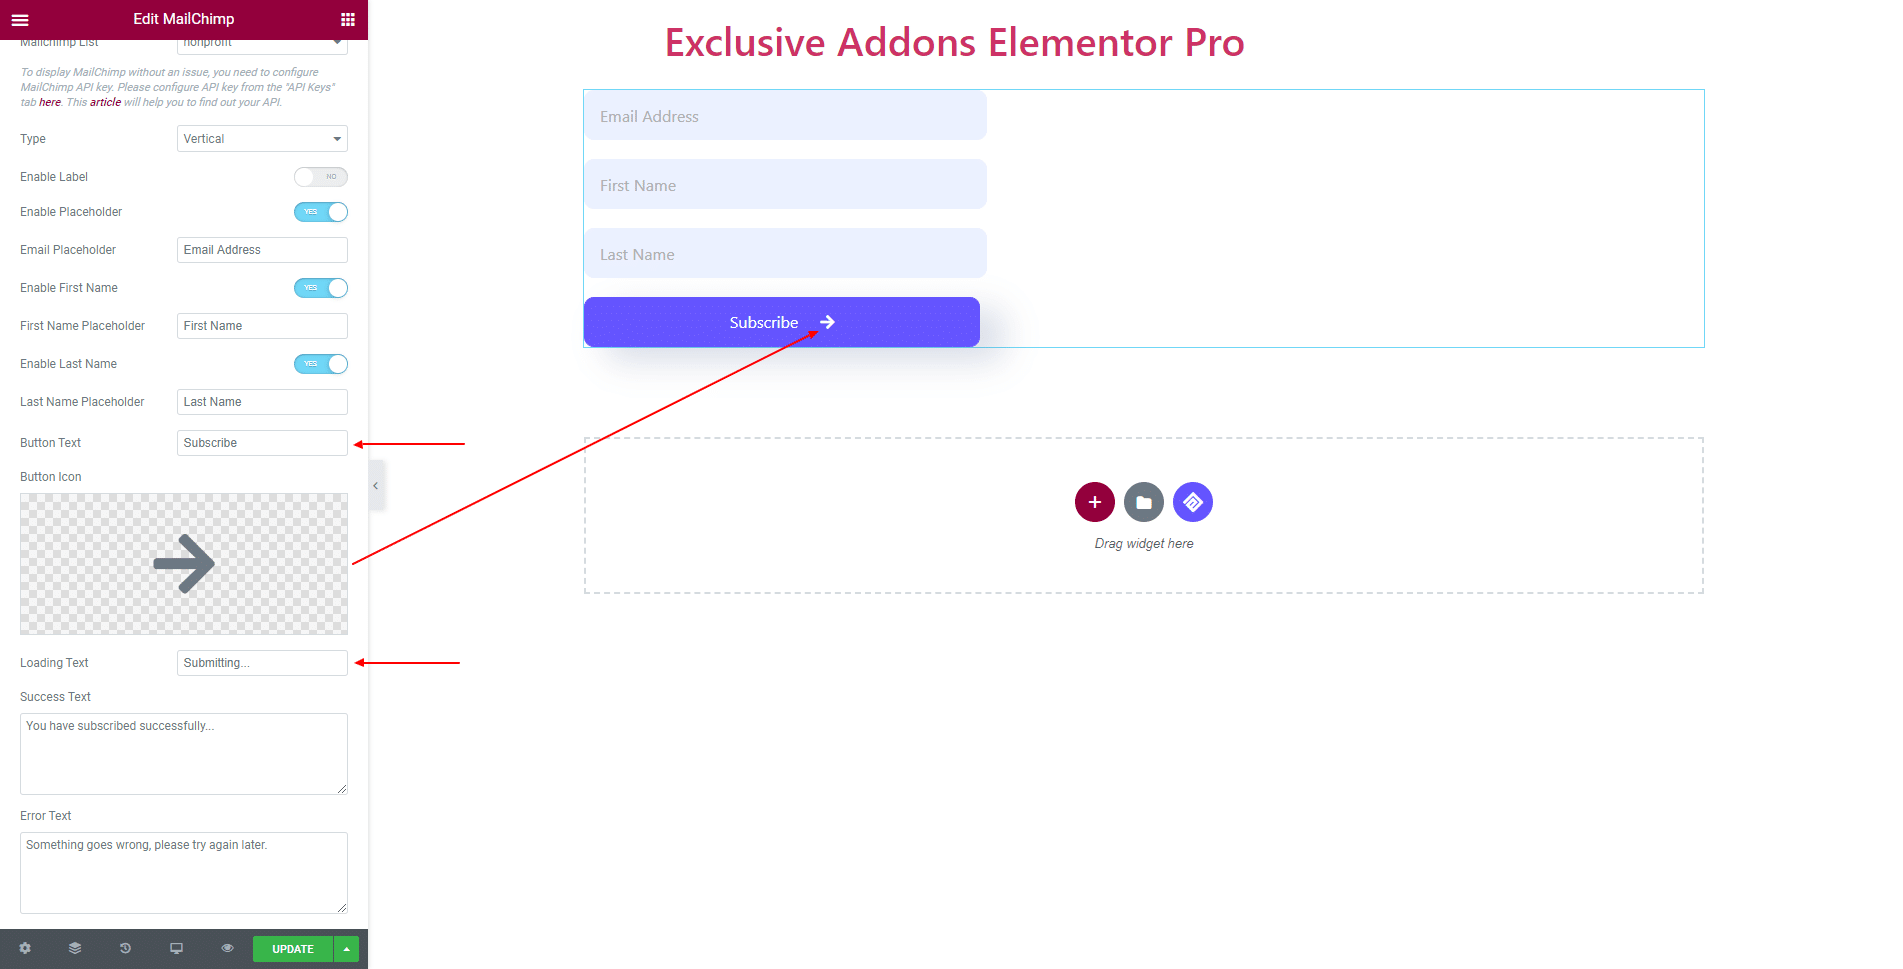
Besides, you get to set Button Text, Button Icon, Loading Text, Success Text, and Error Text.
STEP 3:
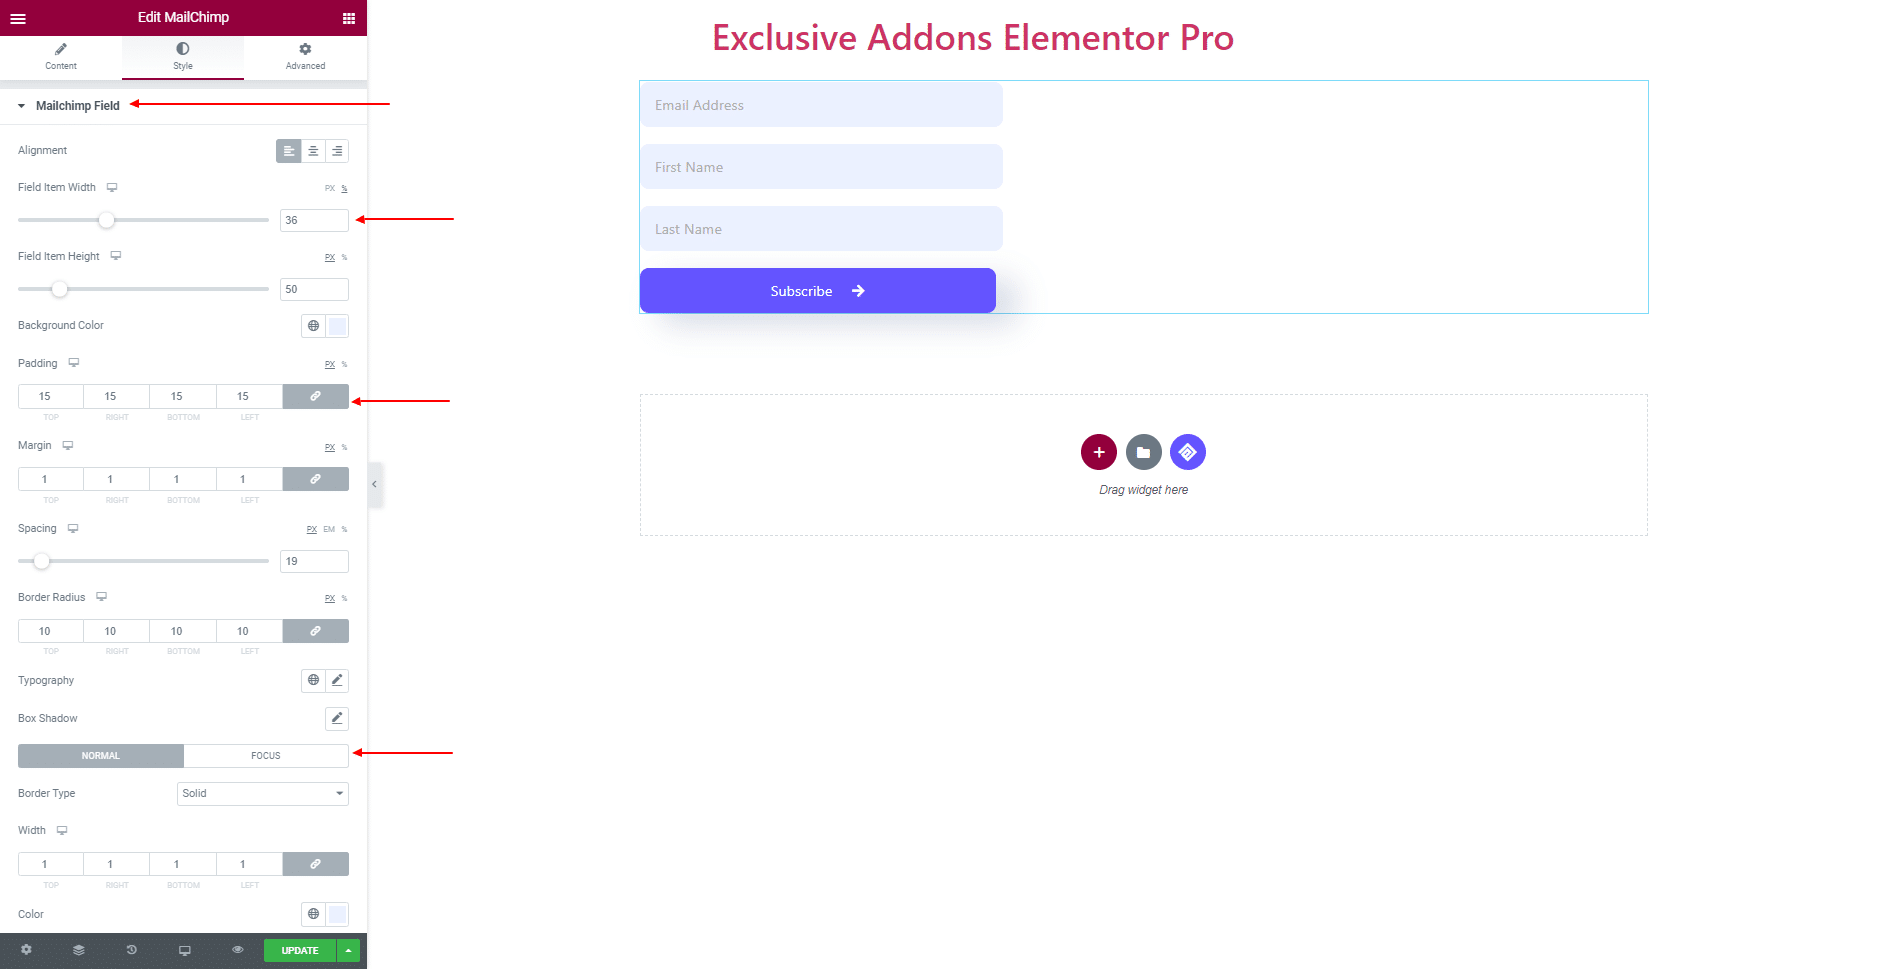
Style tab allows you to customize Mailchimp Field, Placeholder, Submit Button, and Message design.
3.1 In Mailchimp Field section, set content Alignment, Field Item Width-Height, Background Color, Padding, Margin, Spacing, Border Radius, Typography, and set individual Background Type for both ‘Normal’ and ‘Hover’ state.
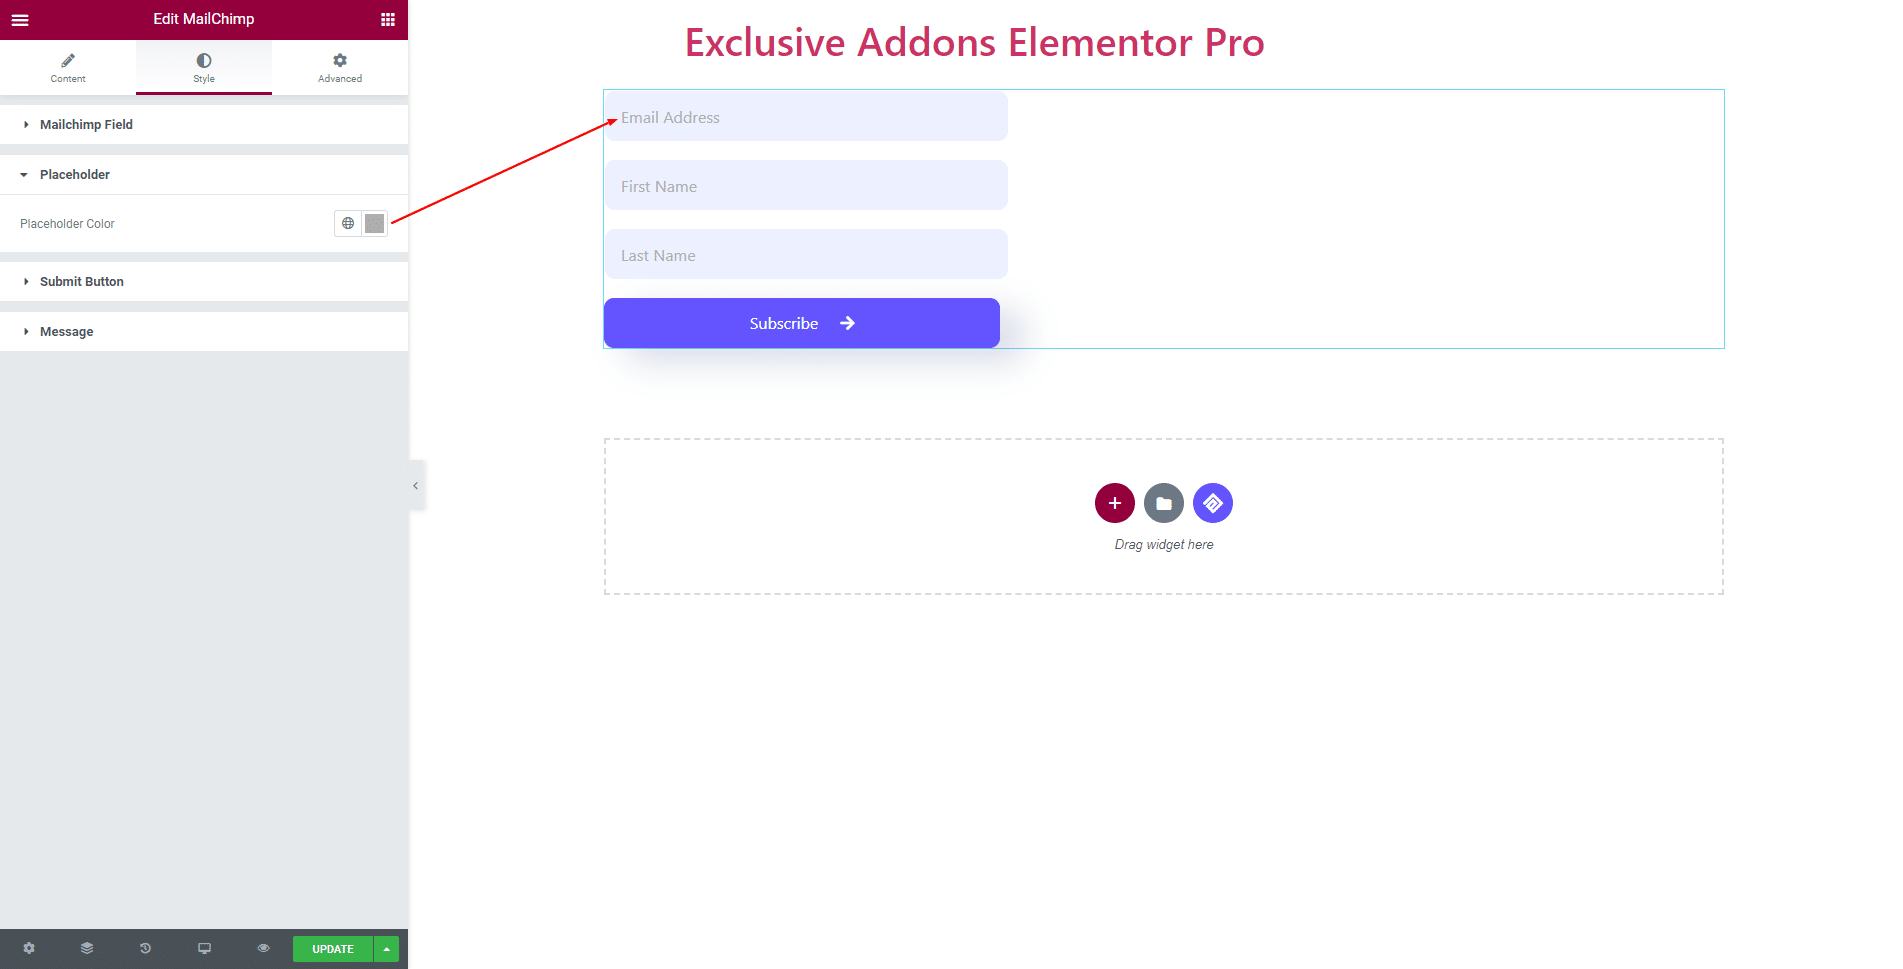
3.2 For Placeholder, you can choose the Placeholder Color.
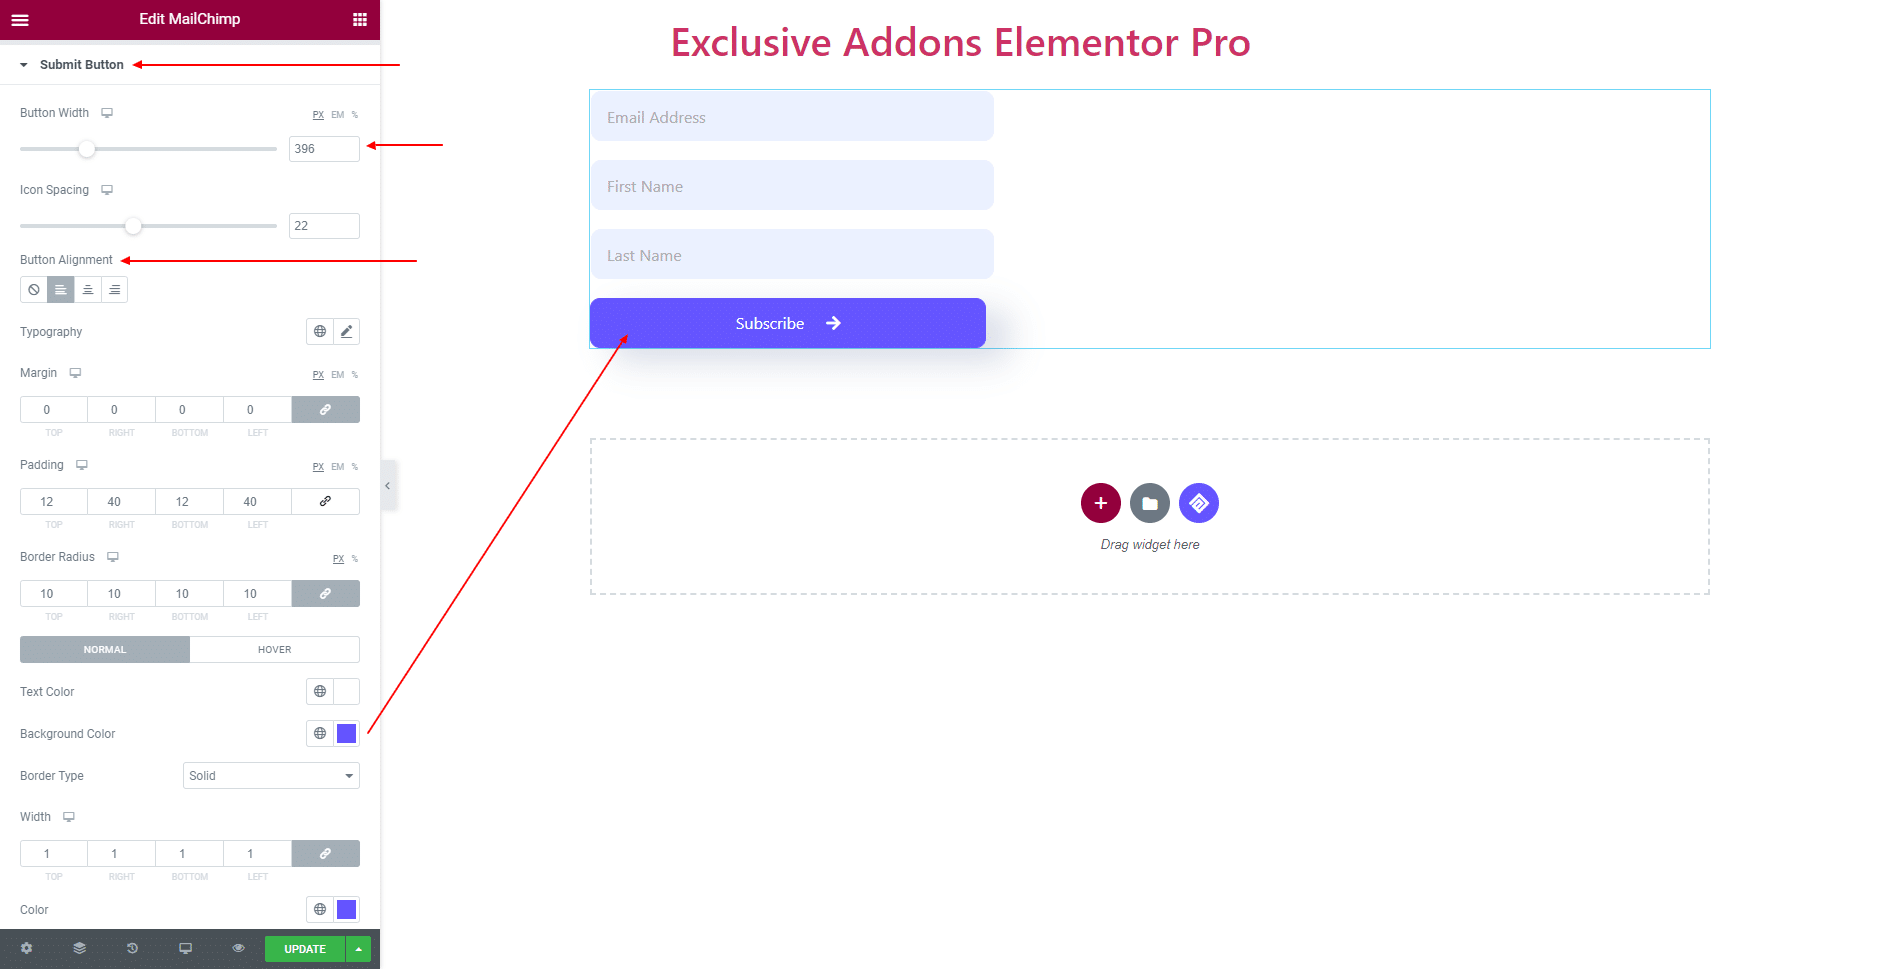
3.3 In Submit Button section, change Button Width, Icon Spacing, Button Alignment, Typography, Margin, Padding, and Border Radius. For ‘Normal’ and ‘Hover’ state, you can use separate Text Color, Background Color, and Border Type.
3.4 In Message section, set individual Typography and Color for ‘Success Message‘ and ‘Error Message‘.
STEP 4:
Finally, hit the Update button, and include a stylish Mailchimp Widget on your WordPress site.
