How to configure and style Elementor Woo Add to Cart Widget
Exclusive Addons comes with a WooBuilder. A compact tool to build complete eCommerce sites. The WooBuilder includes a bunch of widgets for the Single Product Page and “Thank You” Page, which includes Add to Cart widget.
You can add a stylish Add To Cart button to the Single Product Page with lots of customizable options. Learn how to configure and style ElementorAdd to Cart from Exclusive Addons.
STEP 1:
Edit the Single Product Page to add Woo Add to Cart Exclusive Addons widgets.
1.1 Go to Templates & Saved Templates from your WordPress dashboard. There you will see the Single Product Page template you have created before. Click on the “Edit with Elementor” option to start editing the page template.
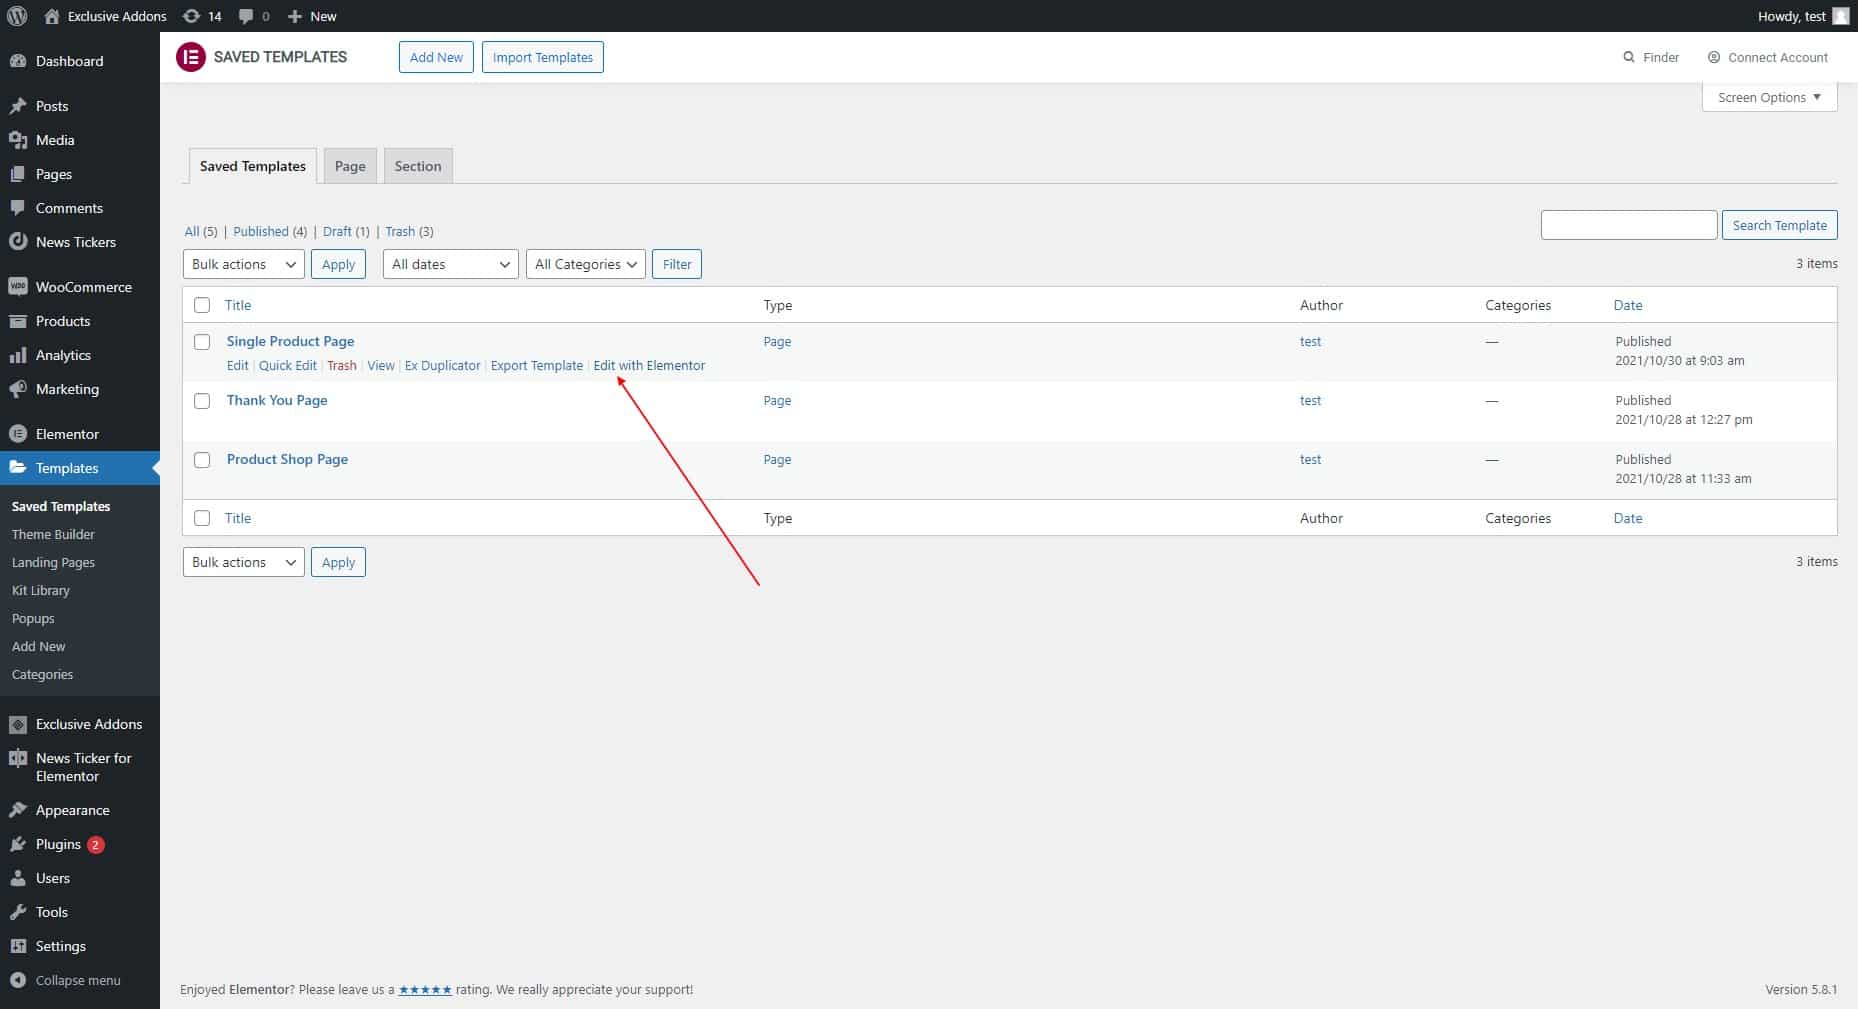
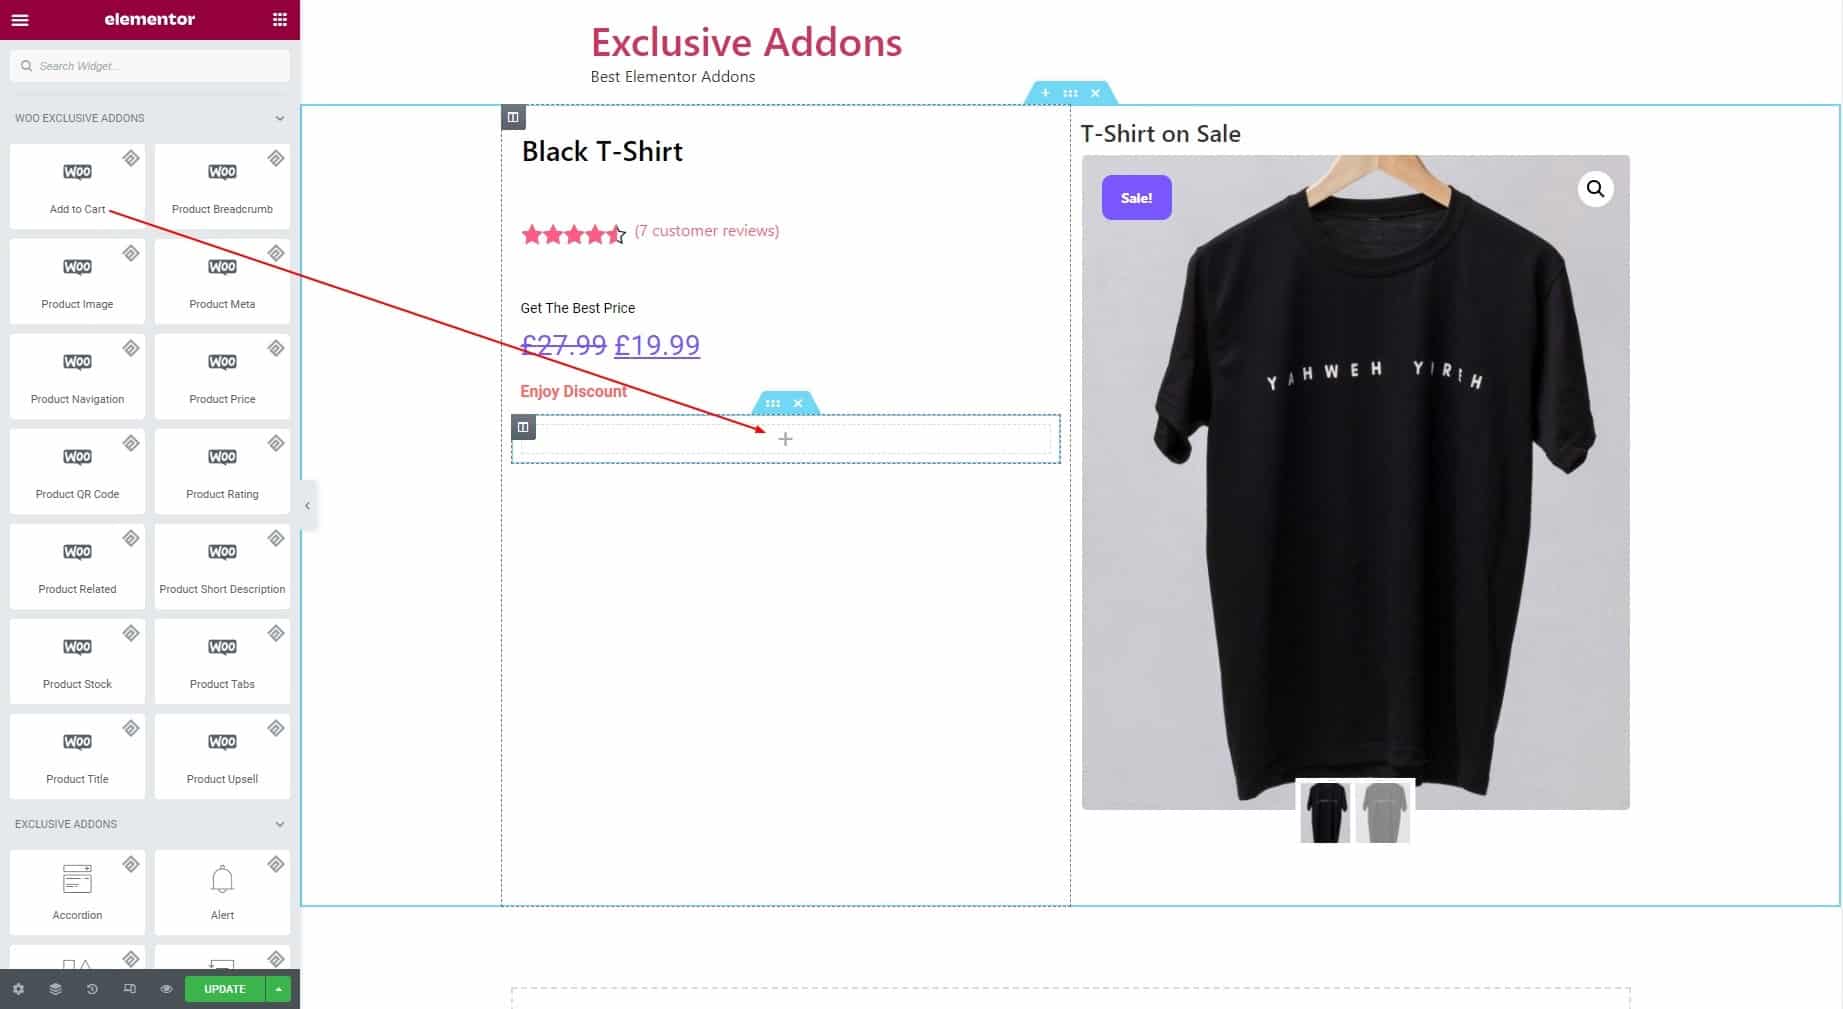
1.2 Now find Exclusive Add to Cart widget under Woo Exclusive Addons section in the Editor panel. Drag and drop the widget into your design.
STEP 2:
The Container tab allows you to configure the Container section and Befoe & After text.
2.1 In the Container section, you can set the Button Text and choose Display Style to “Inline” or “Block”.
Inline Display Style
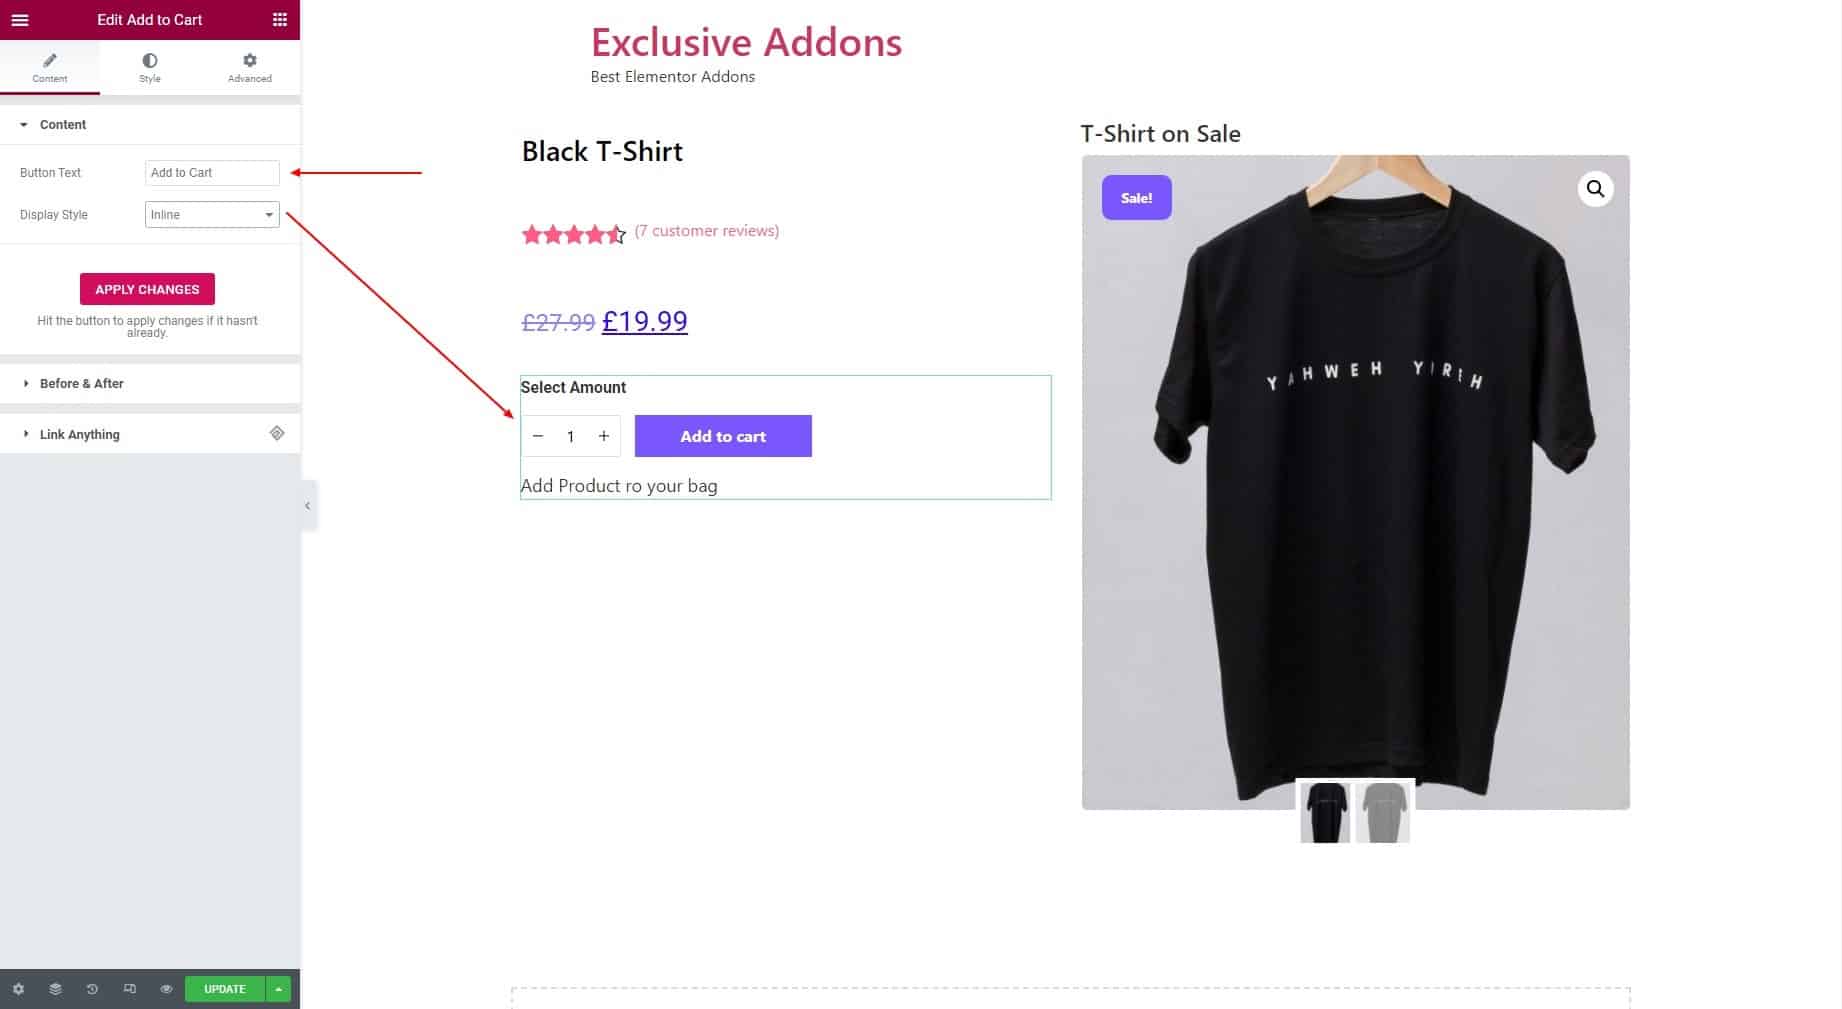
Block Display Style
There is an “APPLY CHANGES” button in case the changes don’t apply automatically.
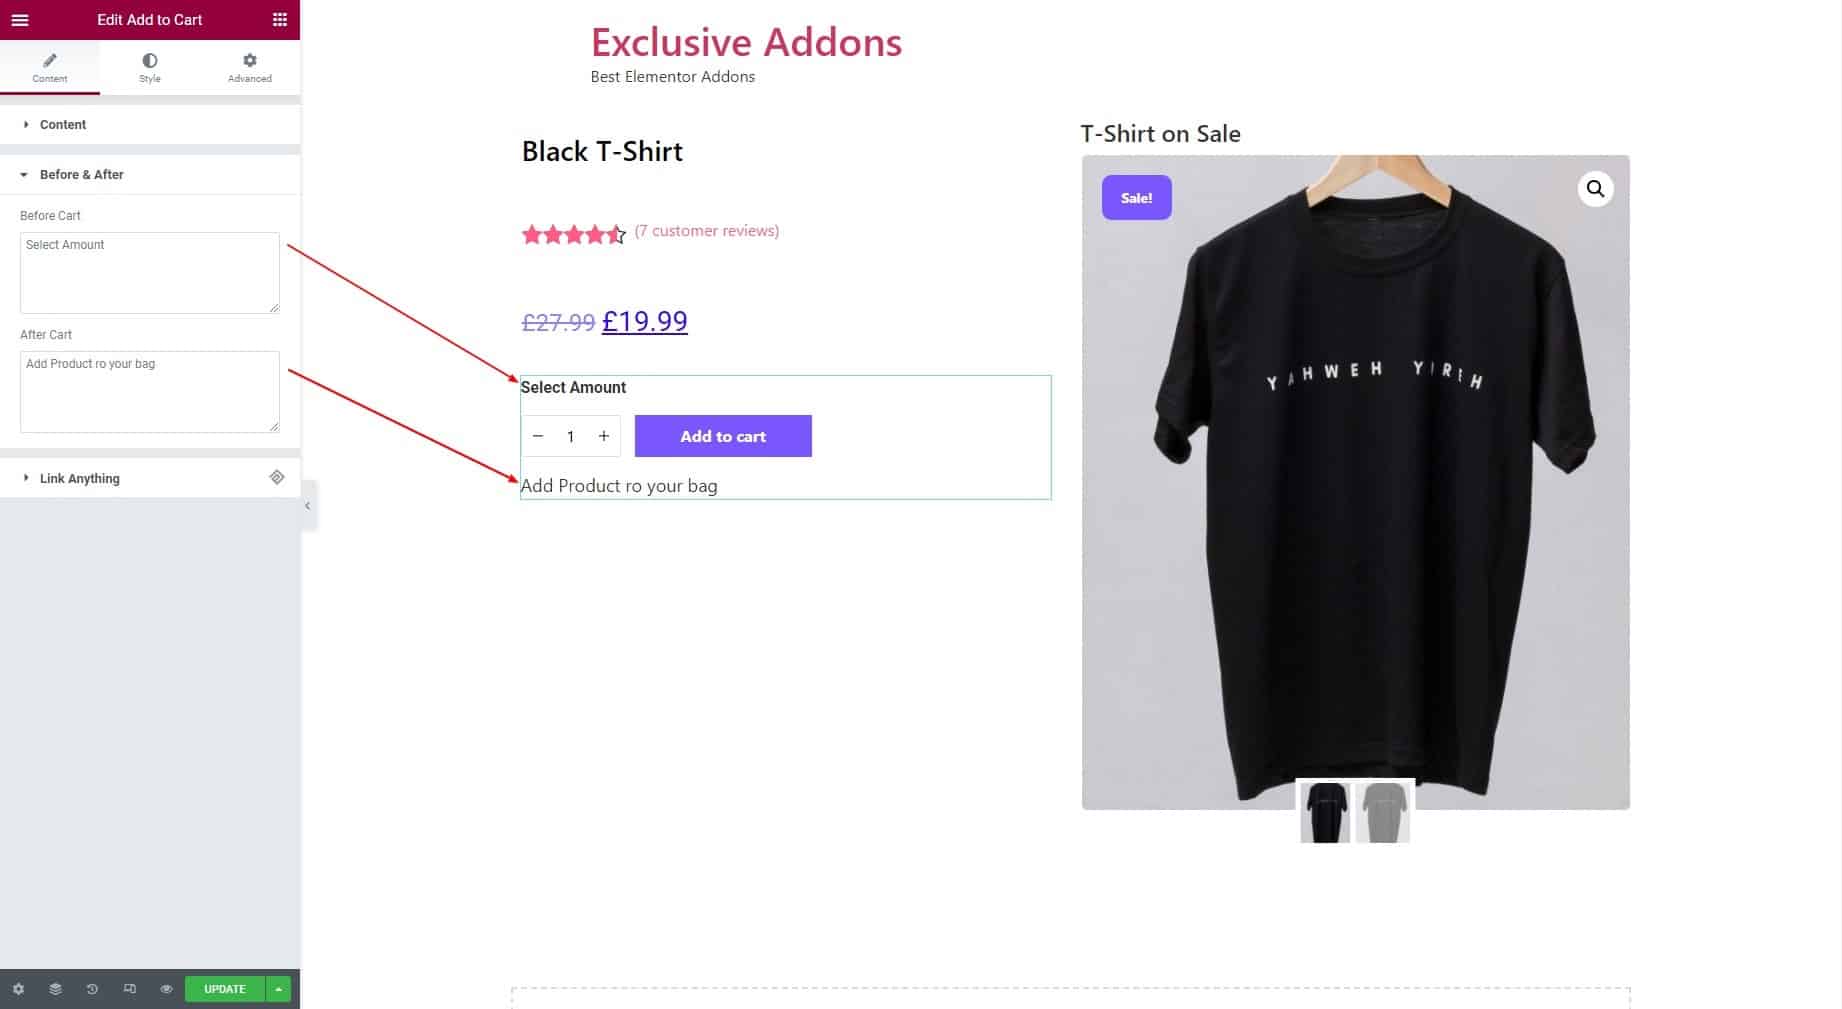
2.2 In the Before & After Text section, you can add text Before Cart and After Cart.
STEP 3:
Style tab allows you to customize Container, Quantity, Button, Form, and Before & After Text Style.
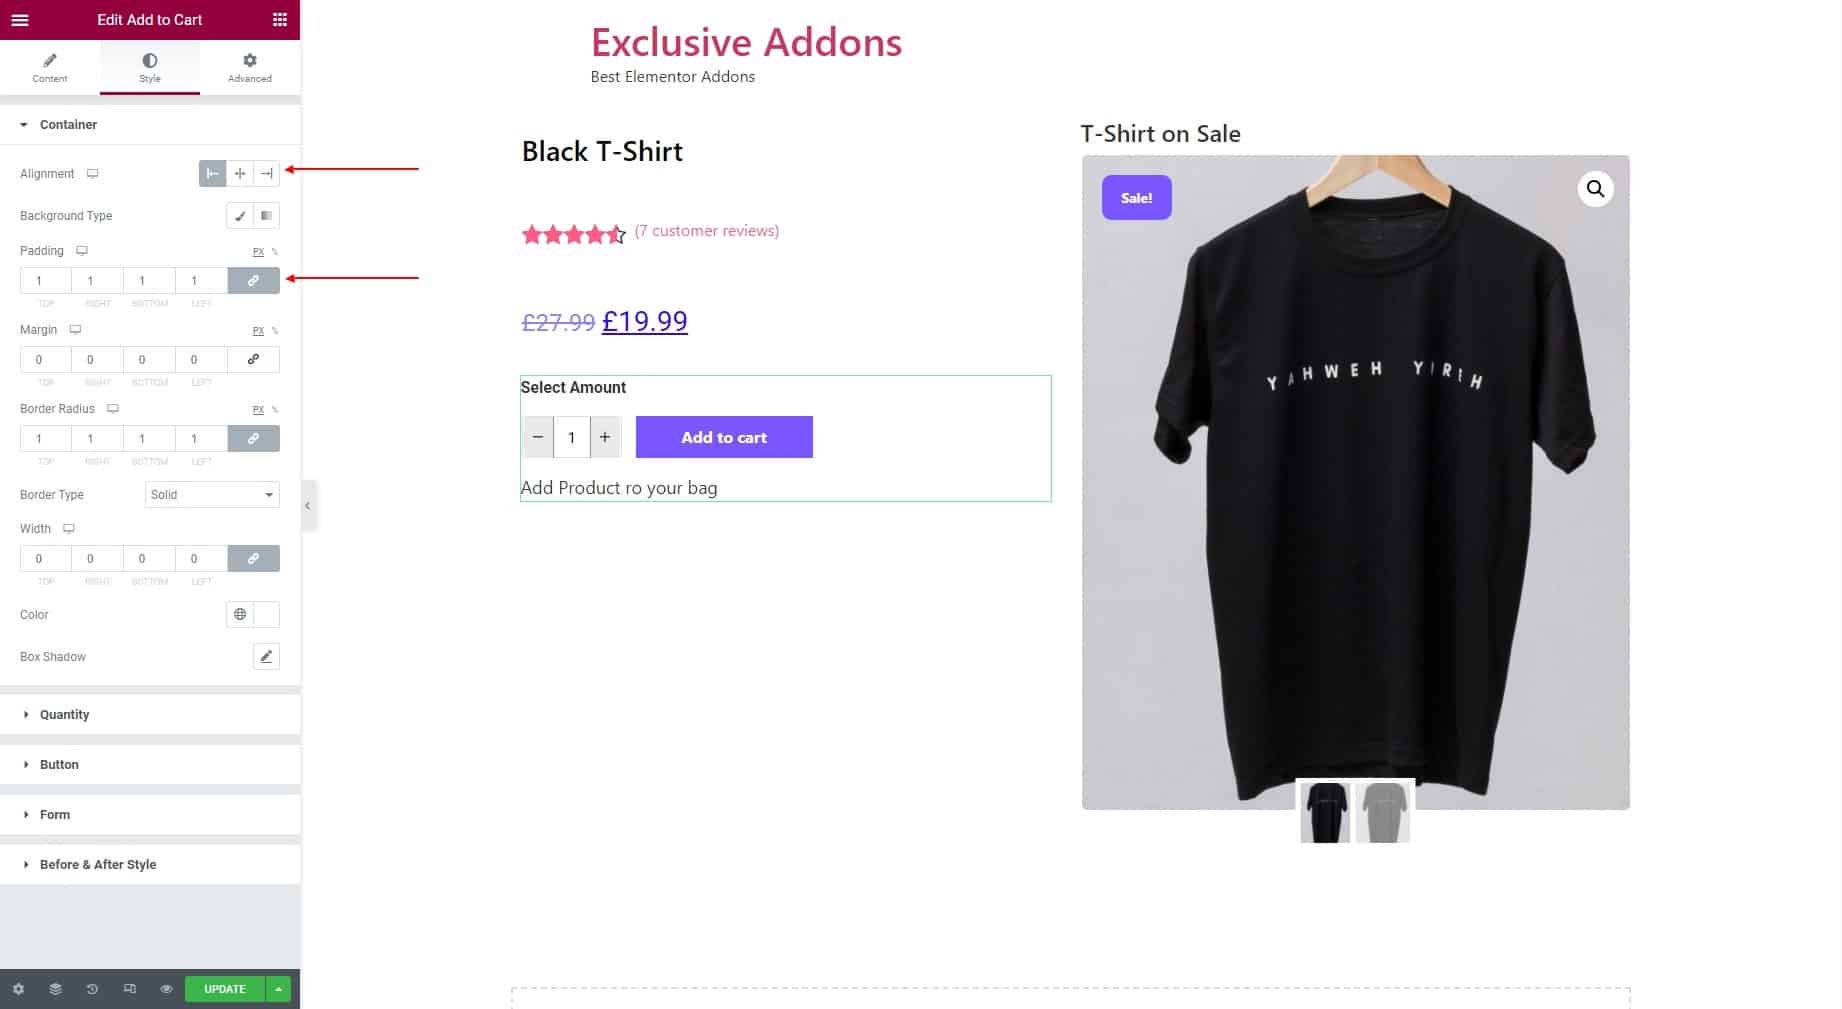
3.1 In the Container section, set the Alignment to Left, Right, or Center. You can also set Padding, Margin, and Border Radius. Then select a Border Type and set its Width and Color as well.
3.2 In the Quantity section, you can customize the product quantity number. Adjust the Input Width and Input Height. You can set Input Padding, Input Background Color, Input Text Color, as well as Border Type and Input Border Radius.
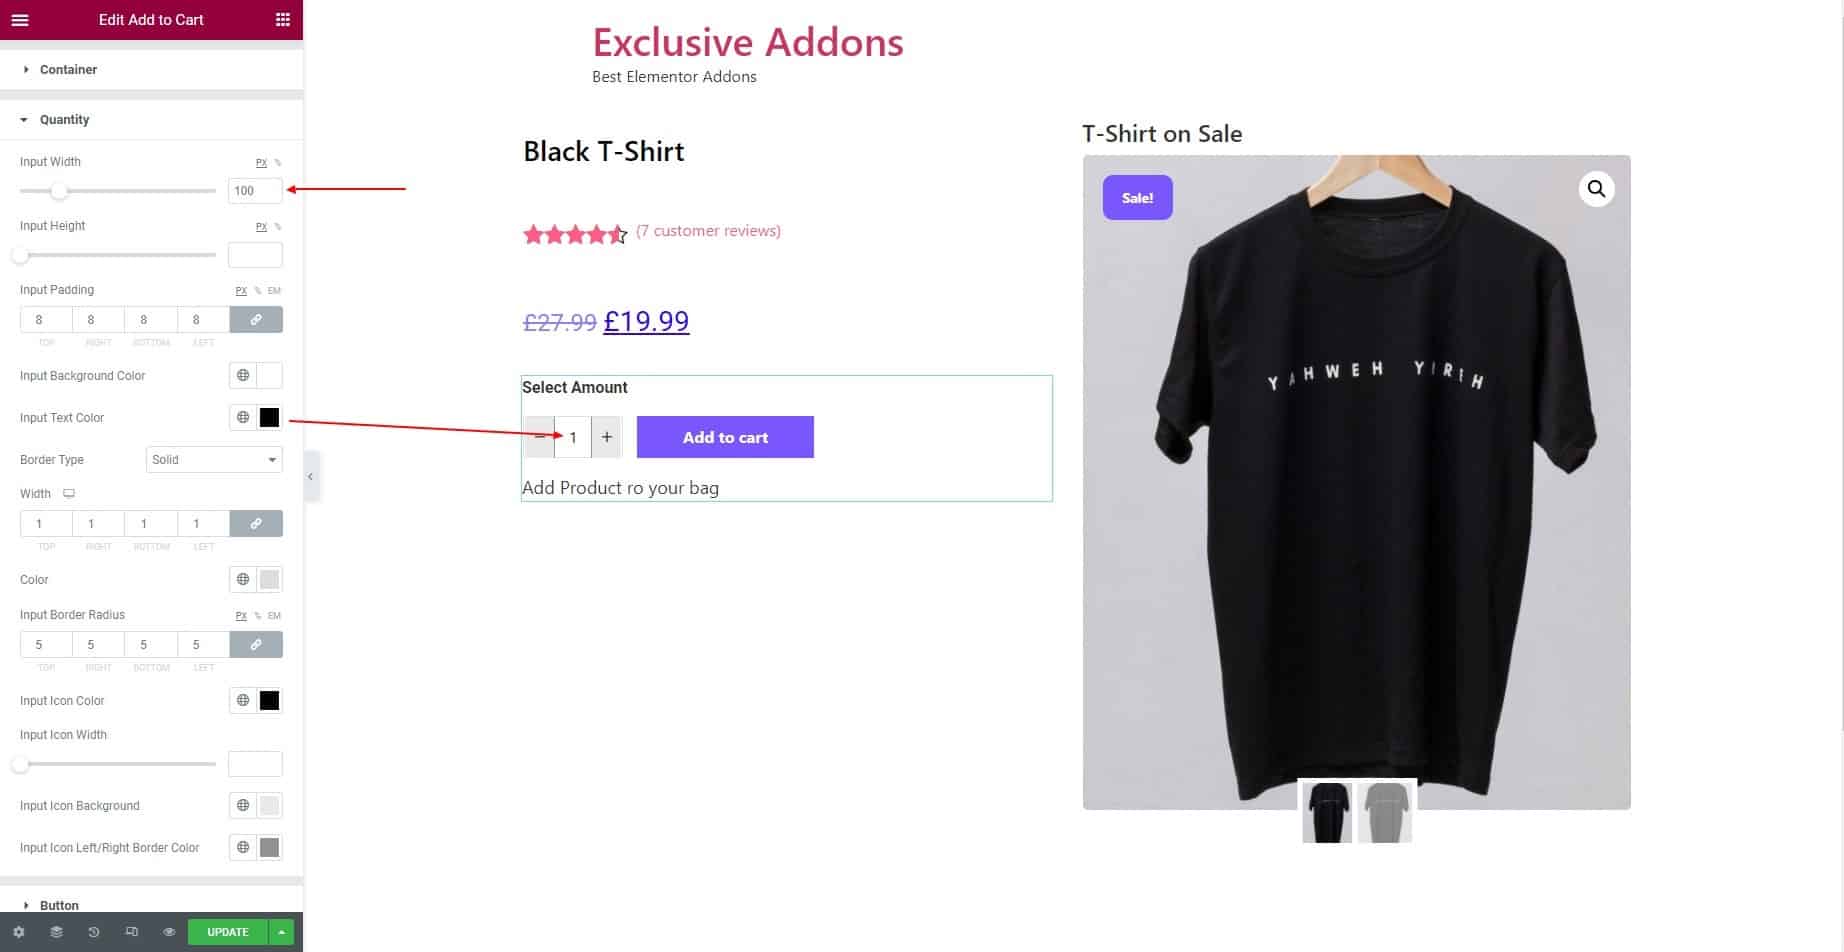
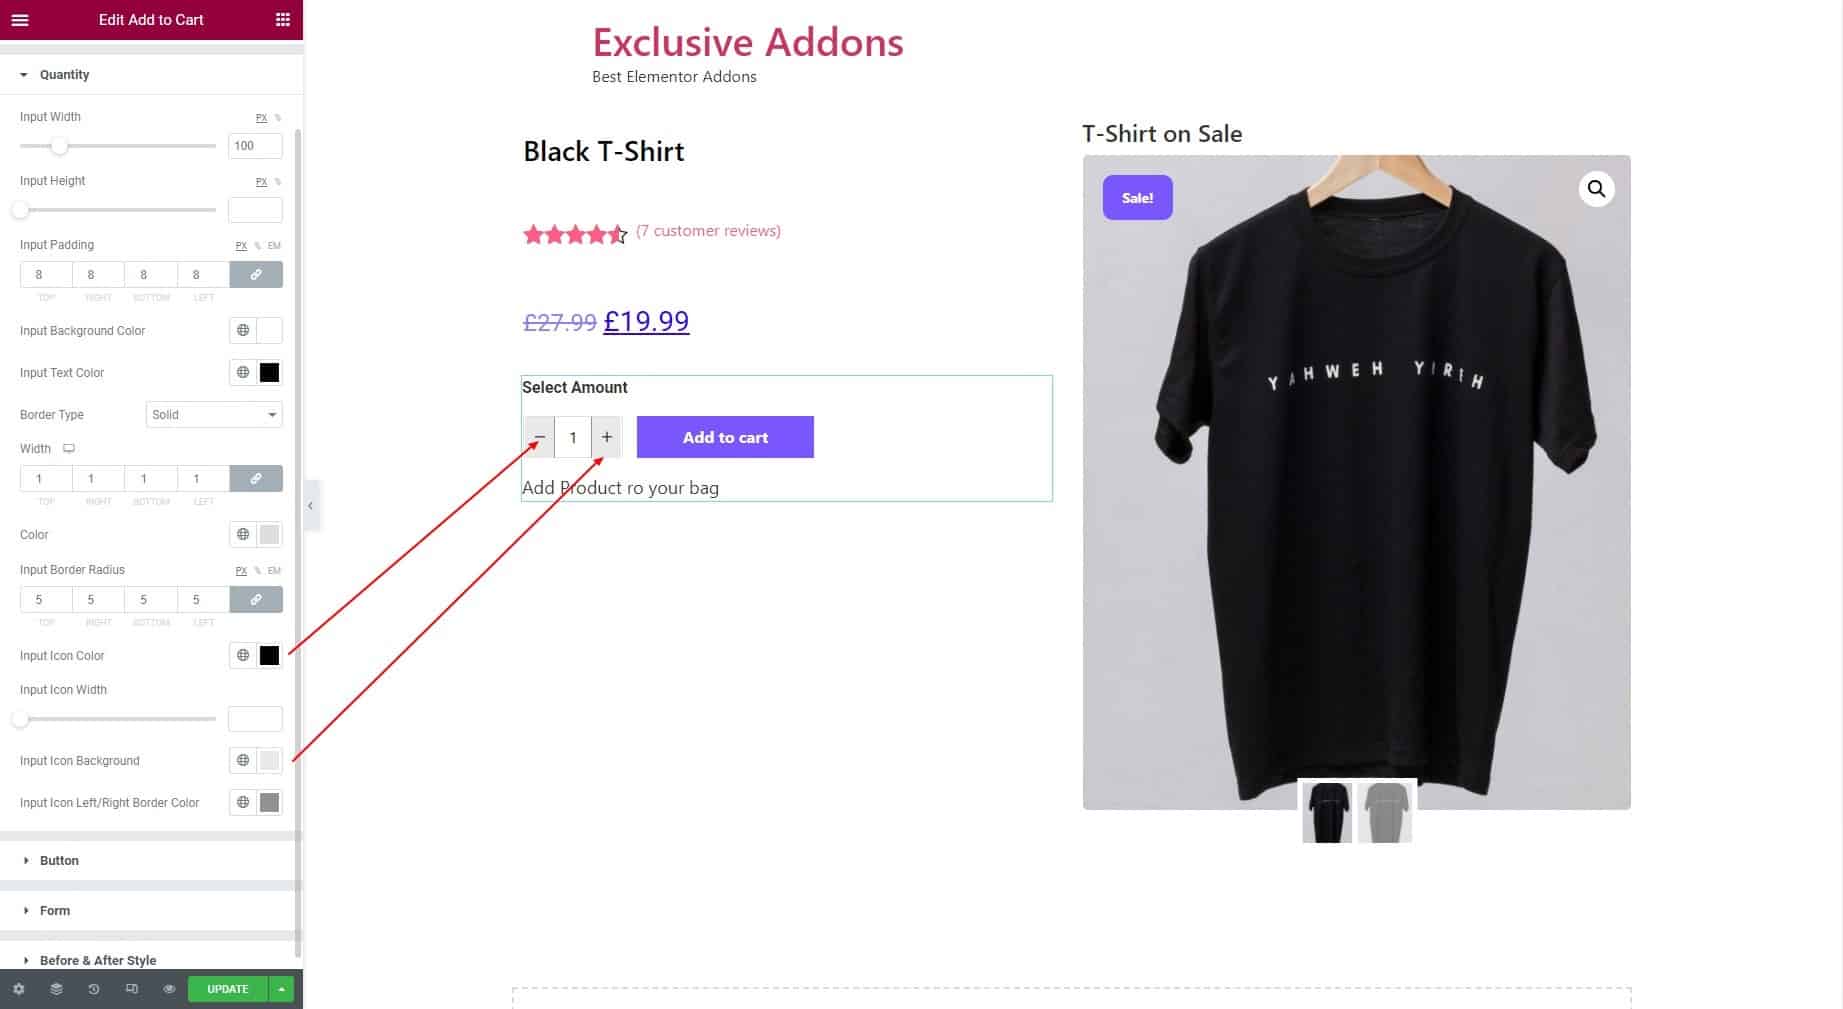
You can also set Input Icon Color, Input Icon Width, Input Icon Background Color, and Input Left/Right Border Color.
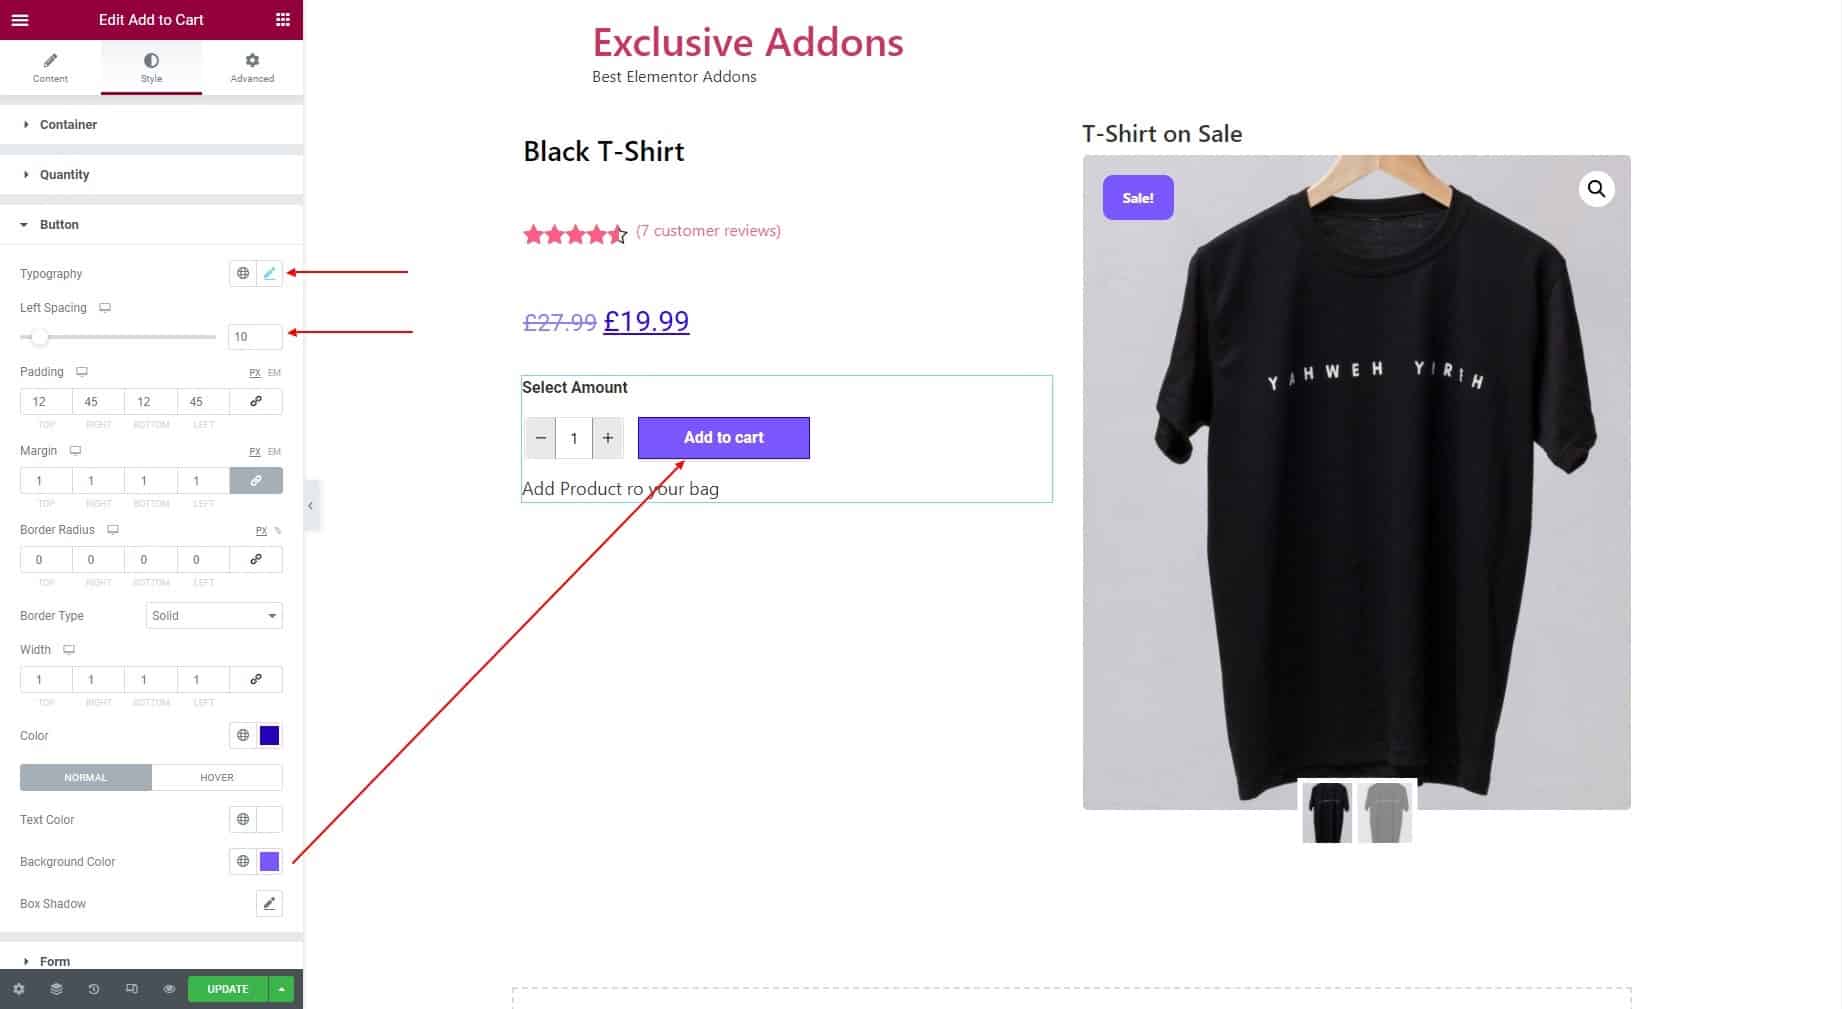
3.3 As for the Button, you can set the Typography for the text inside the button. You can adjust the Left Spacing for Add to Cart button, and set Padding, Margin, Border Radius, and Border Type. You have the option to set individual Text Color, Background Color, and Box Shadow for Normal and Hover state.
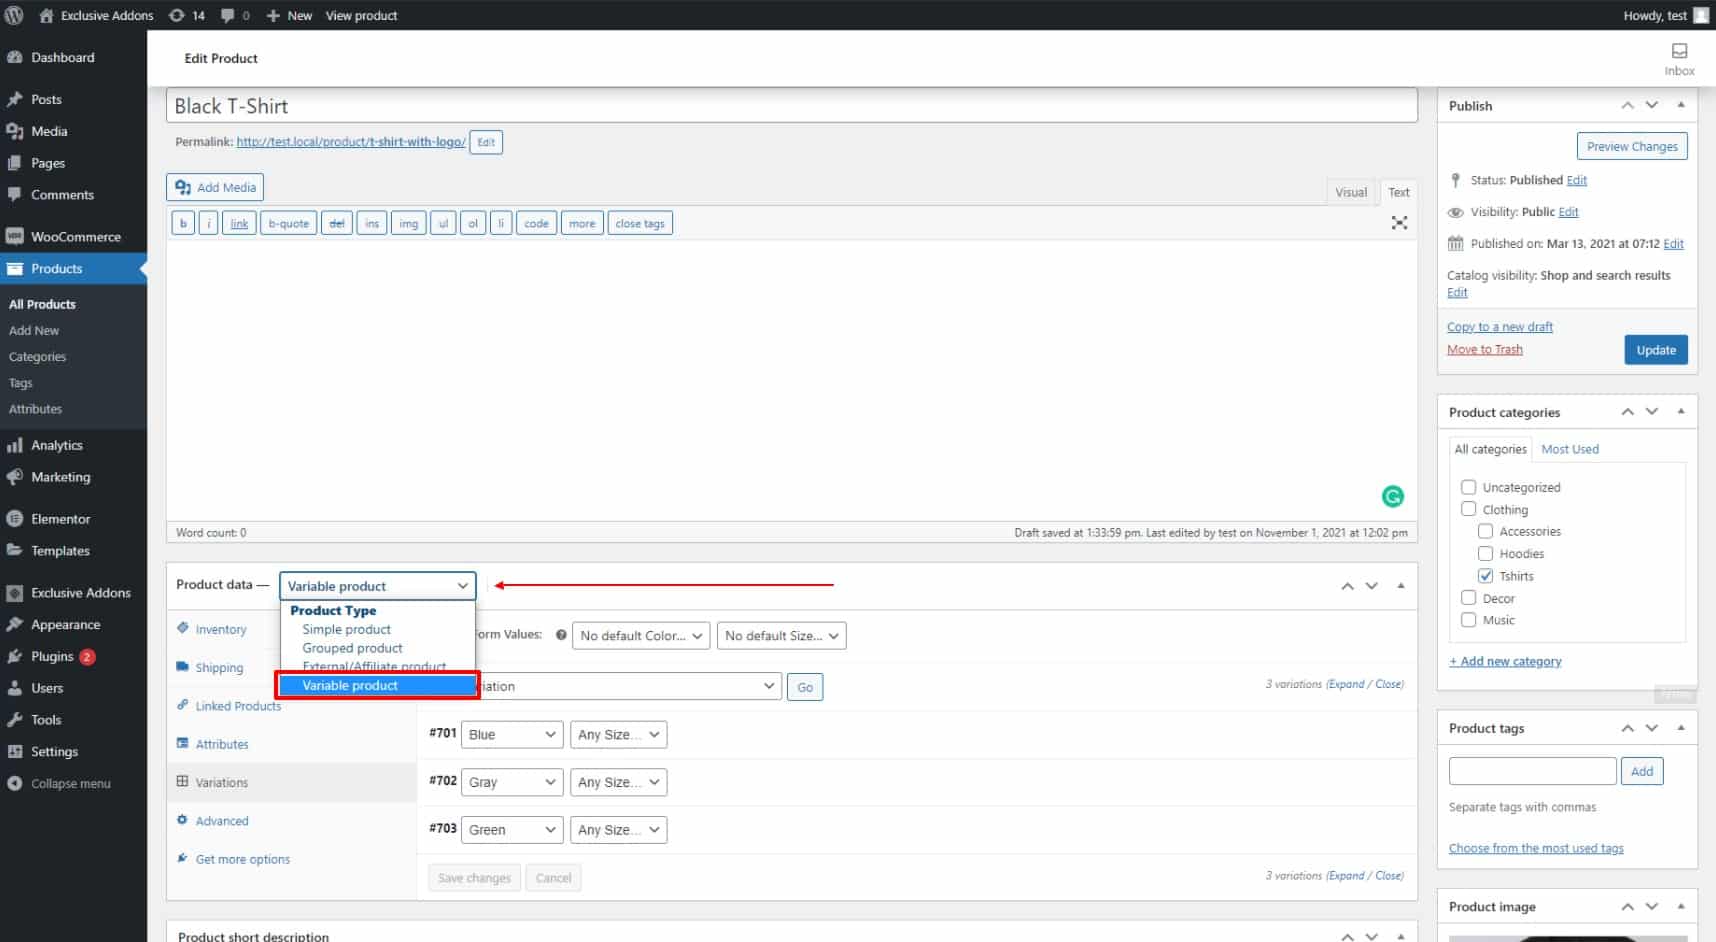
3.4 For the variable products you can customize the Form style too. To set a product as a variable product, go to the individual product page from your WordPress dashboard. Then in the Product Data section choose the product type to “Variable Product” and add variation for it.
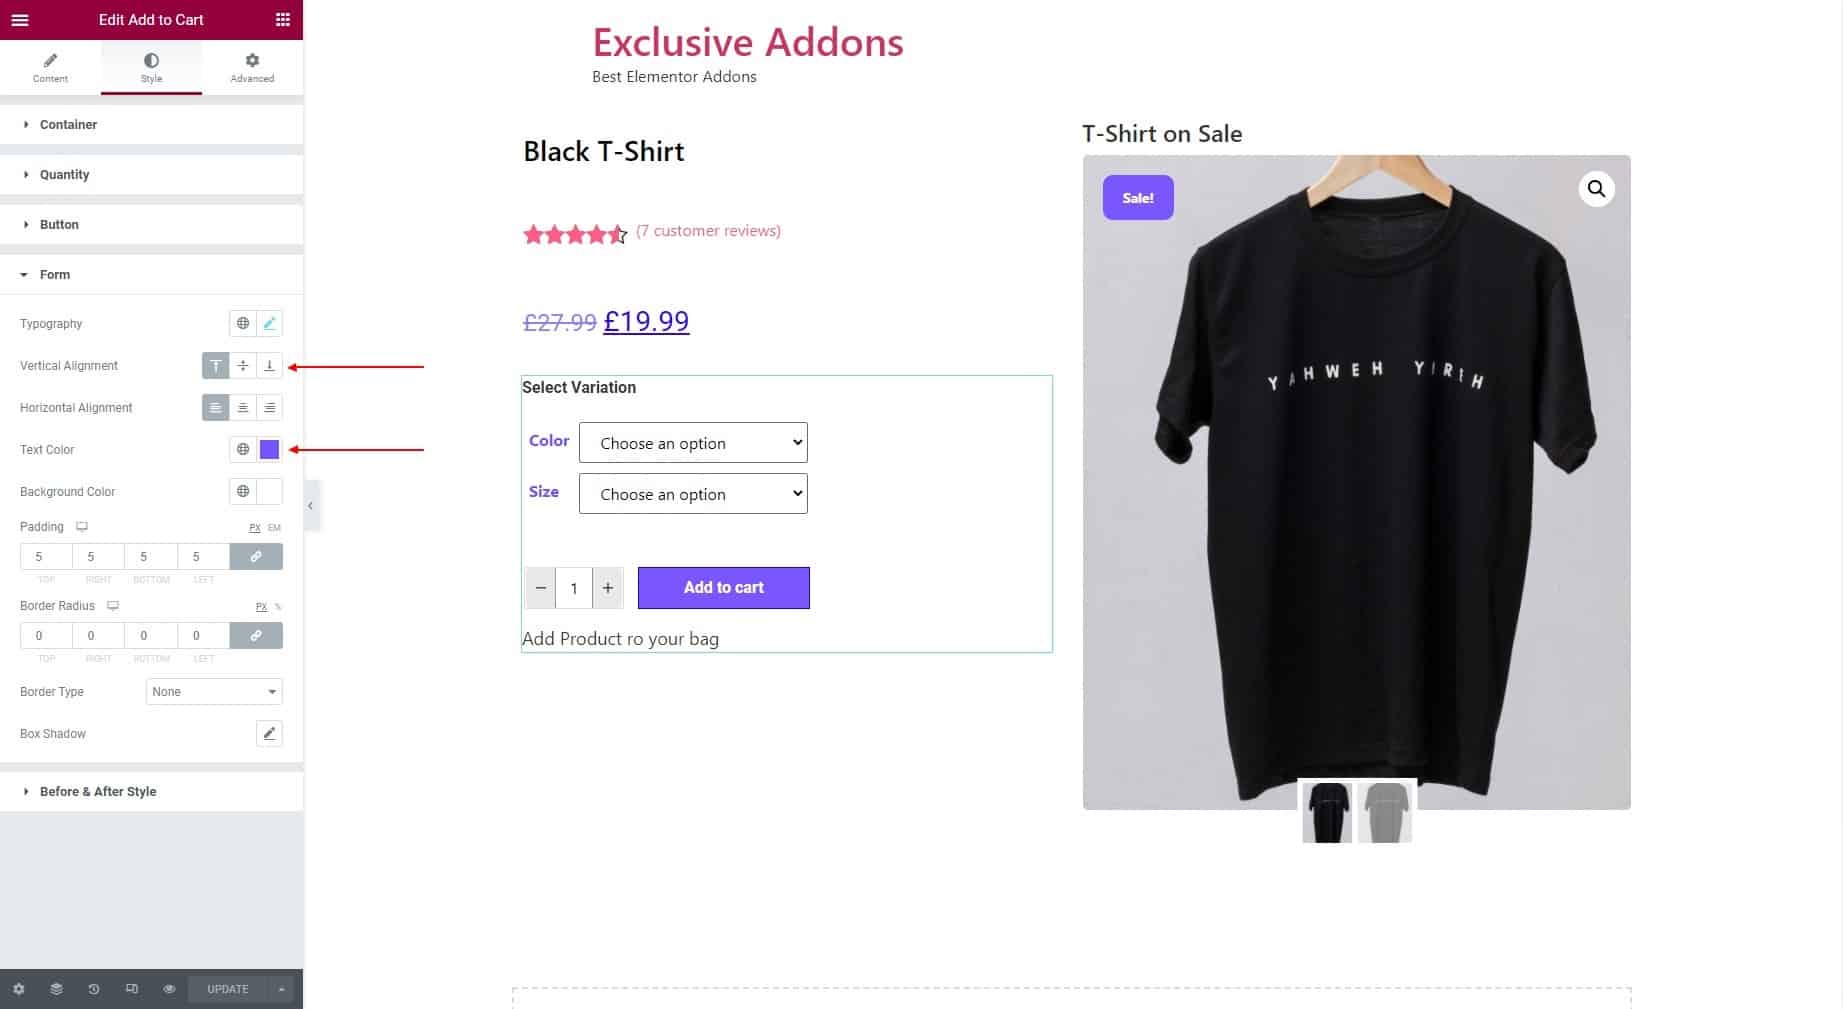
Now come back to the “Edit with Elementor” page and go to the Form section under the Style tab. There you can set the Typography, Vertical Alignment, Horizontal Alignment, Text Color, Background Color, and other attributes like Padding, Border Radius, and so on.
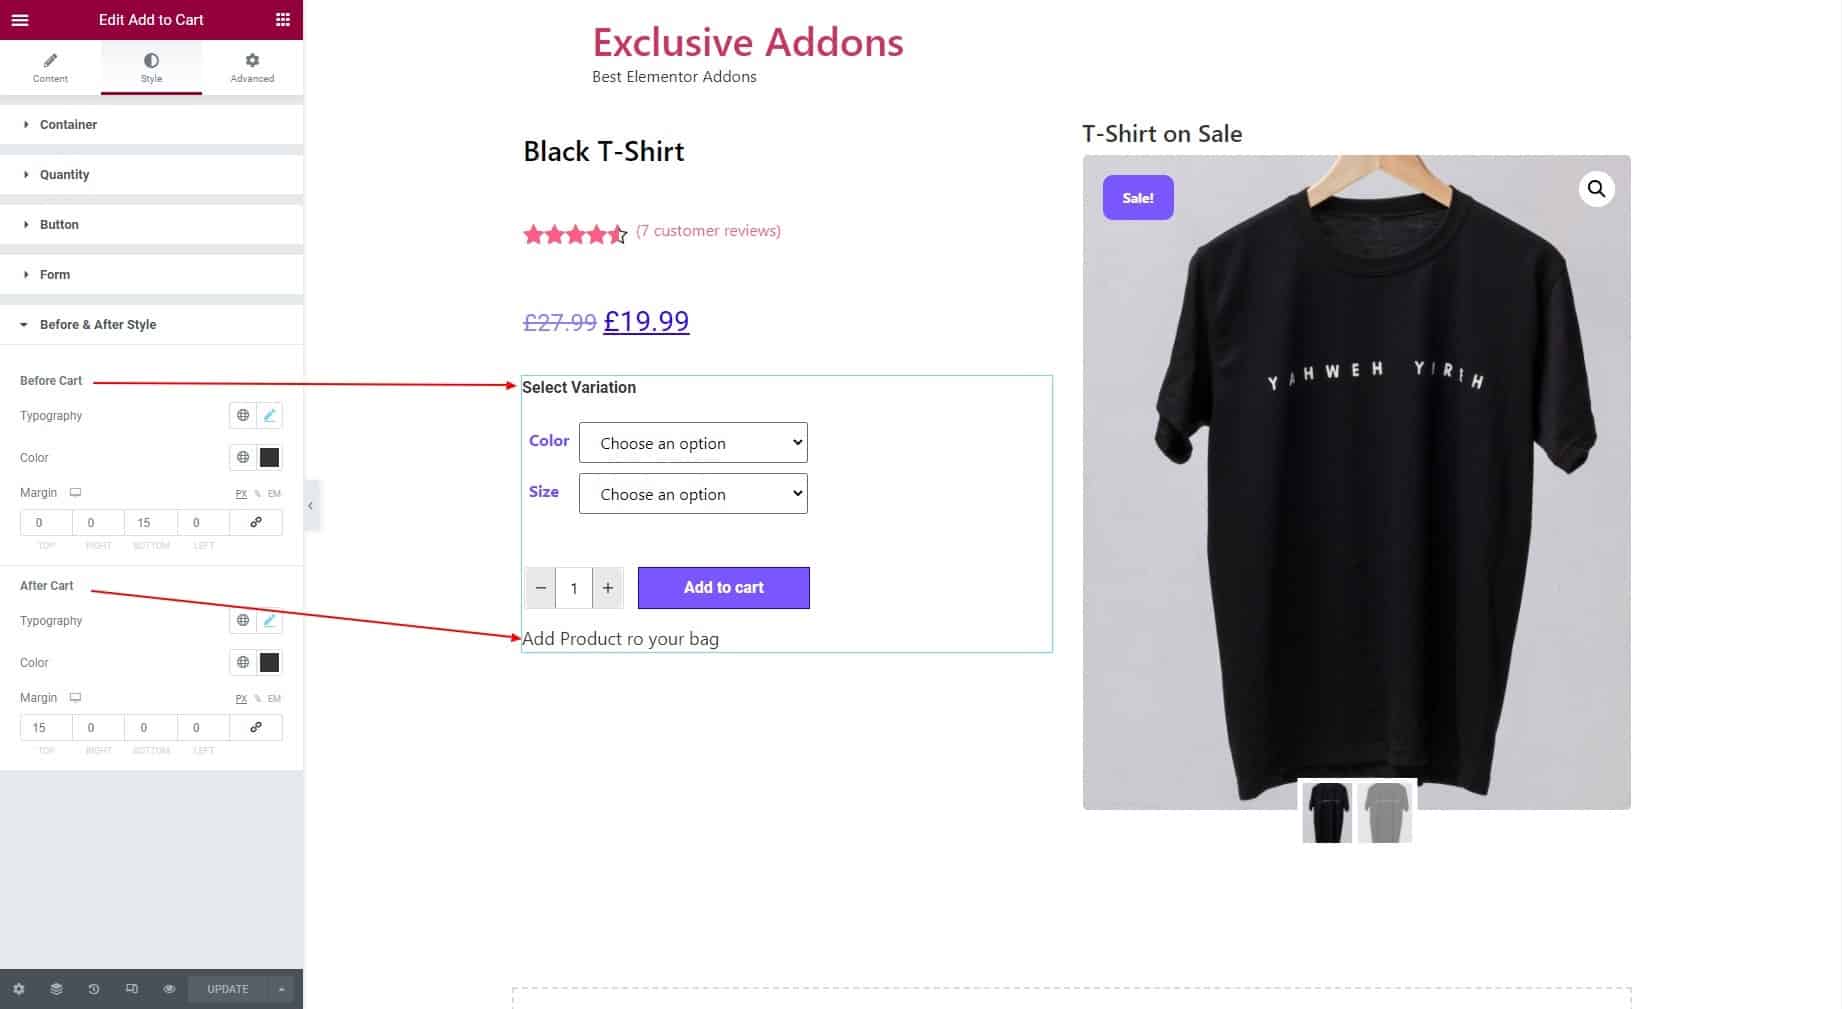
3.5 In terms of the Before & After Text Style section, set Typography, Color, and Margin for Before Text and After Text individually.
STEP 4:
Finally hit the Update button to add Woo Add to Cart widget to your wordpress site.