How to Configure & Style Google Review Widget with Elementor
You can embed Google reviews into your website and enhance the trustworthiness of your business. Showing those positive user reviews is now super easy with our Google Review widget.
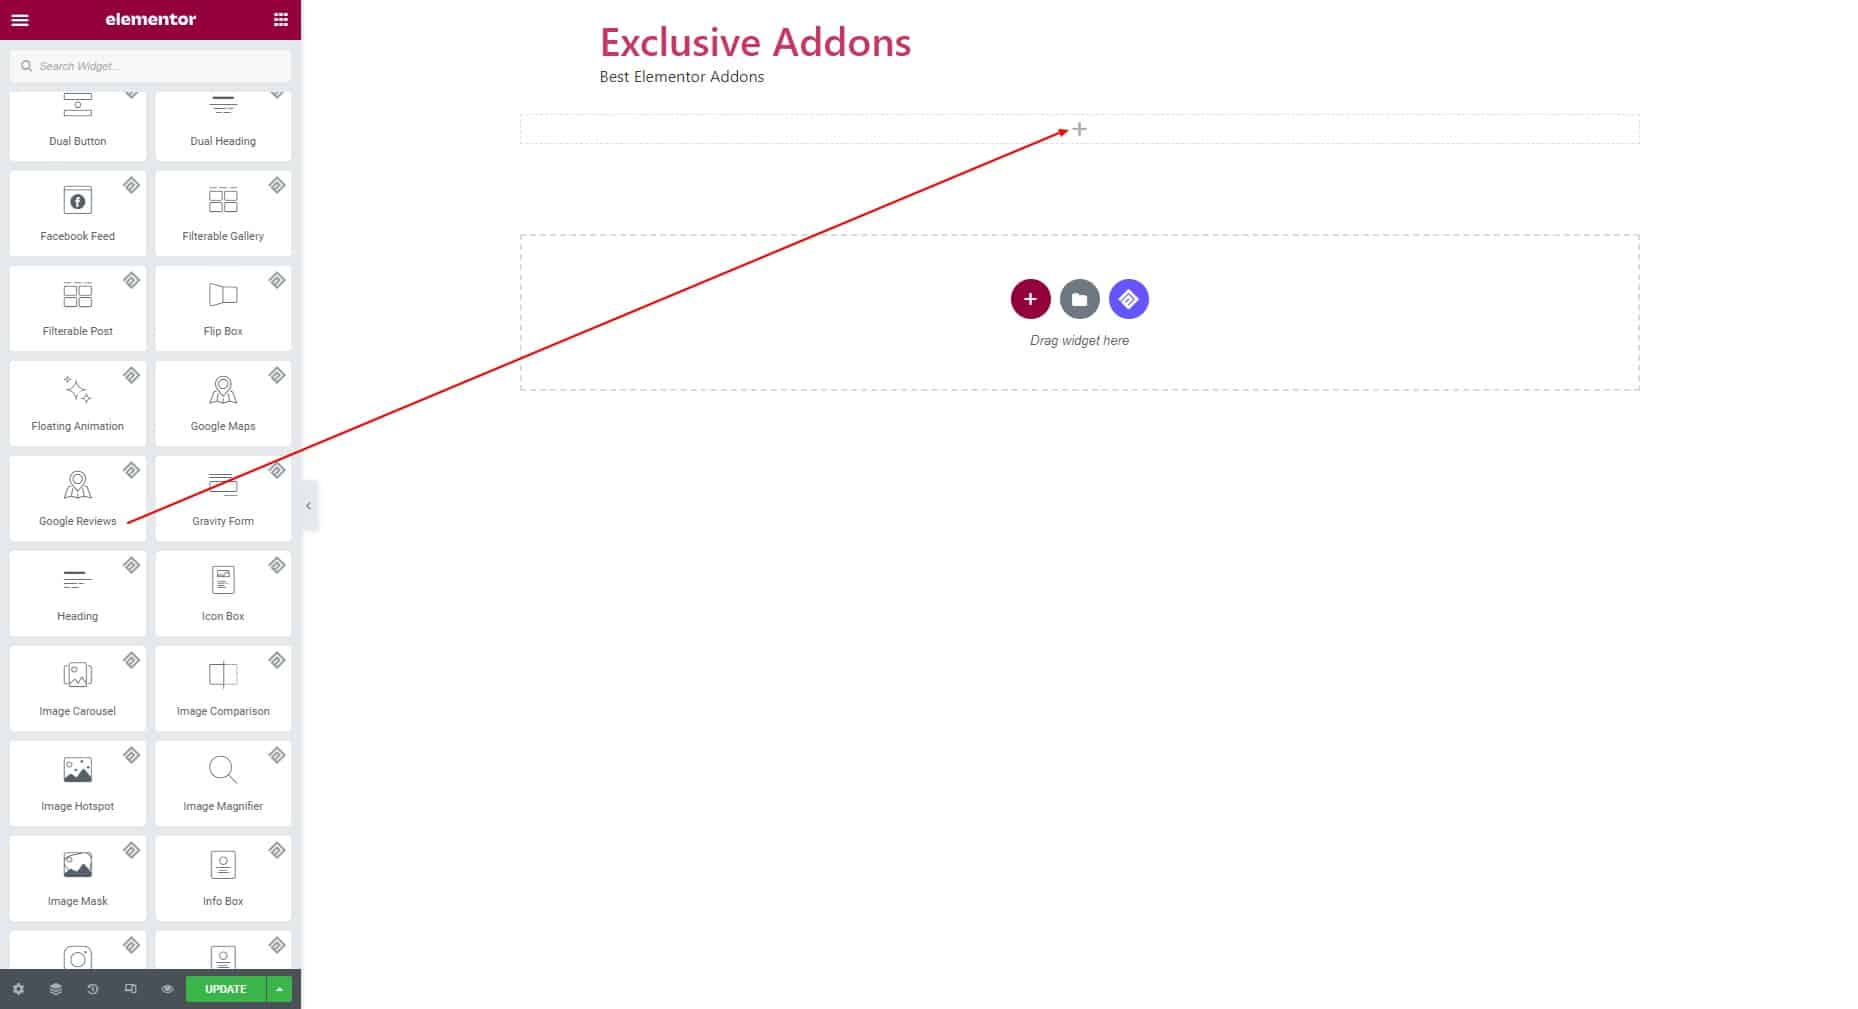
STEP 1:
In the Content tab, you can configure the Google Review widget by editing Access Credential, Reviews Content, and Carousel Setting.
STEP 2:
In the Content tab, you can configure the Google Review widget by editing Access Credential, Reviews Content, and Carousel Setting.
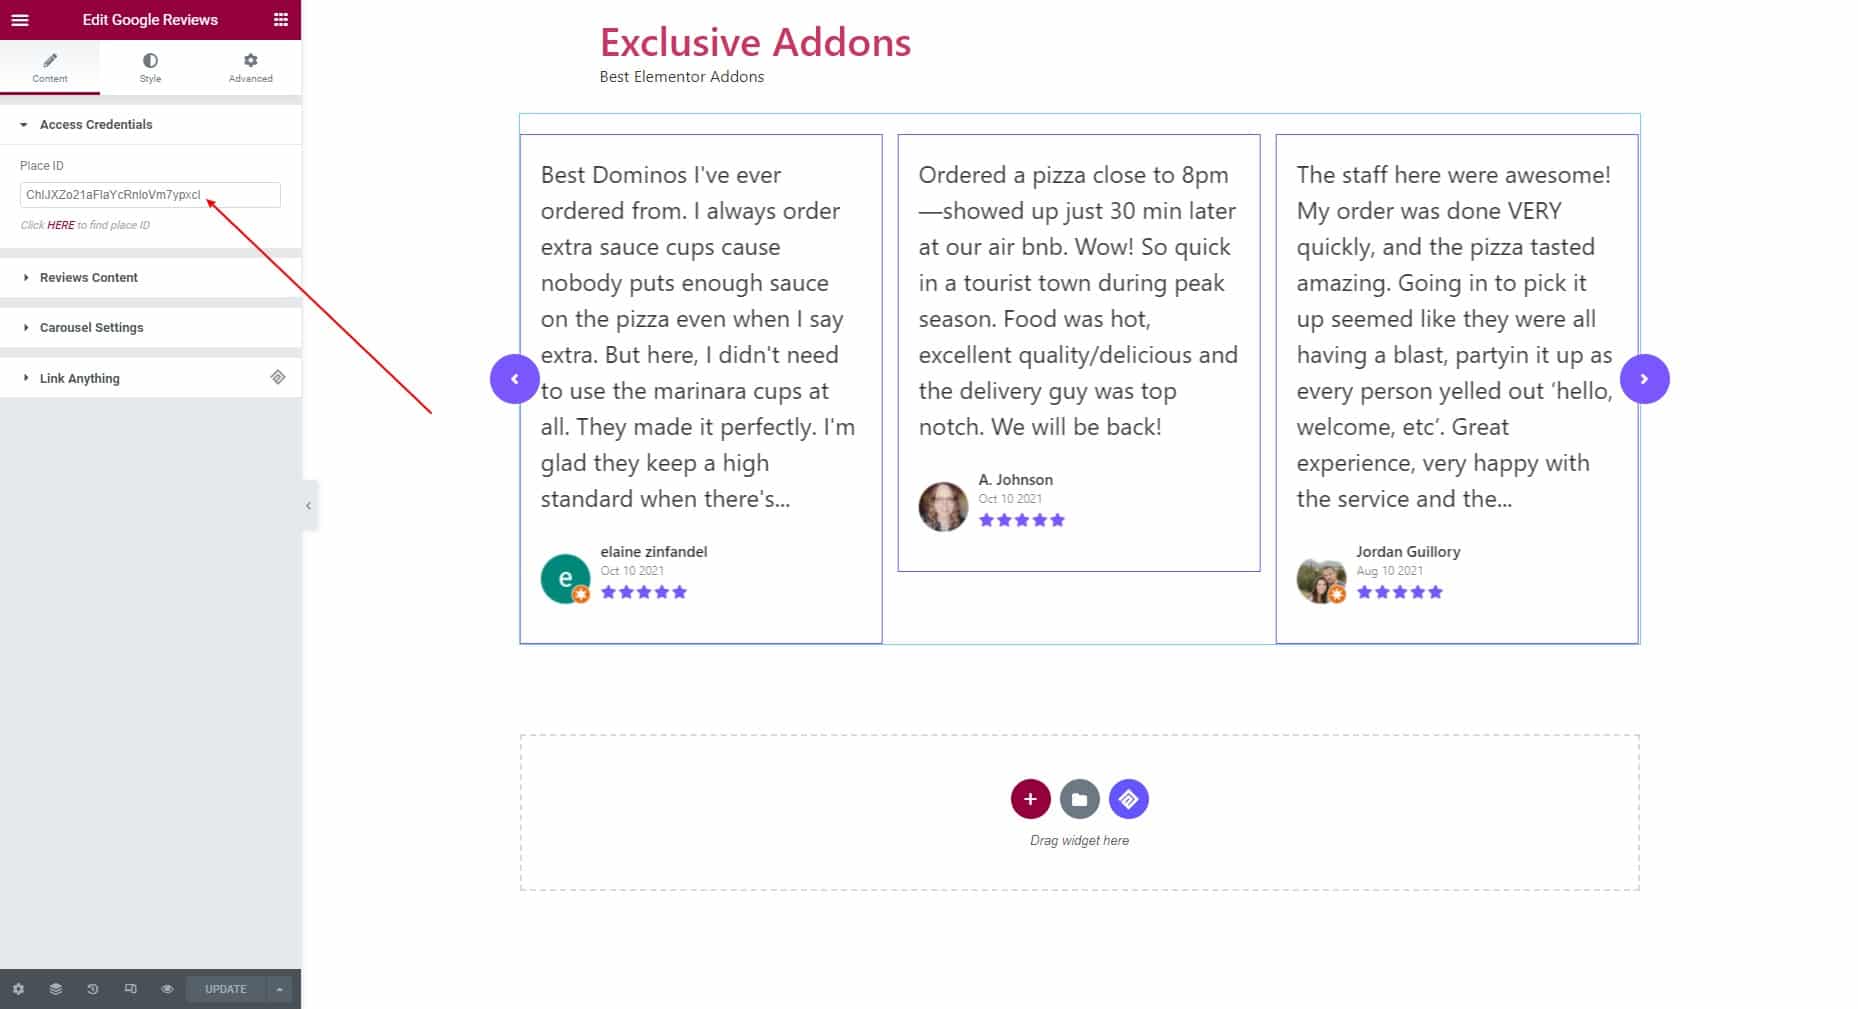
2.1 In Access Credential section, you have to put Google Place ID. Generate the place id from here.

There put the place name in the field, and you will have a place ID. Copy that ID and get back to your web page.
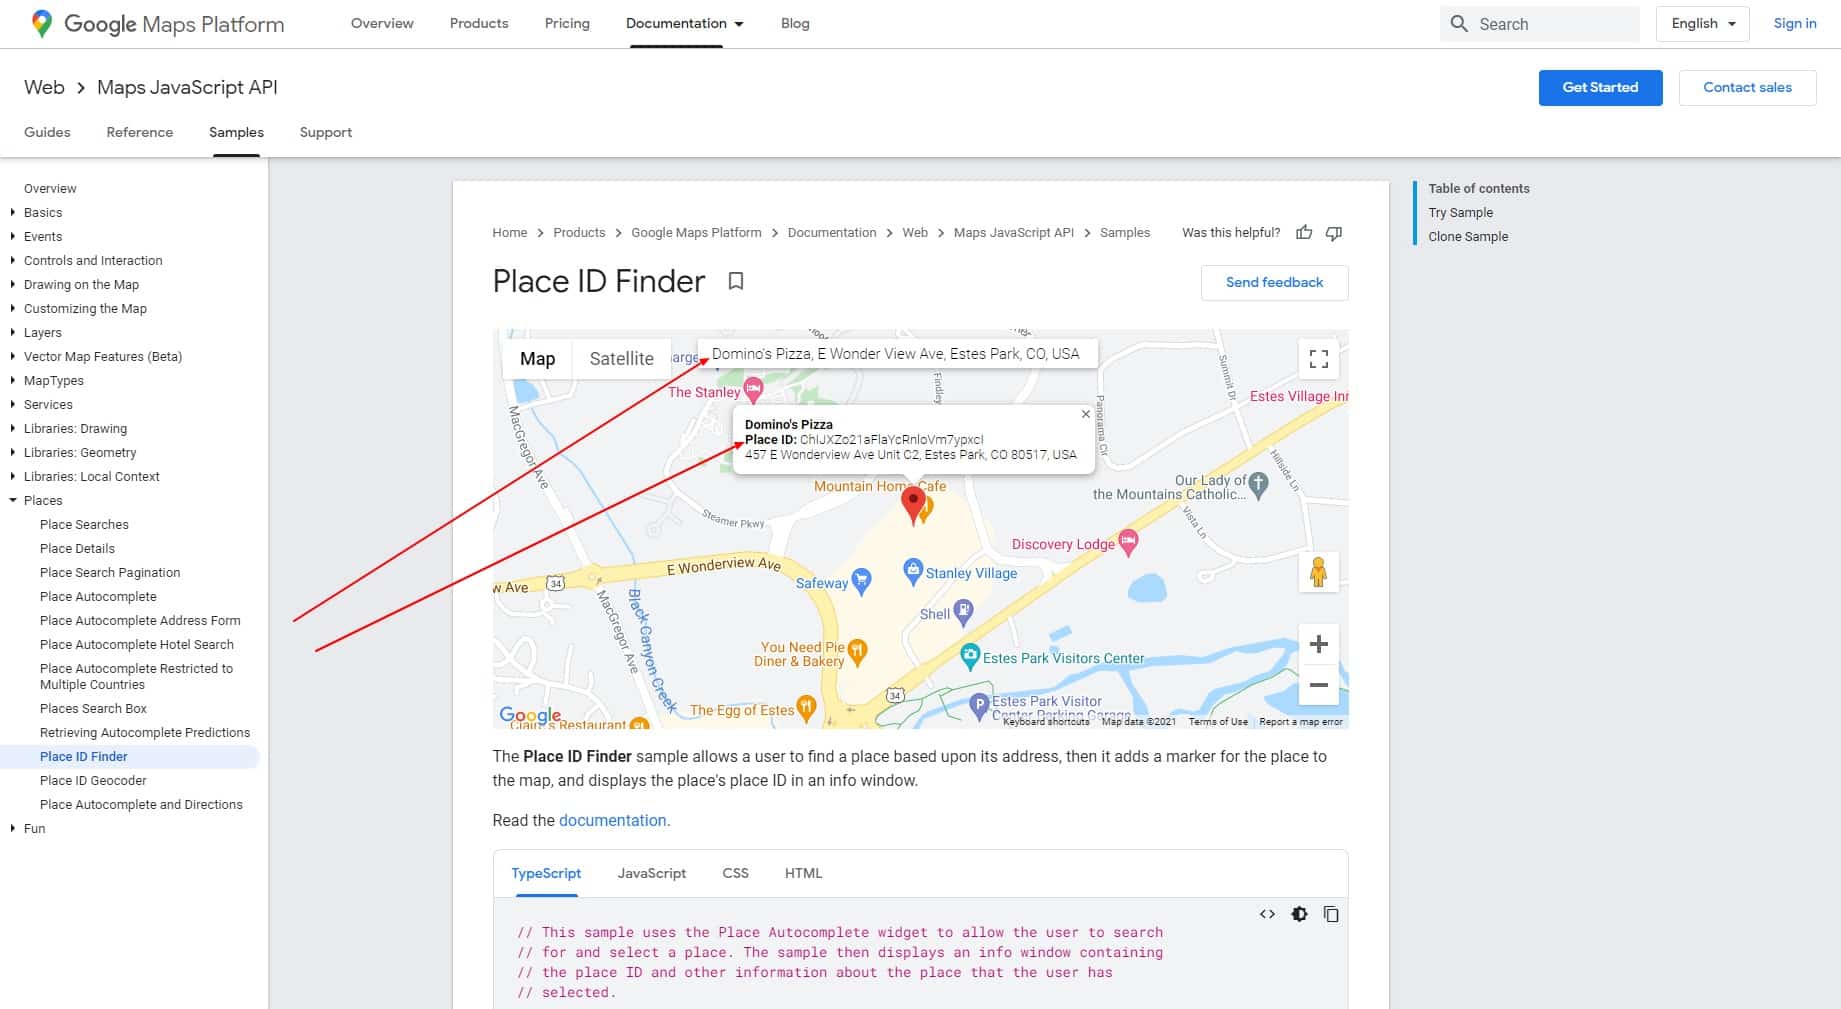
Now paste the Place ID in the respective field and you will see reviews appear on your web page.
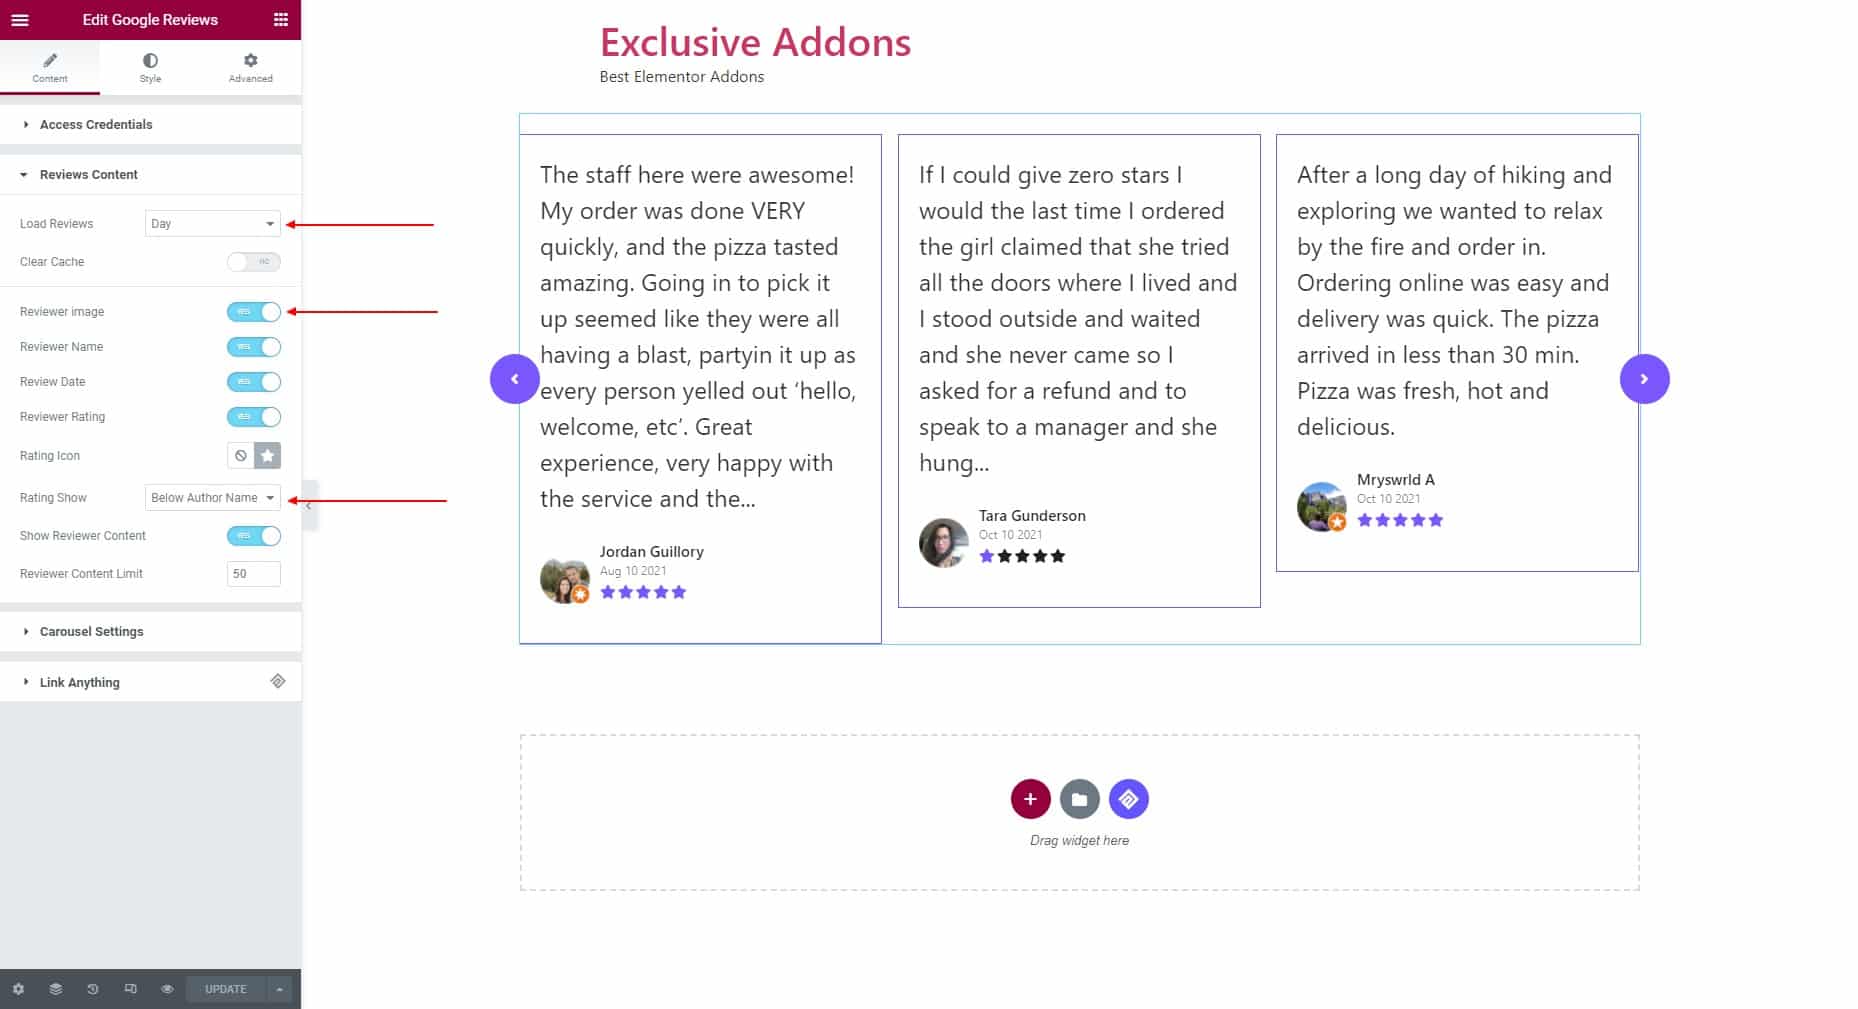
2.2 Once the reviews appear on your web page, you can configure review content settings. There you can set the order to Load Review based on Day, Hour, Week, Month, or Year. You can also decide to choose to show Reviewer Image, Name, Date, Rating, and Icon.
Set Rating Icon from the Icon Library. Besides, you can choose where to Show Ratings, you have options to set it “Below Author Name”, “Above Description”, or “Below Description”. Also, decide to Show Reviewer Content, and set Reviewer Content Limit.
2.3 Then you can configure Carousel Settings. Here you have options to set the Navigation Style to “Arrows”, “Dots”, “Dynamic Bullets”, and “Arrows and Dots”. Also, you can select the number of Columns to show and adjust the Column Space.
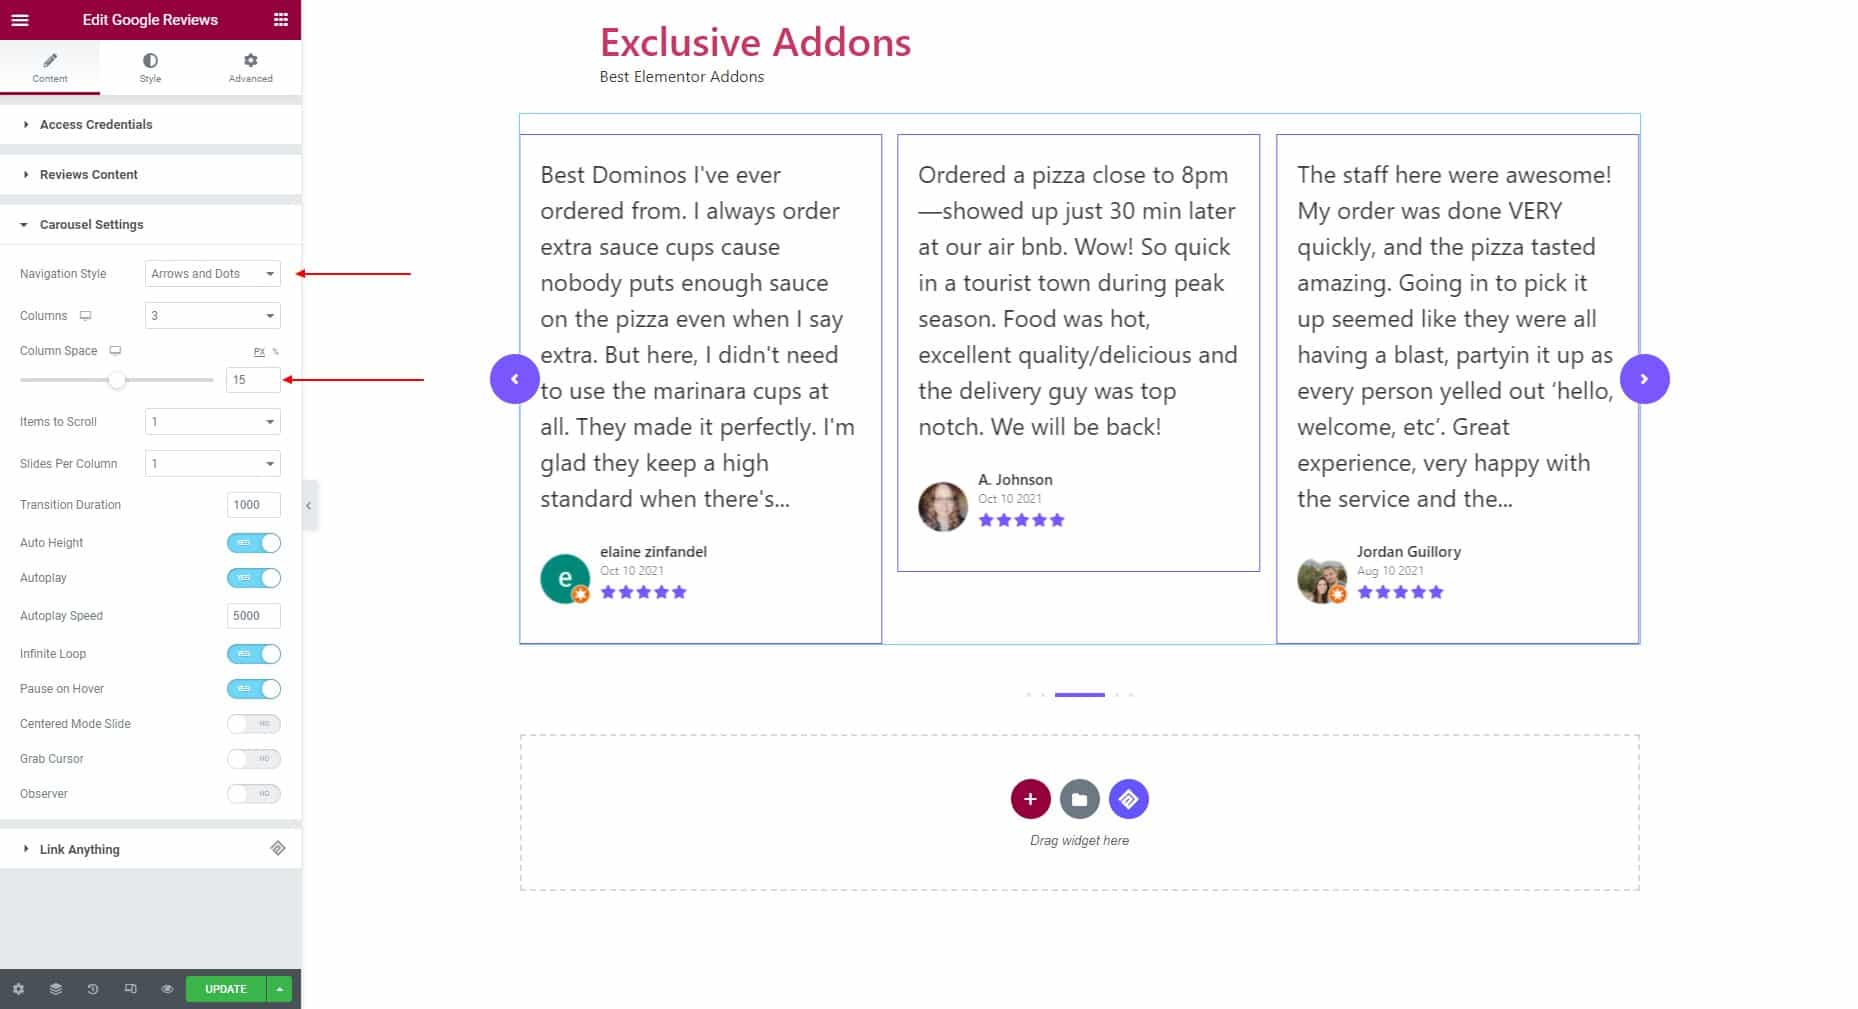
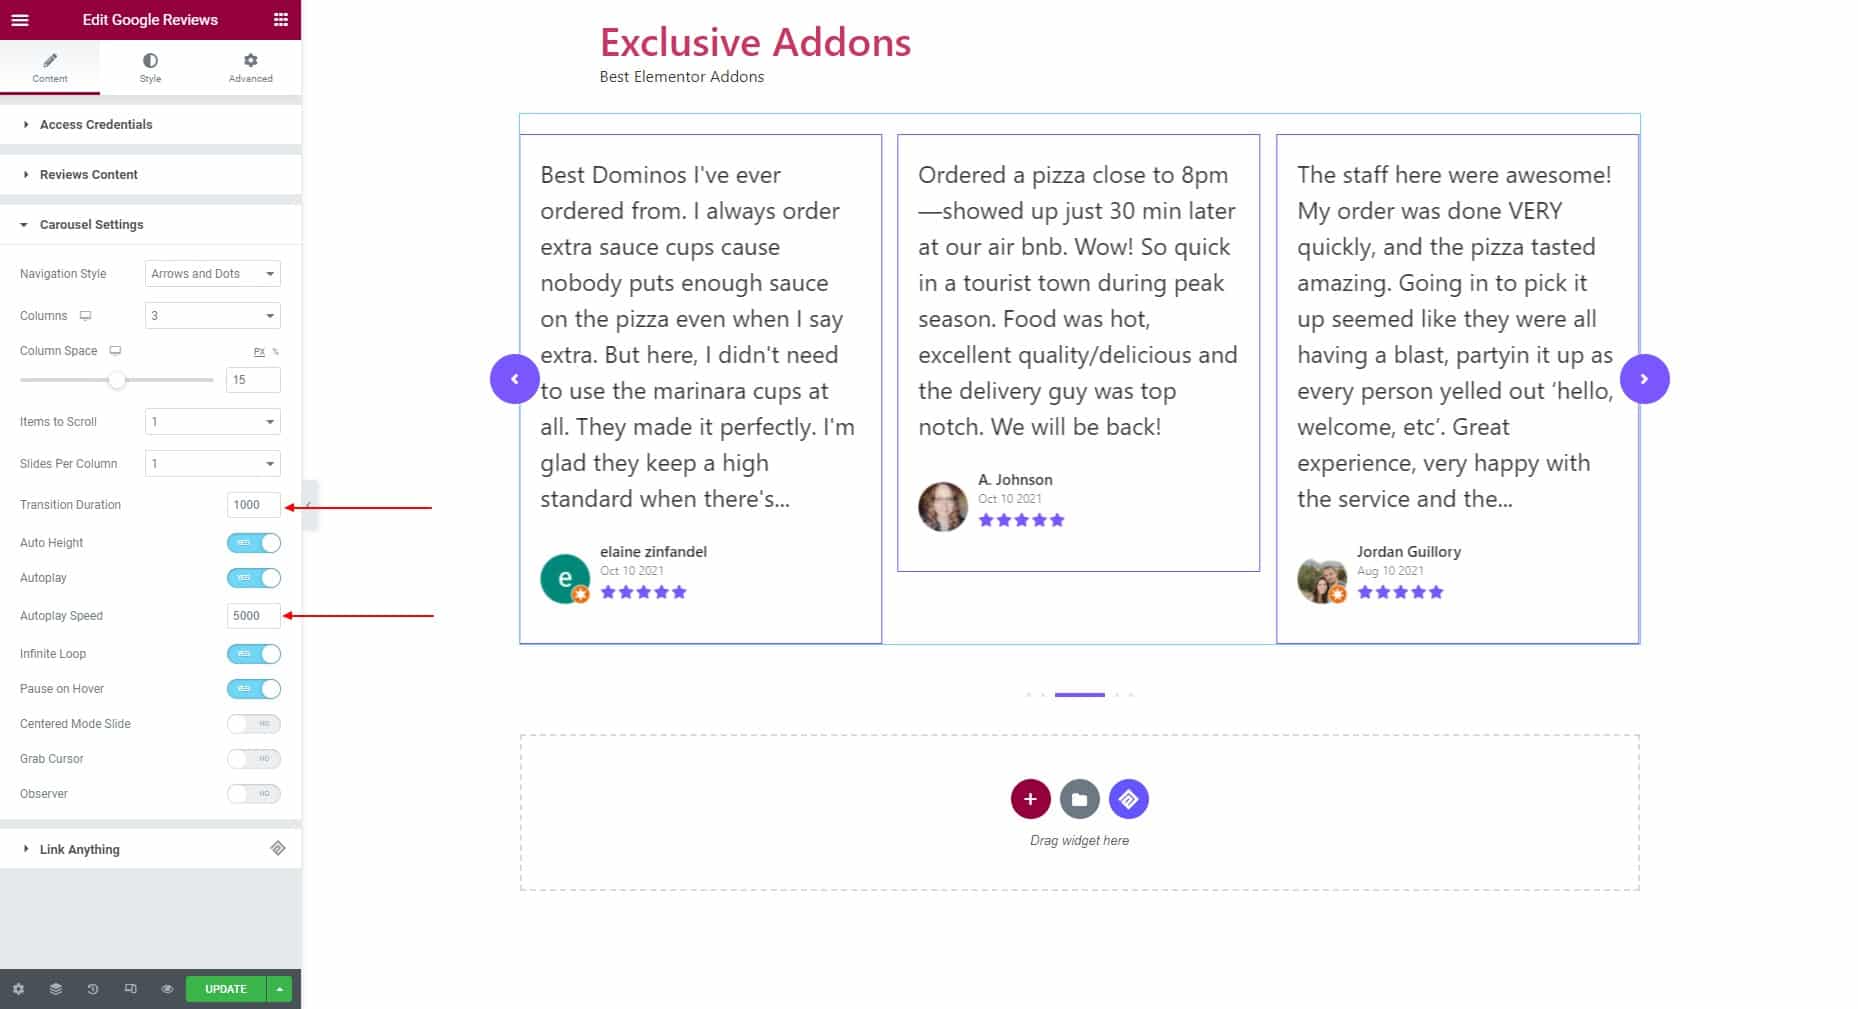
You can select Items to Scroll and Slides Per Column and also set Transition Duration and Autoplay Speed. Options to enable features like Auto Height, Autoplay, Infinite Loop, Pause on Hover, Centered Mode Slide, Grab Cursor, and Observer.
STEP 3:
In the Style tab, you can customize the style for Container, Reviewer Content, Rating, Reviewer Image, Reviewer, Arrows, and Dots.
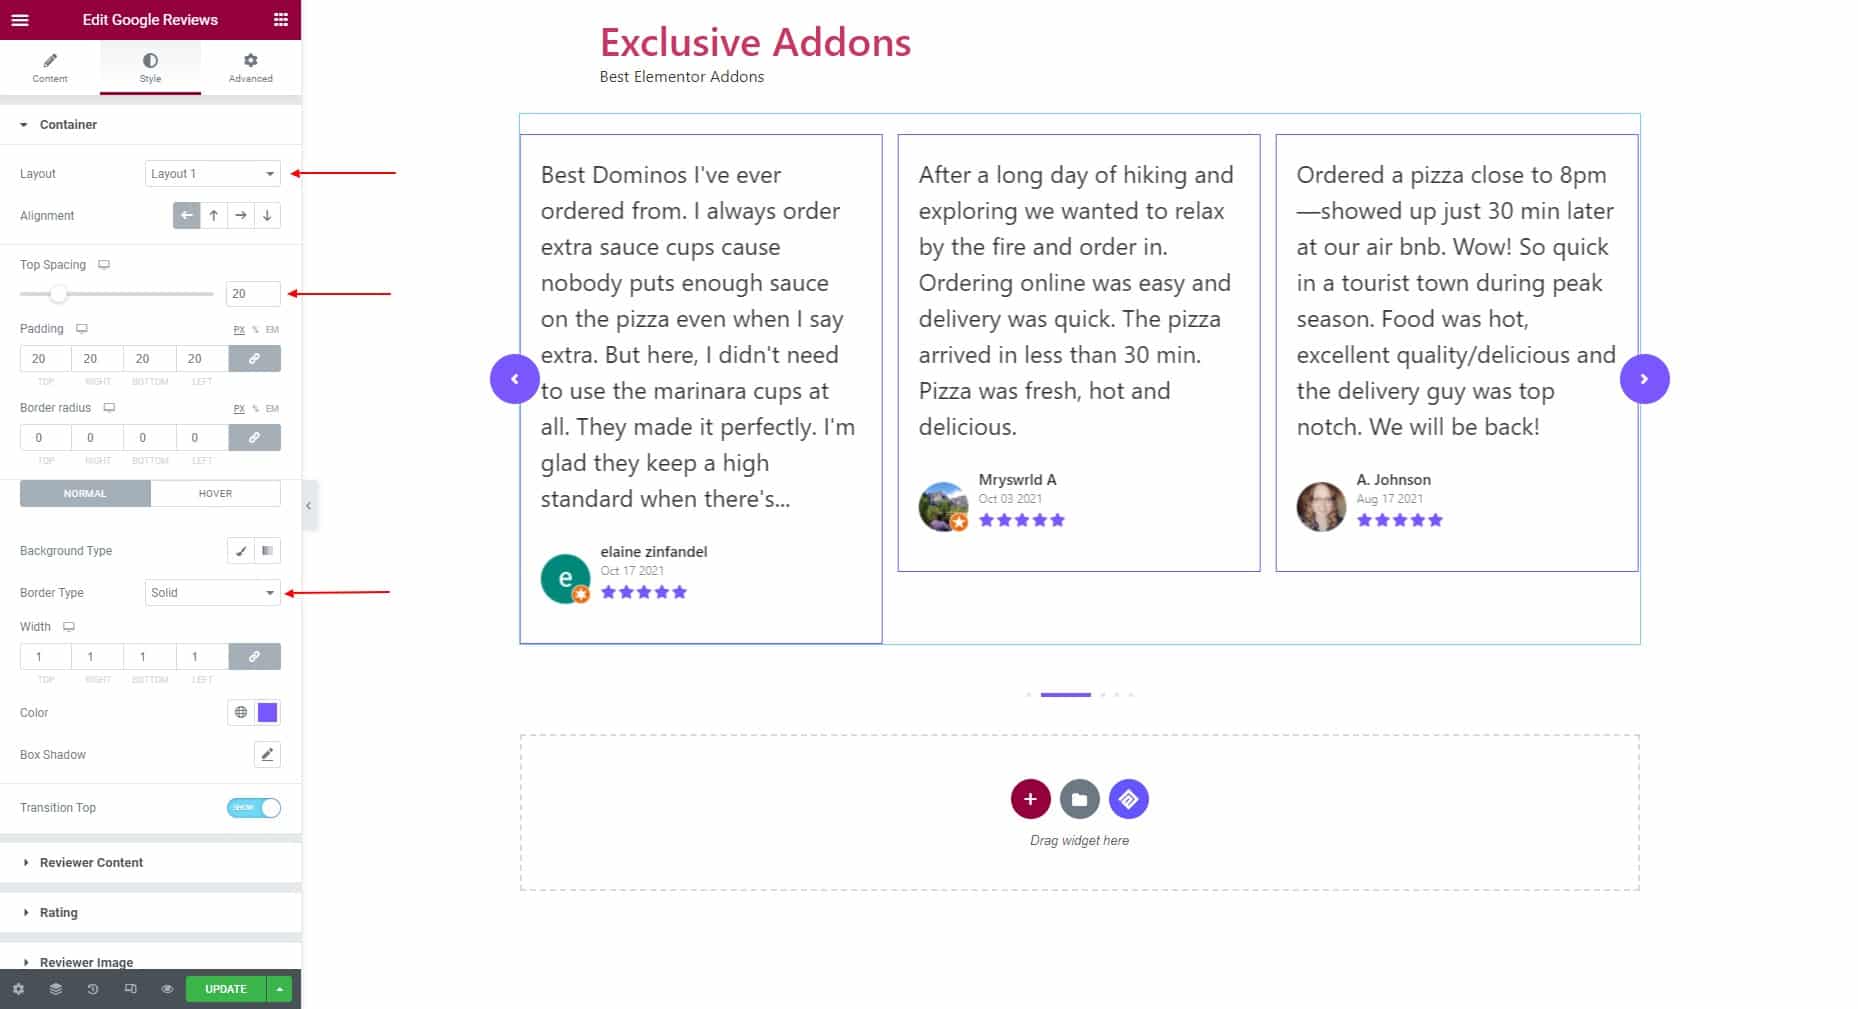
3.1 In the Container section, you can select one of the two Layout and choose the Alignment to left, right, center, or bottom. Then you have the option to adjust Top Spacing and set Padding, Border Radius. You can also set individual Background Type, Border Type, and Border Text Color for Normal and Hover states.
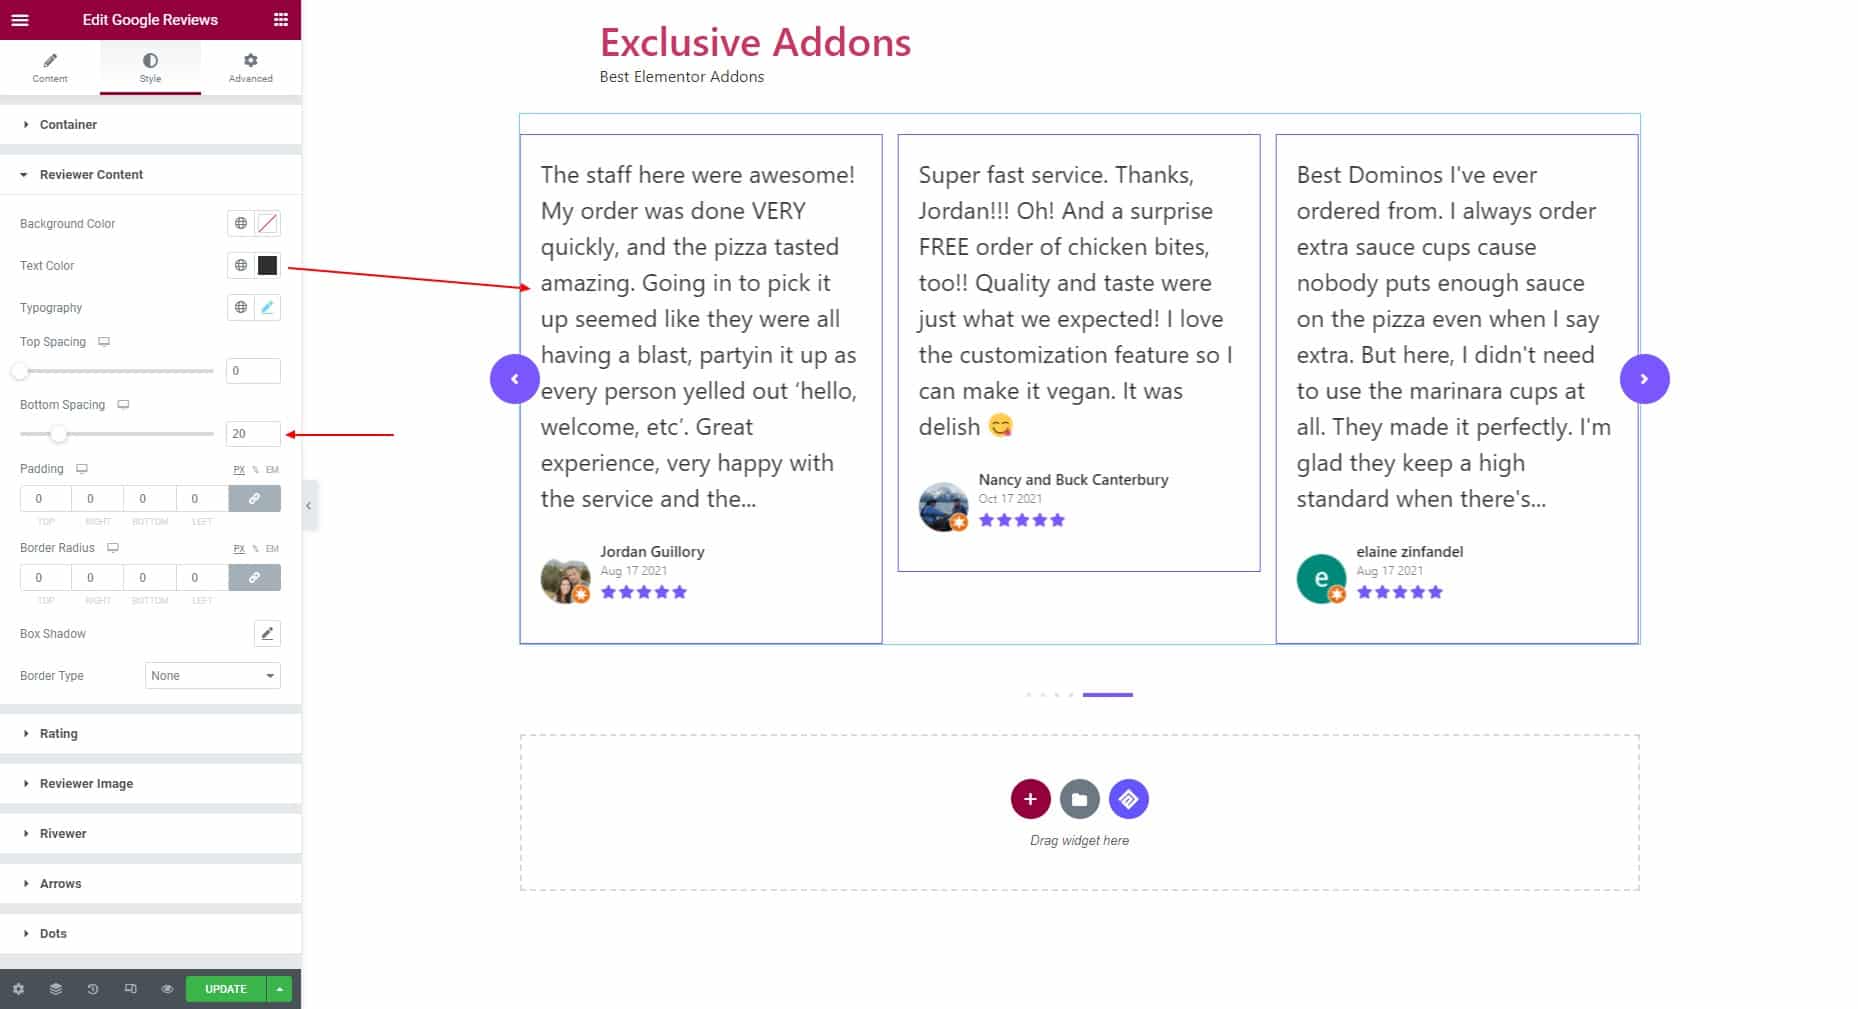
3.2 In Reviewer Content section, choose content Background Color, Text Color, adjust Top Spacing and Bottom Spacing. Also, set Padding, Border Radius, Box Shadow, and Border Type.
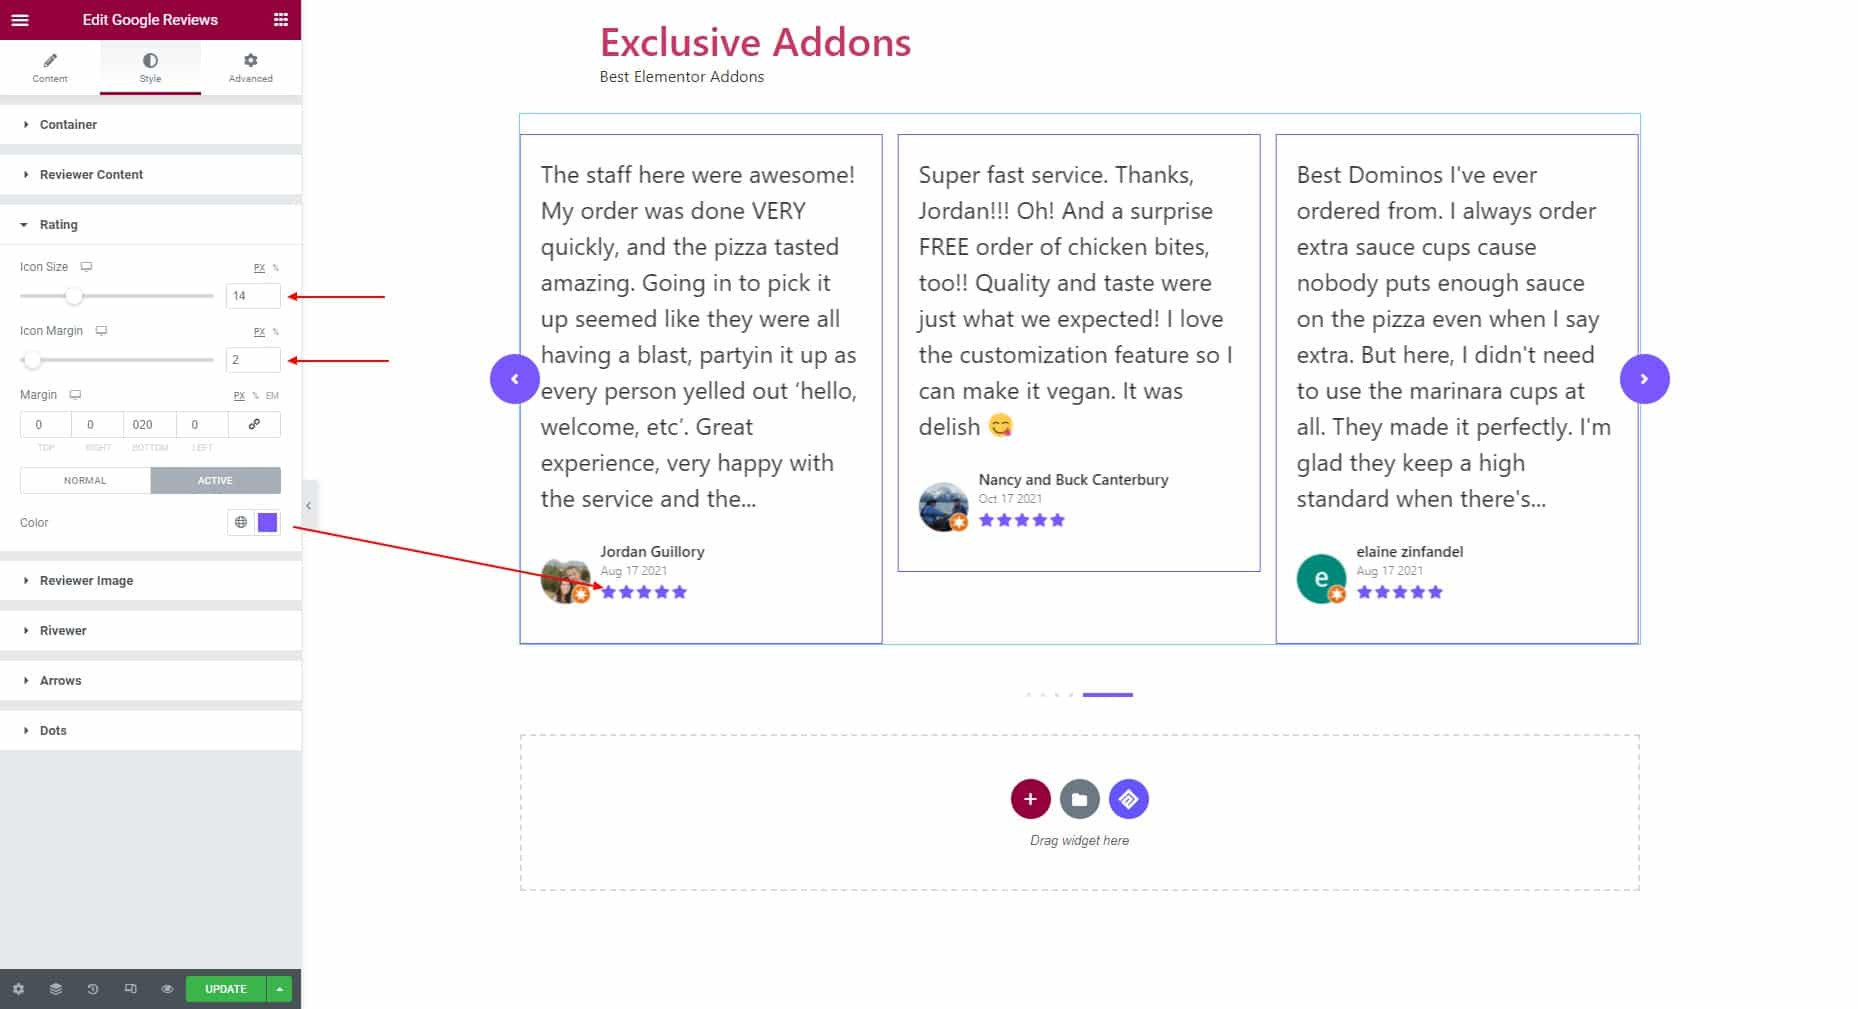
3.3 The Rating section, you can adjust rating Icon Size and Icon Margin. Set separate icon Color for Normal and Hover state.
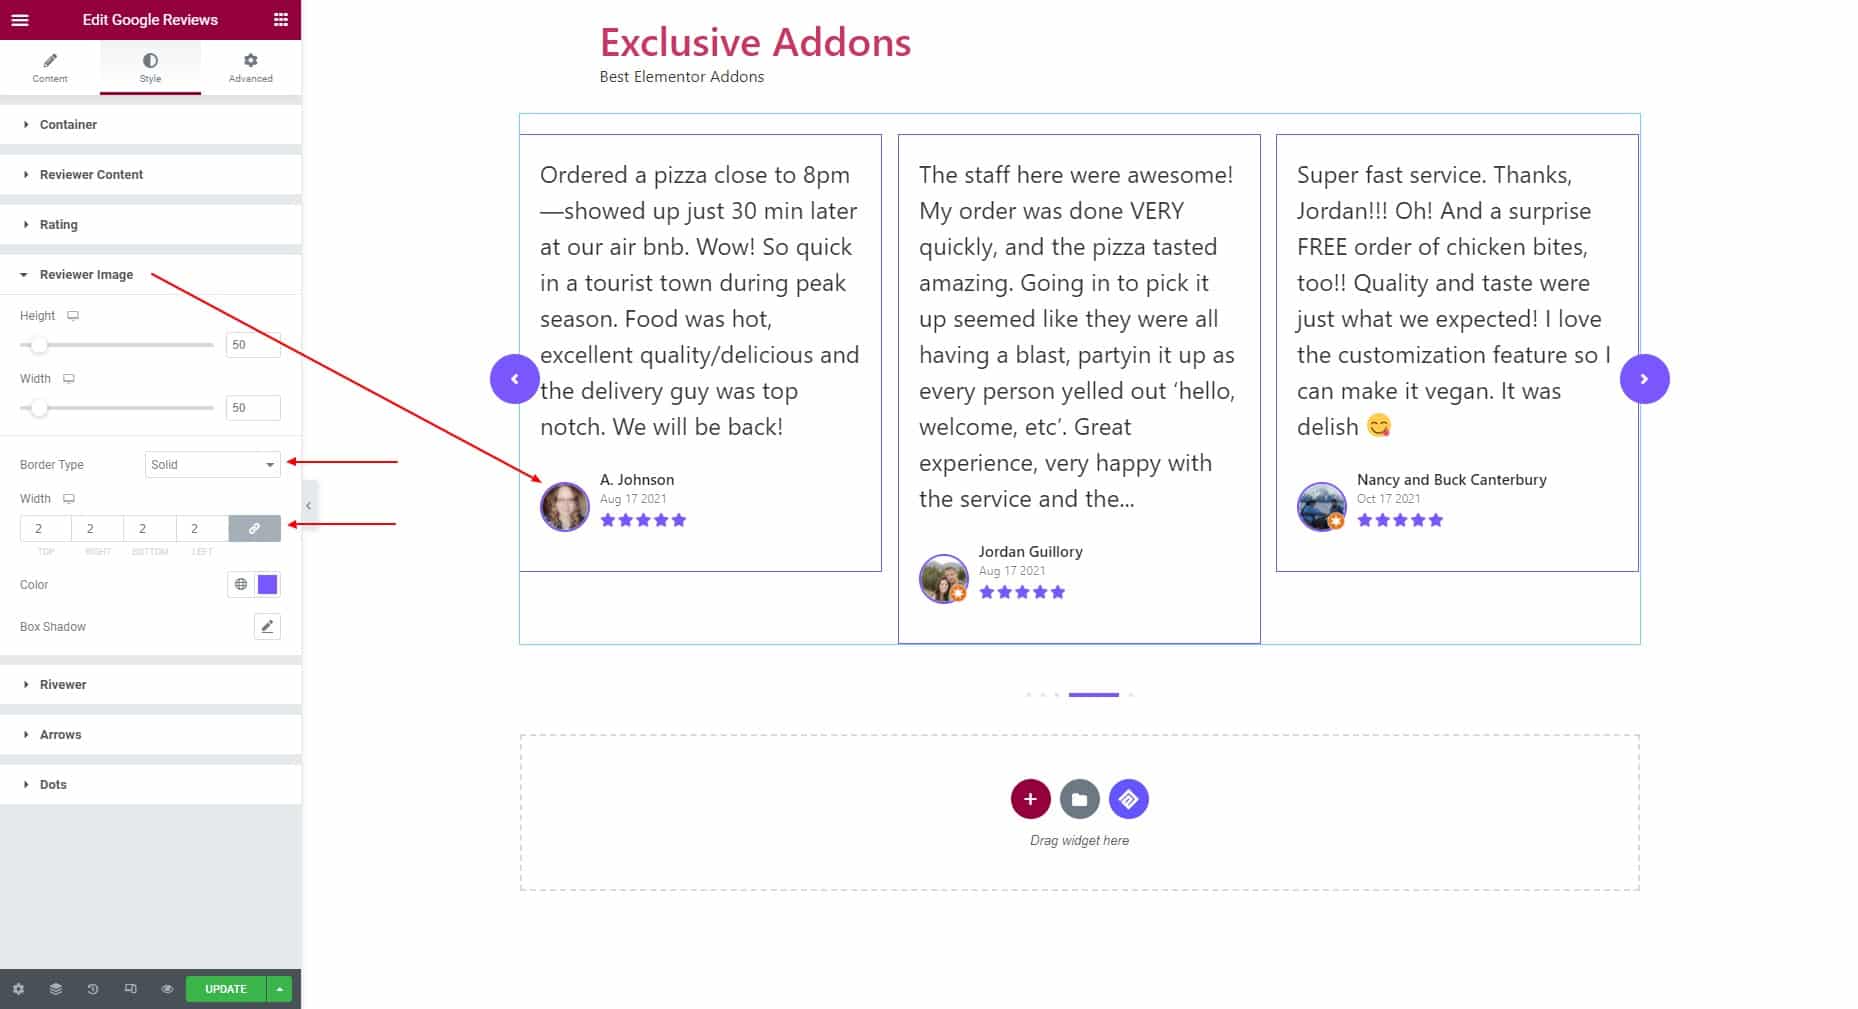
3.4 In the Reviewer Image section, adjust the image Height and Width. Then select Border Type, Border Width, and Color.
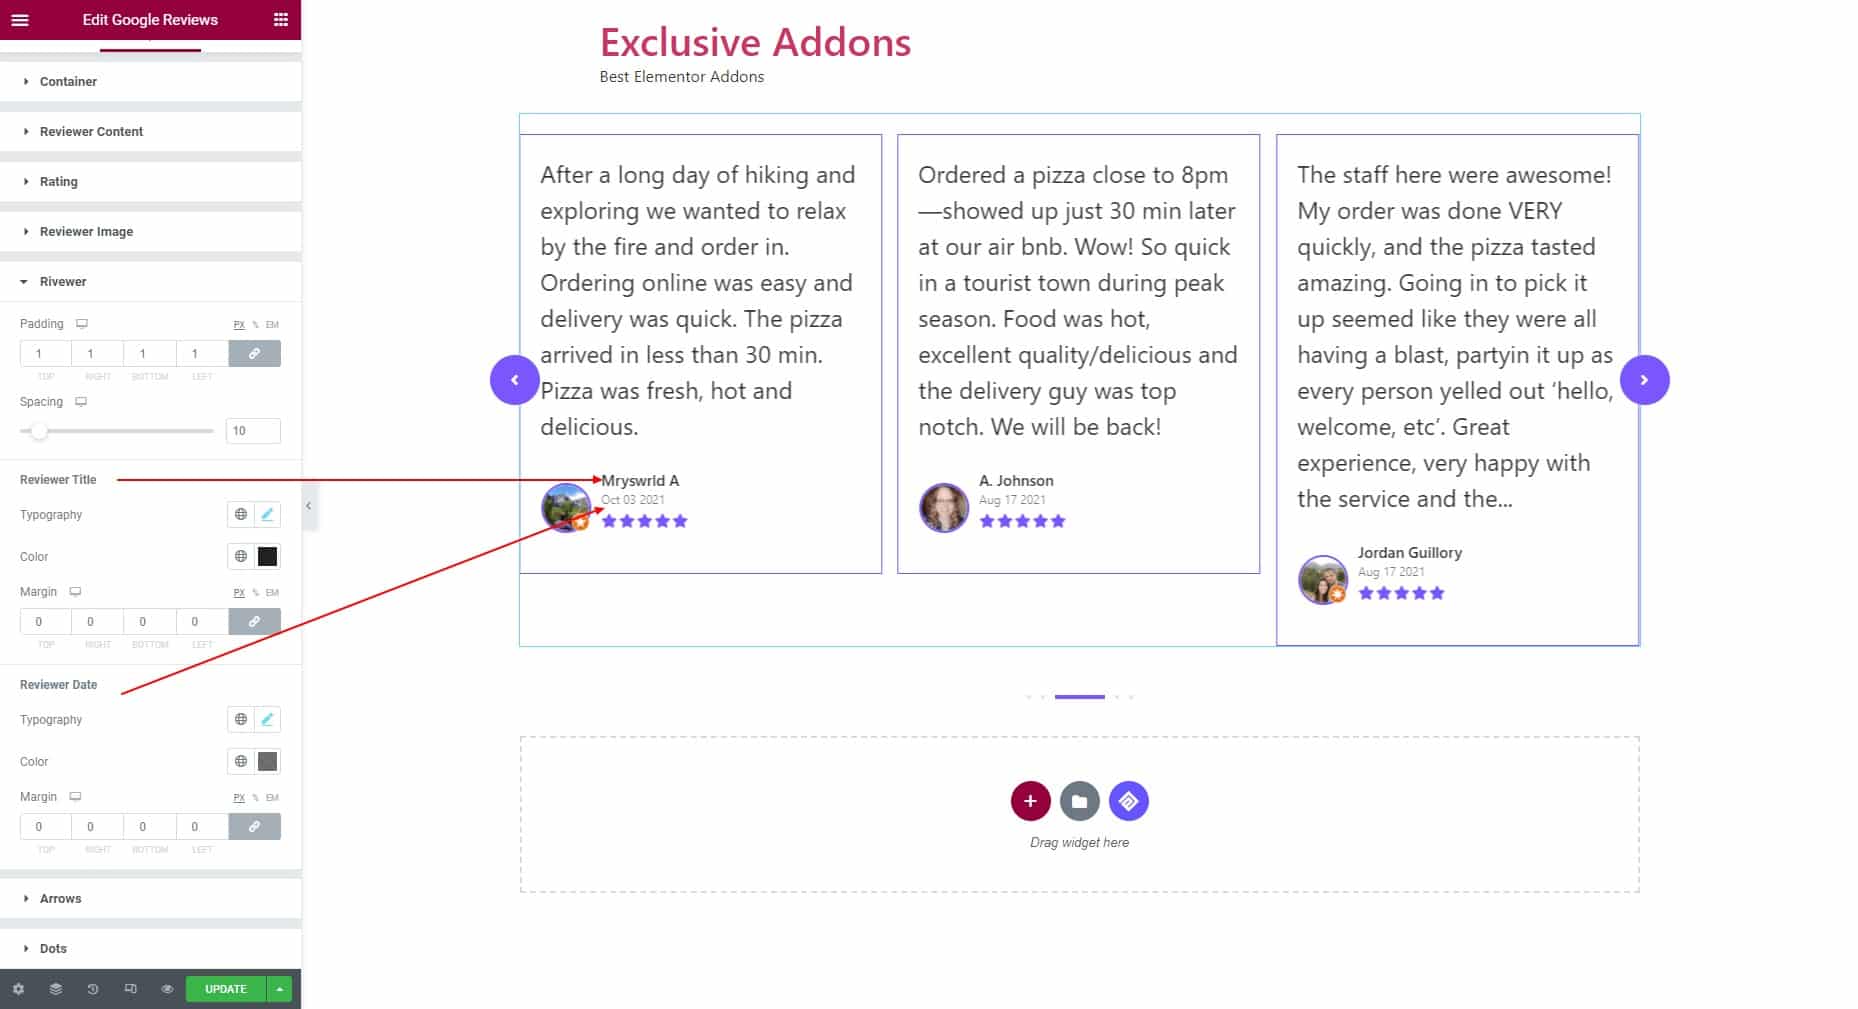
3.5 In Reviewer section, set Padding and Spacing. For Reviewer Title and Reviewer Date set individual Typography, Color, and Margin.
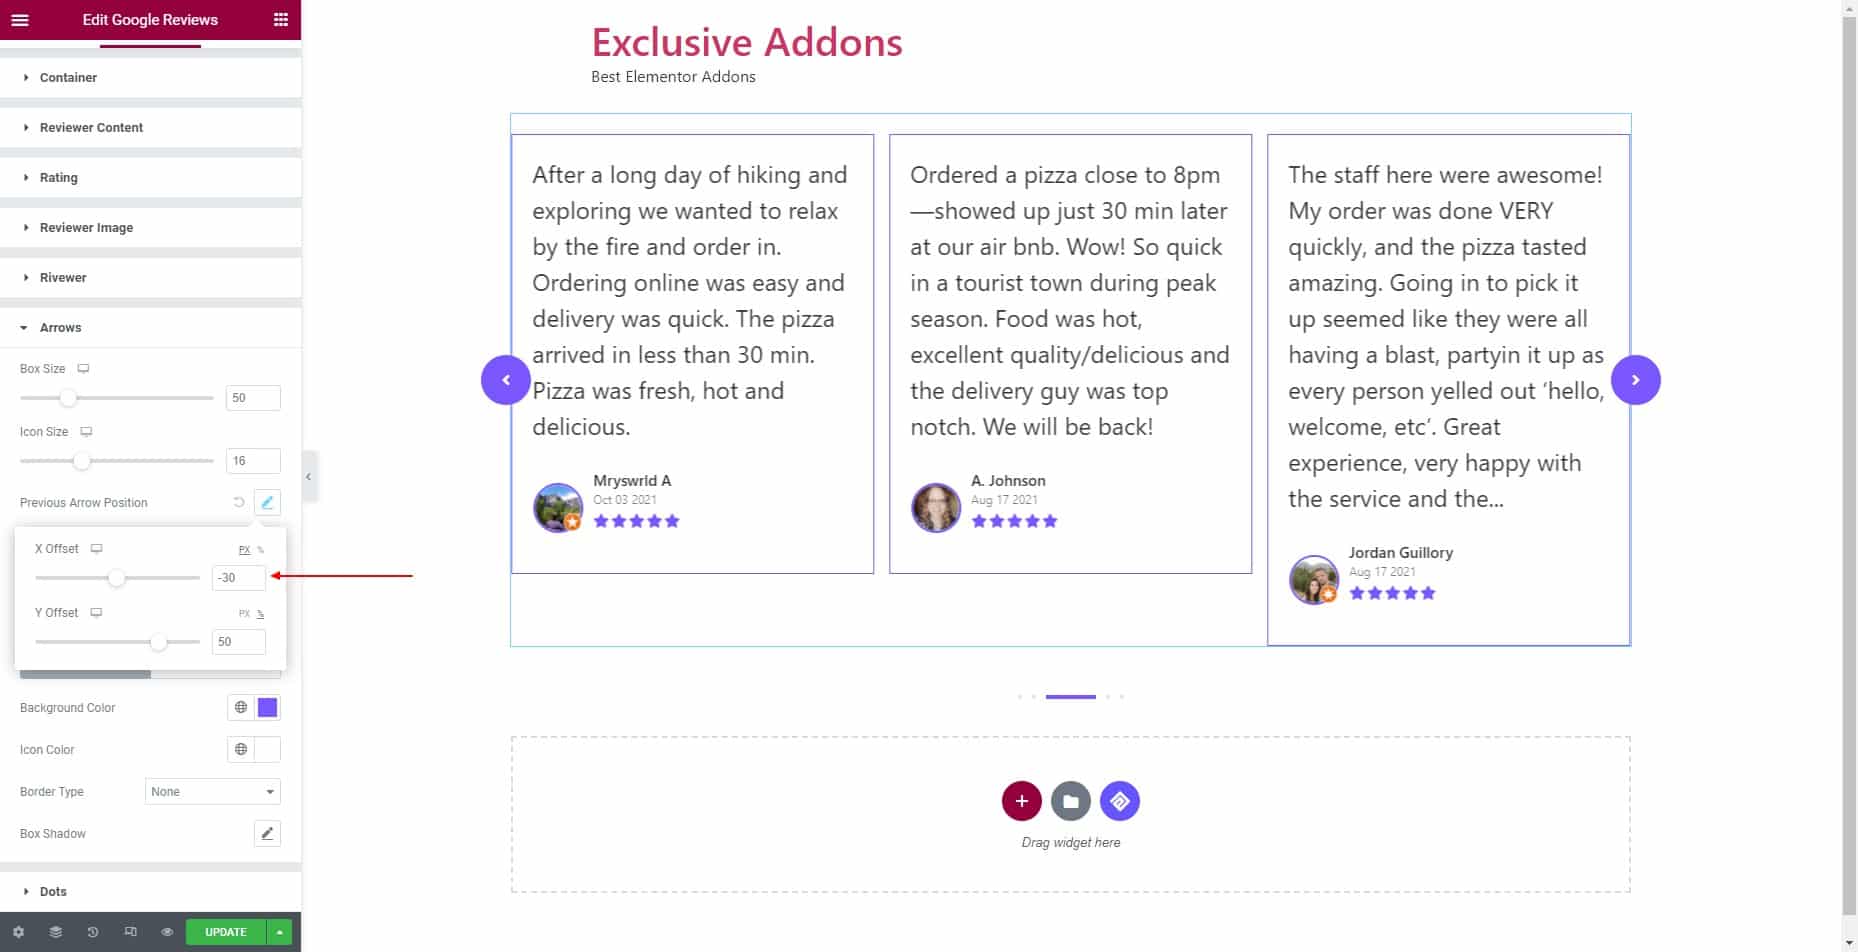
3.6 As per the Arrows, you can adjust Box Size, Icon Size, and set Border Radius. Individual styles like Background Color, Icon Color, Border Type, and Box Shadow.
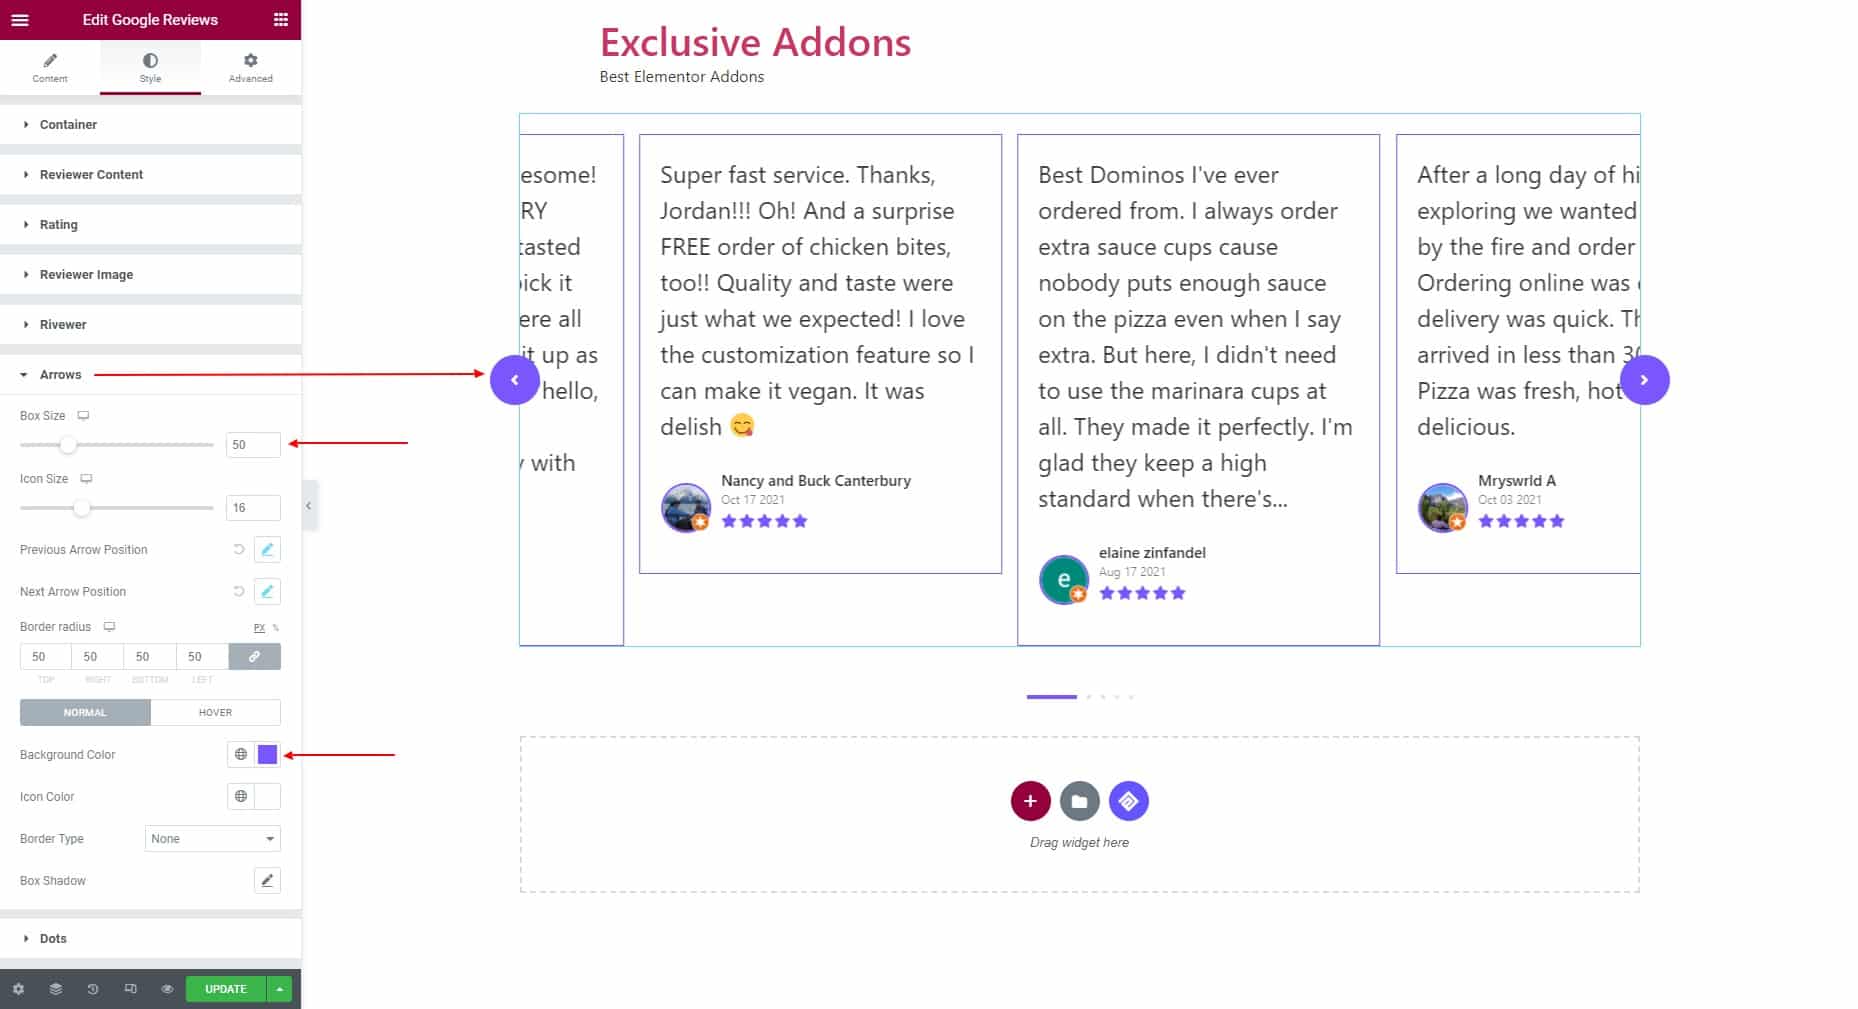
You can adjust the Arrow Position using the widget. Change the X Offset and Y Offset individually for Previous Arrow Position and Next Arrow Position.
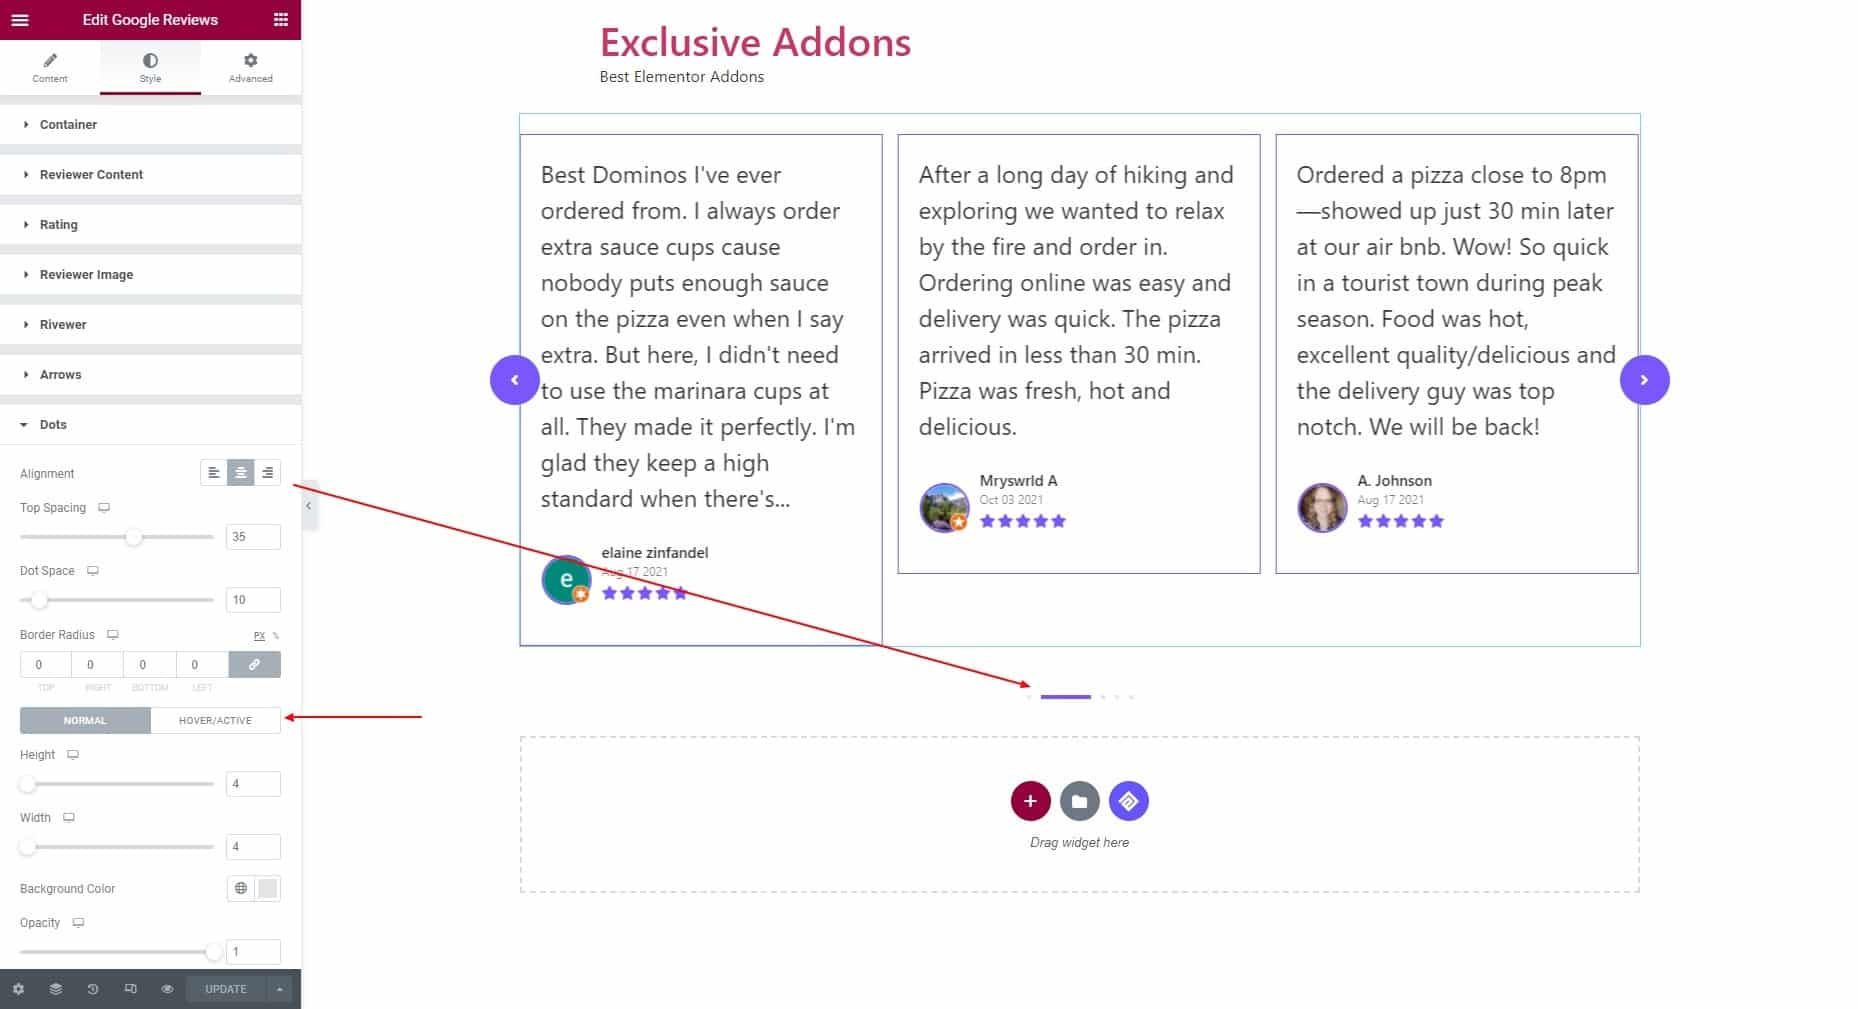
3.7 If you choose Navigation Style to Arrow and Dots, you can customize Dots style as well. Set the Alignment to Left, Right, or Center. Then you adjust Top Spacing and Dot Space. Then set Height, Width, Background Color and Opacity for Normal and Hover state.
STEP 4:
Finally, hit the Update button and add Google Review widget to your WordPress site.