
Headers and Footers are the gateway to impress website visitors. It is one of the primary elements that affects the user experience of your site. However, the default WordPress header and footer seems to be a little boring at times. So you can consider customizing them.
With Elementor Pro, you have the easiest and the most flexible ways to design a customized Elementor header and footer. In this article, we will show different ways of creating website headers/footers with Elementor.
What is an Elementor Header?
In simple words, a Header is something that sits at the top of a webpage. Traditionally, the narrow strip at the top of the website is known as a header.
In most cases, a header includes site title with site logo. You can use creative icons there. Provide a great user experience by adding a menu on the header. It helps visitors to easily navigate through the website. If your website allows user accounts, inclusion of a Login link is a good idea. Besides, some website links their important pages like pricing or promotion to the header with a CTA button.
What is an Elementor Footer?
Footer is the bottom part of the web page that contains small but vital information. It is important for two reasons. First, it displays technical information about the website that the website owner chooses to display. Secondly, the footer serves a great purpose to create a more sophisticated design of the website.
Web page footers most often convey technical information. This may include a short description of the website, with contact info. A footer also contains links to technical pages like Terms & Conditions, Privacy Policy, Customer support link, and so on. You can include a Mailchimp subscription form in the footer as well.
Also read: How to design a coffee shop website template.
How to Create Header Footer with Elementor Pro
Now come to the focus point. Creating WordPress custom headers and footers with Elementor is an easy task. There are alternative ways of how you can build header footer templates. In this section, we will be showing you all the methods.
Prerequisite: What You Need to Build Elementor Header Footer
You need to install Elementor and Elementor Pro. First, install Elementor on your website. Go to your WordPress Dashboard >> Plugin and click to Add New, then enter “Elementor” in the search box. After that, install and activate the plugin.
For Elementor Pro, you have purchased the premium version of this page builder. After completing the purchase procedure, you have to then log in to your Elementor account, and download a ZIP file of the plugin. Then upload the .zip file and activate the plugin to complete the installation procedure.
Step-1: Create Header Footer Templates with Elementor Pro
There are three different methods, you can create Elementor header and Elementor footer as custom templates.
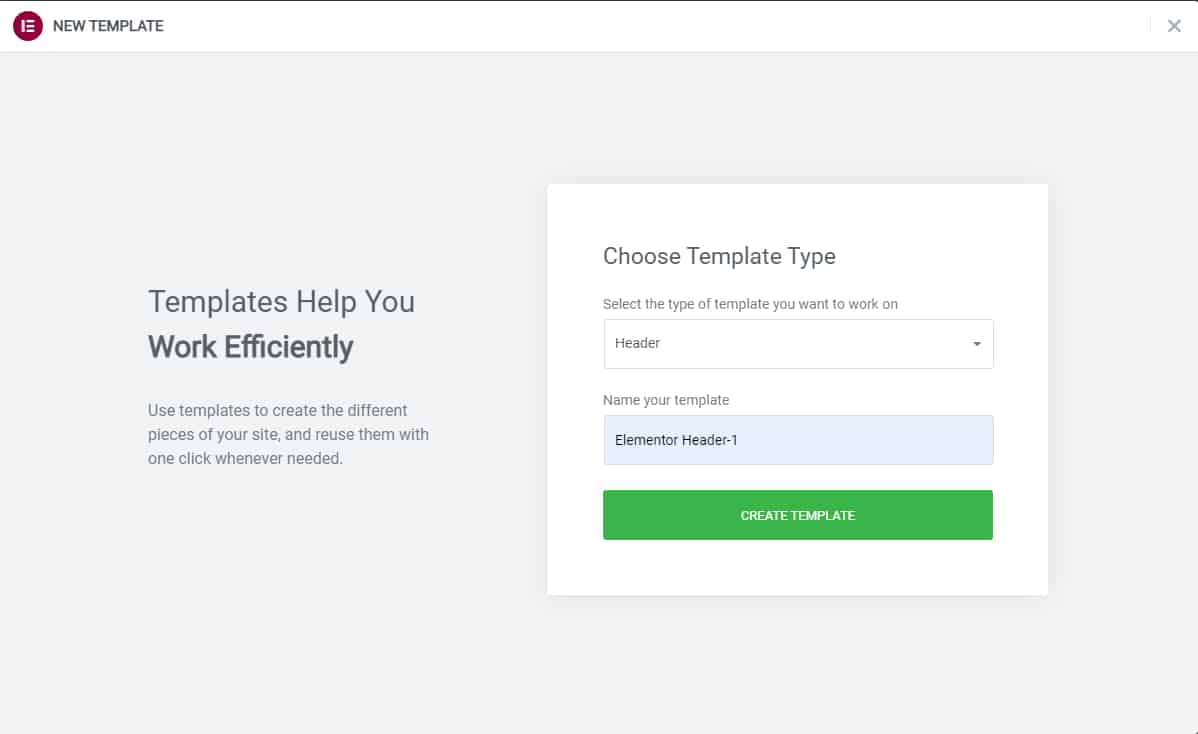
Method-1: Login to your WordPress site as admin and go to Elementor >> Template >> Add New. Once you click to Add New, a popup screen will appear where you get to choose Template Type and Template Name. There, choose the template type to Header or Footer and set a name for it. Then click on the CREATE TEMPLATE button.
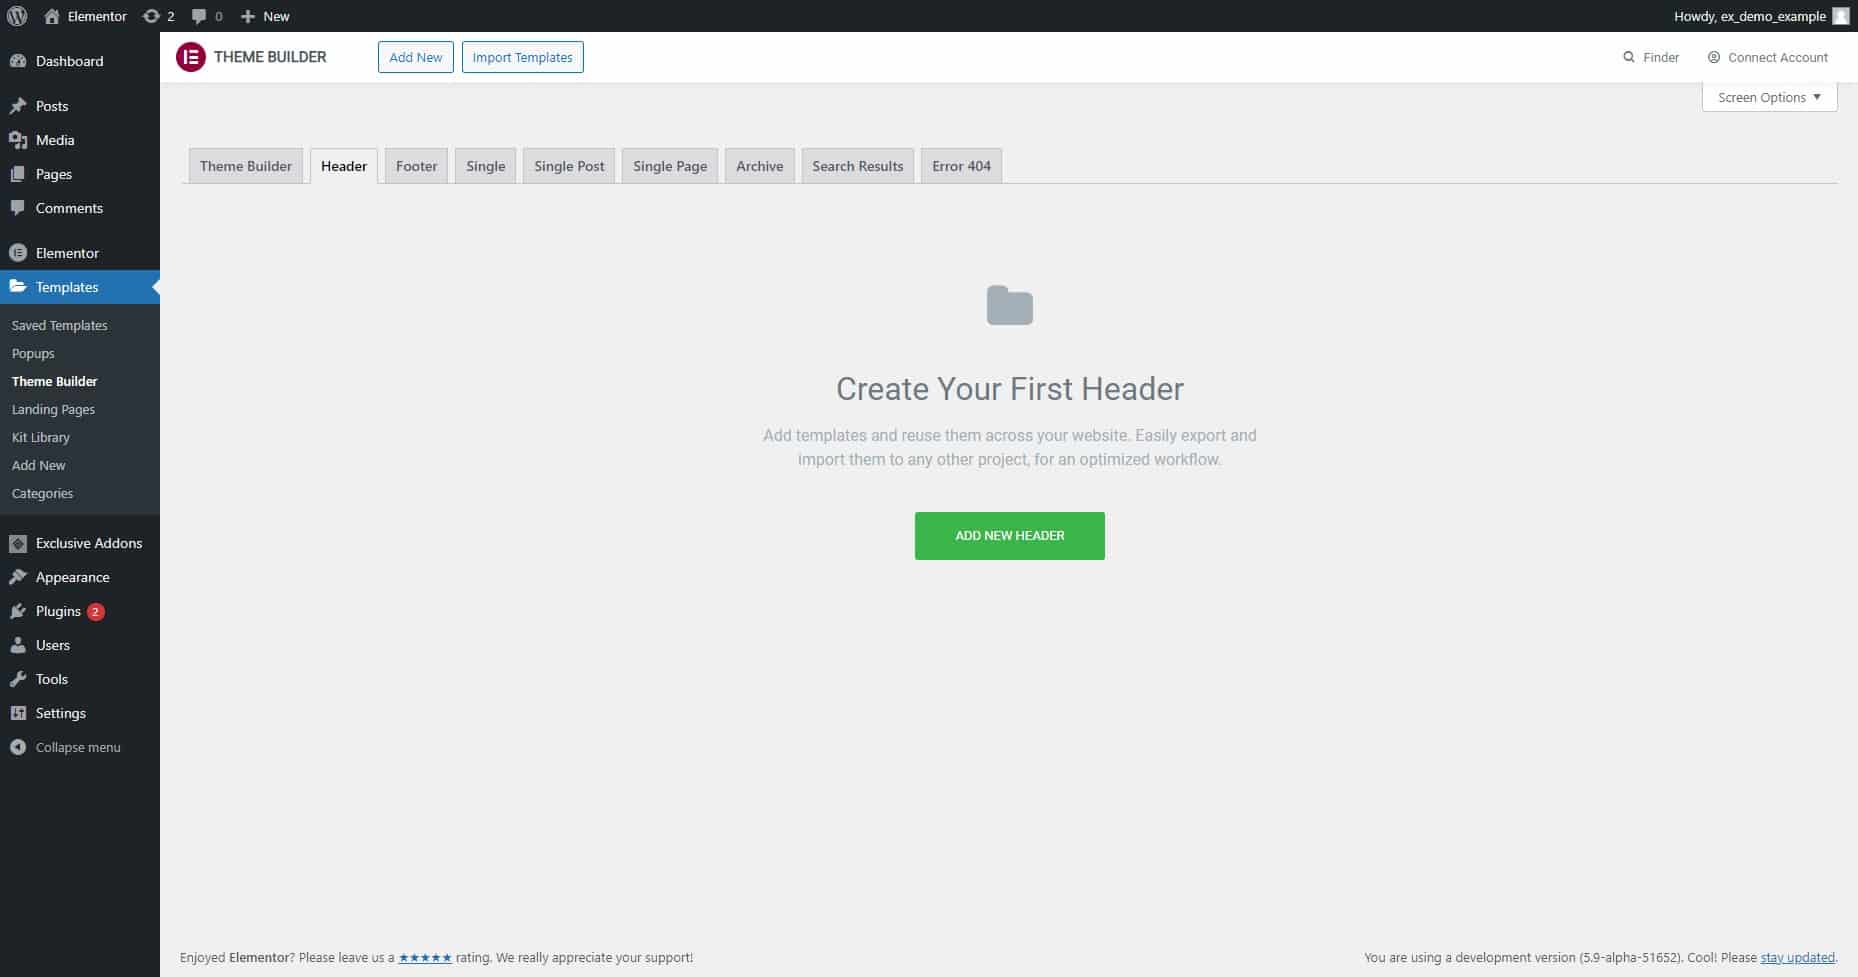
Method-2: There is a different way also. Go to Elementor >> Template >> Theme Builder then choose the Header tab or Footer tab. There you can see ADD NEW HEADER, click on it then repeat the same procedure in Method-1. You can also see a list of your previously created templates there.
Method-3: When you go to Elementor >> Template >> Theme Builder, you can see a section that says, “Meet the New Theme Builder”.

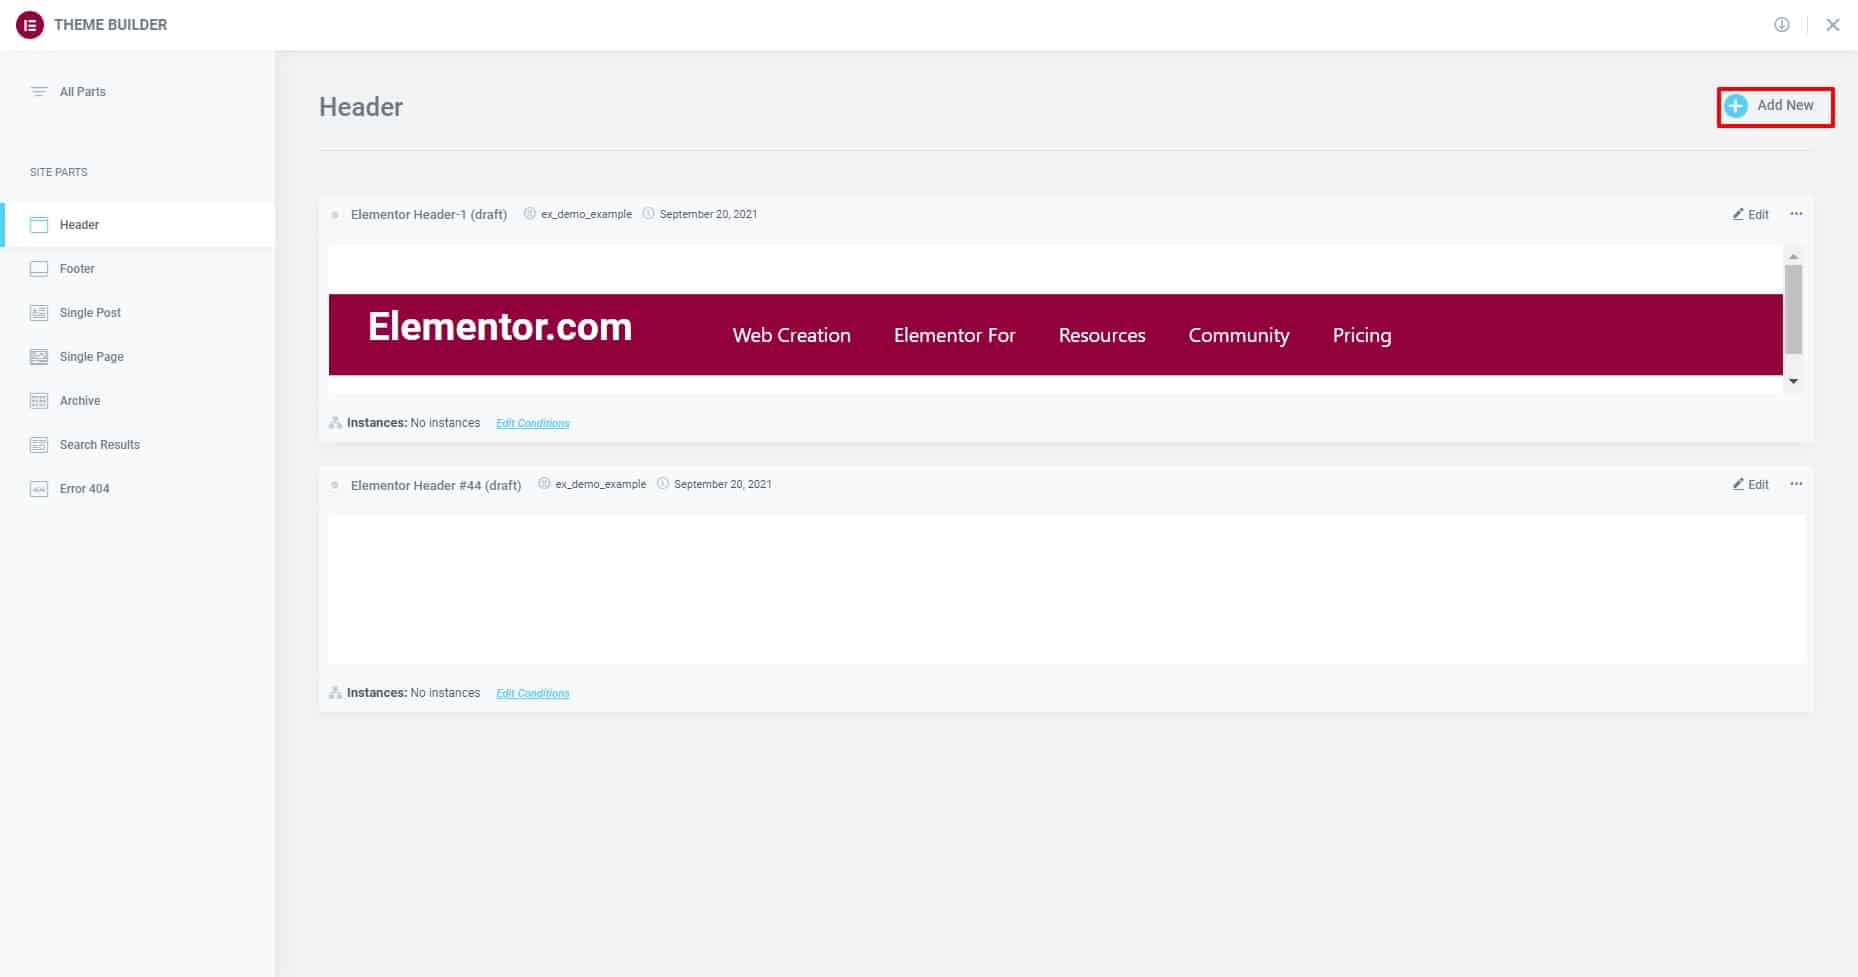
Click the Try It Now button, and it takes you to the visual Theme Builder page. On the left side of that page, you can see a list of SITE PARTS that includes Header and Footer. Select one and there’s a list of Header (or Footer) templates you’ve created with a visual preview. You can edit them, also can include a new one by clicking to Add New icon.
Step-2: Design Elementor Header Footer
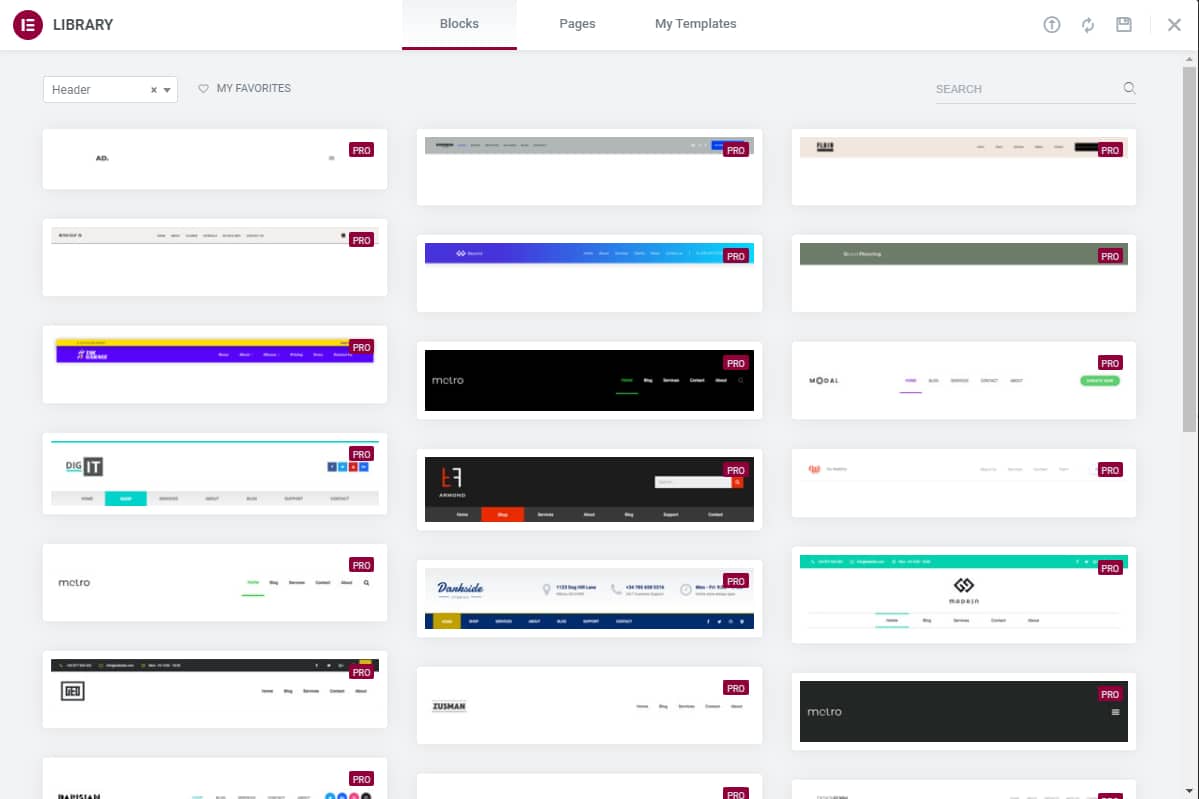
After you create the template, you will find yourself on the Elementor editor page. Elementor Template Library page will automatically appear on your screen. You can import a readymade header template from there. Similarly, if you are creating a footer, there are pre-built footer templates as well.
Otherwise, you can go to the editor page, and design a template for the header or footer on your own. Use available Elementor widgets to create custom header footers with your creative design idea. You can see an example below.
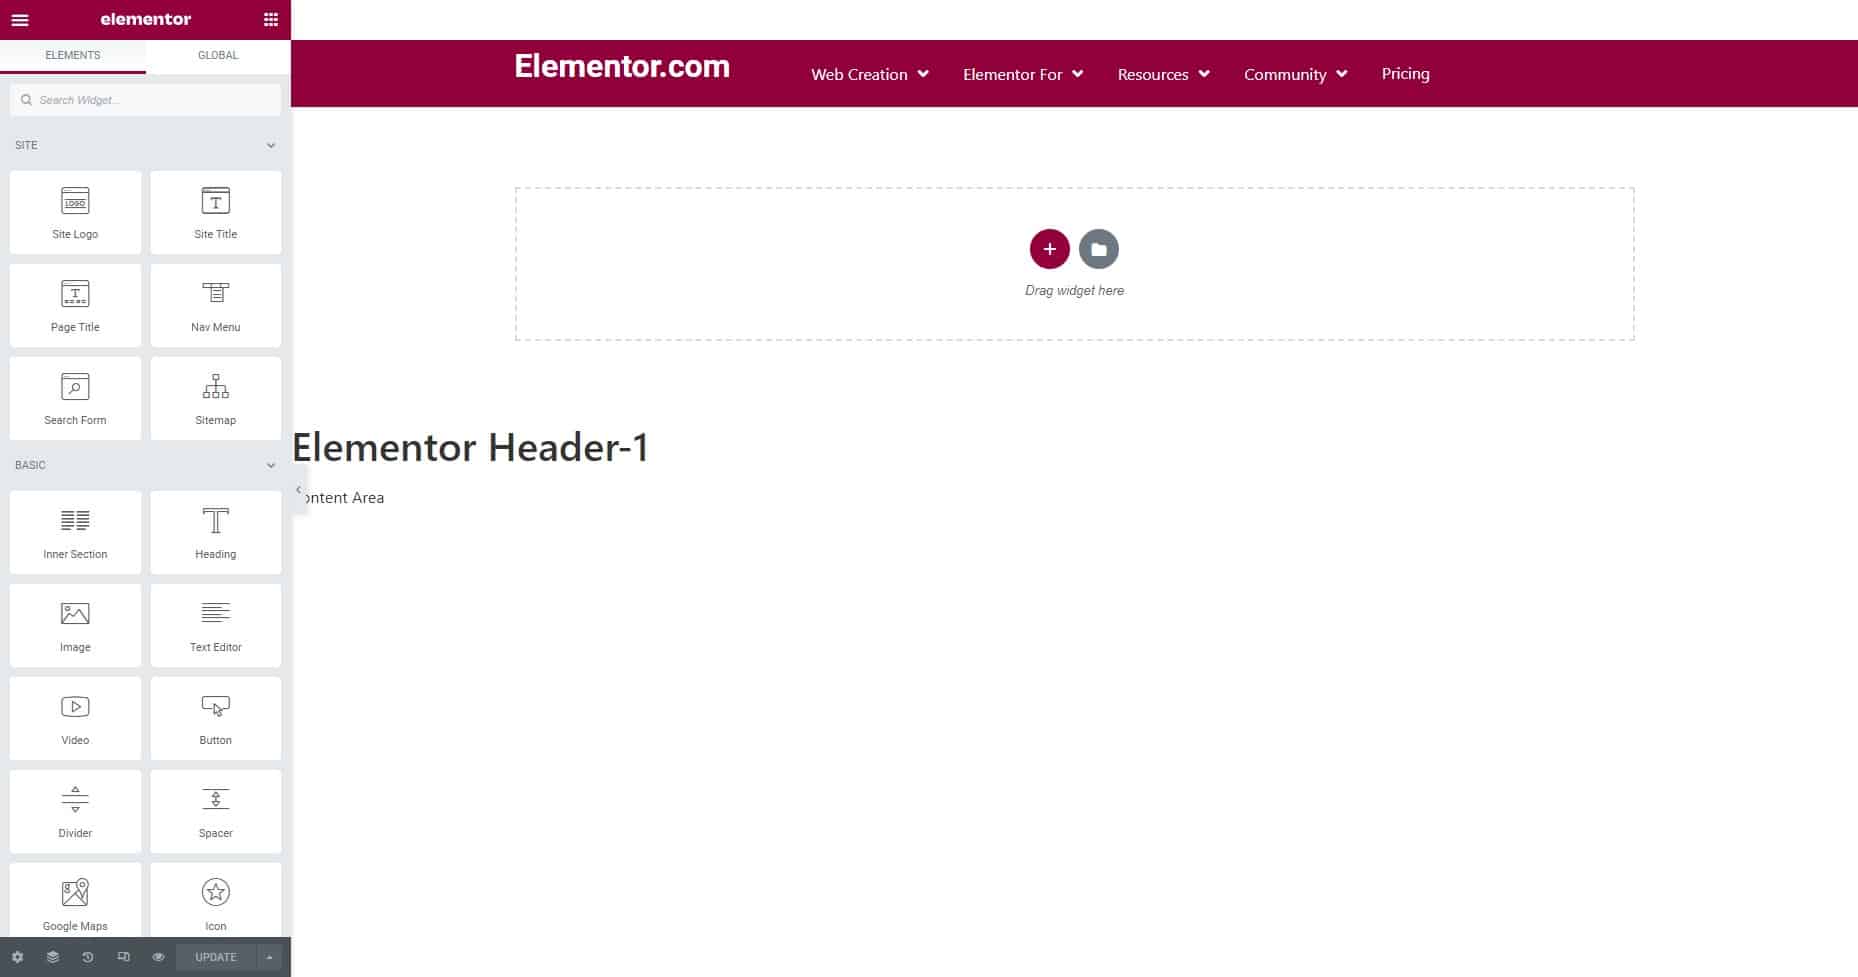
Finally hit the update button to finalize the template.
An Alternative Way: Build Elementor Header and Footer with Exclusive Addons
The way to create headers and footers with default Elementor is great! But you can have a bit easier alternative with Exclusive Addons. Here is what you have to do:
Prerequisite: Install Exclusive Addons and Exclusive Addons Pro
You need to install the following procedures before starting the procedure:
- Elementor Free
- Exclusive Addons Free
- Exclusive Addons Pro
Assuming that you are already using the free version of Elementor. Then you need to install Exclusive Addons Free. As Header Footer is a premium feature, you need to purchase Exclusive Addons Pro to use it. Remember You Don’t Need To Buy Elementor Pro to use the Header Footer feature of Exclusive Addons.
Step-1: Set up the Header Footer Properties
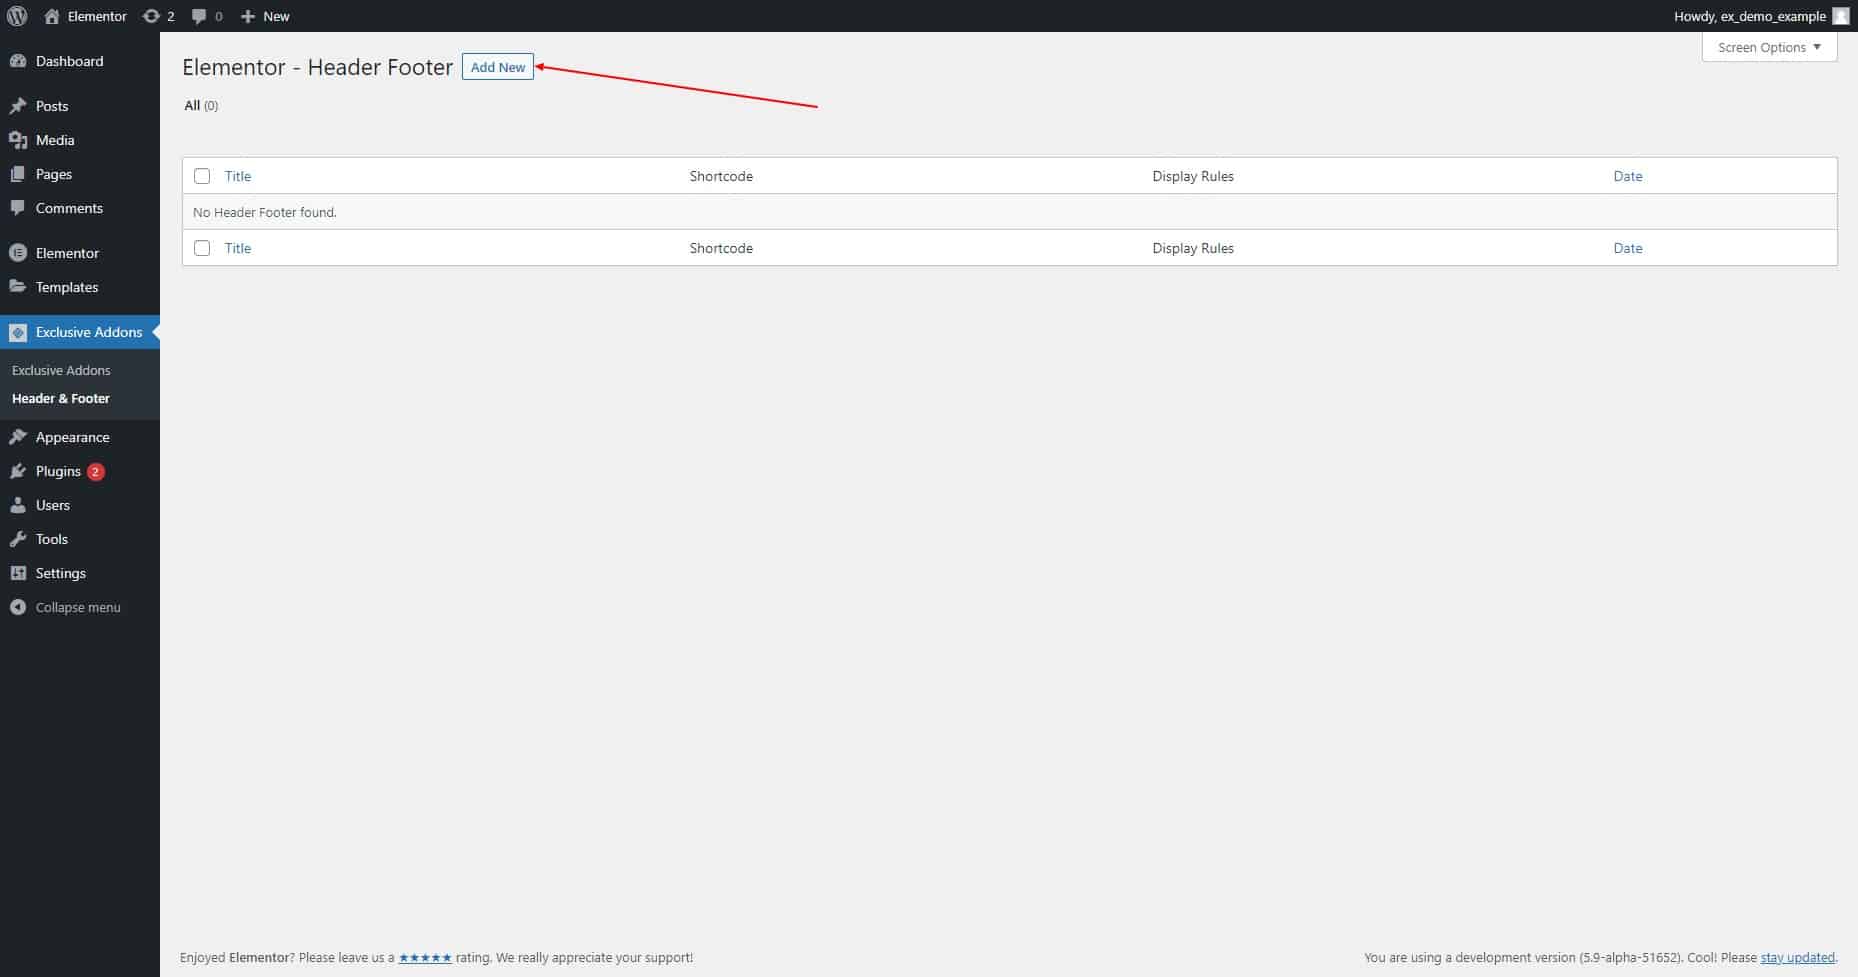
After the installation, go to Exclusive Addons >> Header & Footer from your WordPress dashboard. On that page, you can Add New headers & footers.
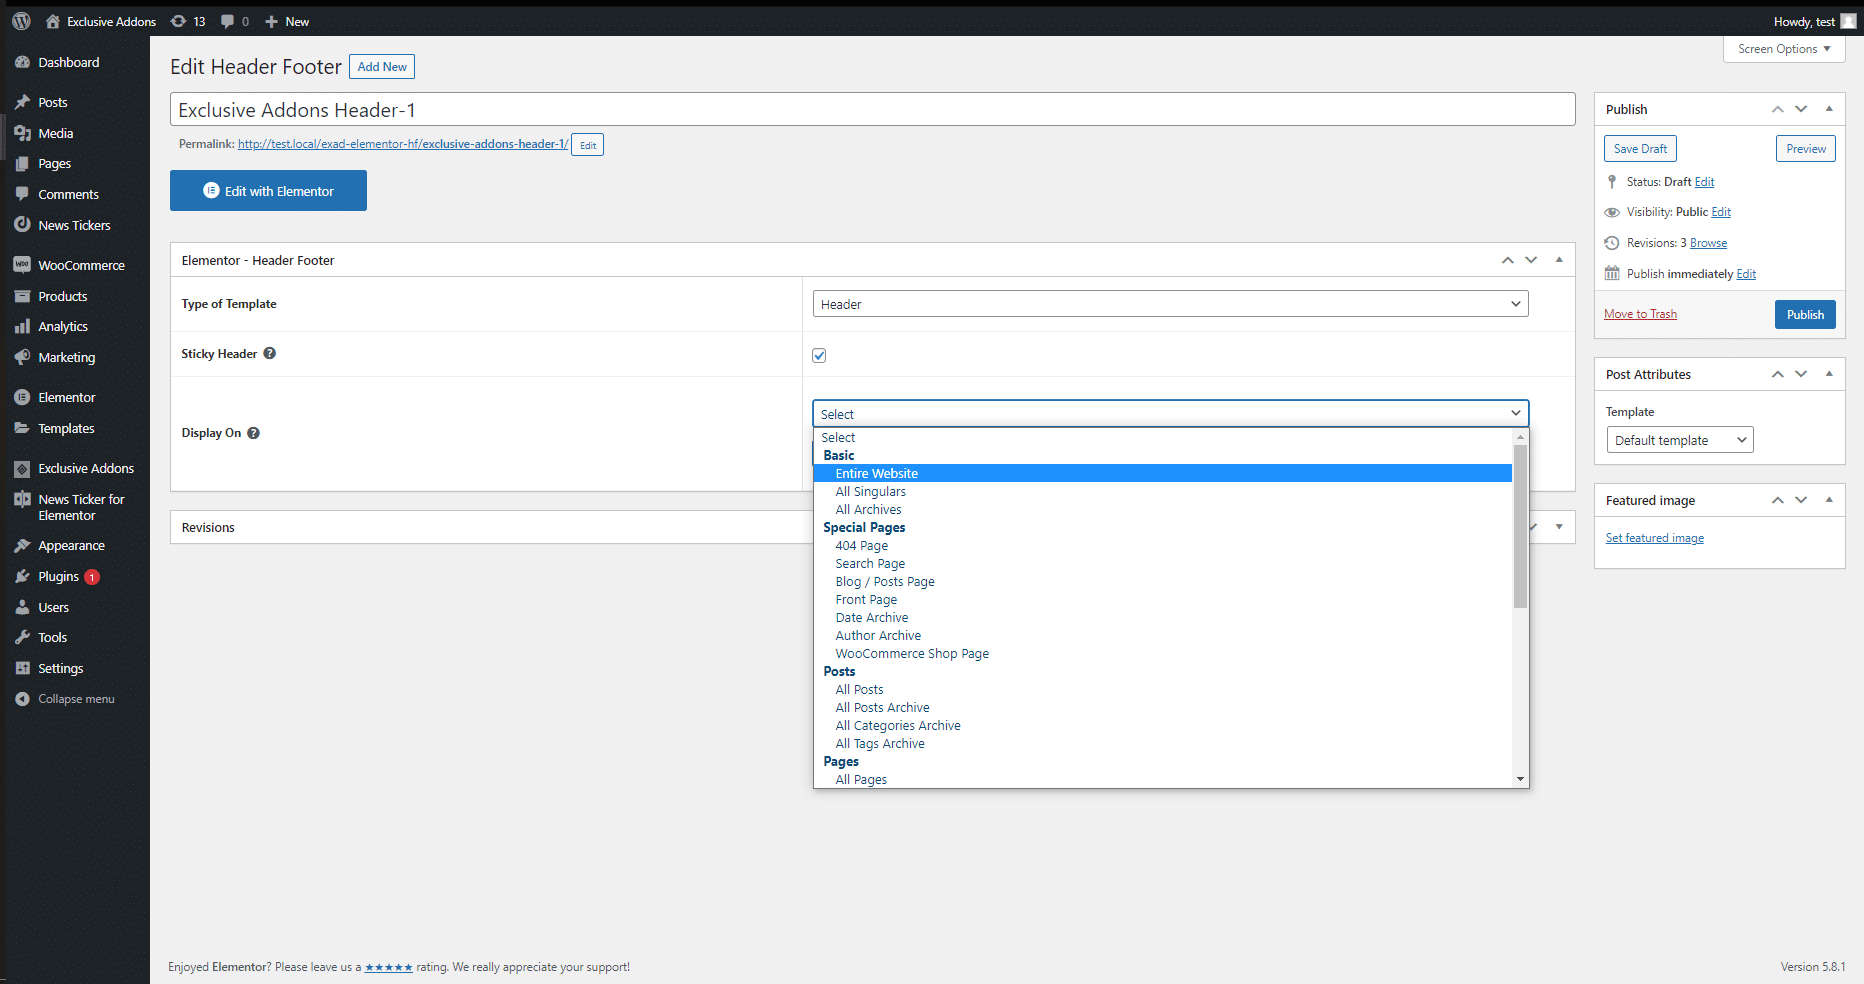
Next, on the “Add New Header, Footer or Block” page, You have several fields to fill up. First one is adding a title. Then in the next section, choose the Type of Template to Header or Footer. After that, there is a checkbox to create an Elementor sticky header. The next step is to choose, on which pages you want to show that header/footer. You can choose to display it on the entire website or there’s a list of pages you can choose to display individually.
Setting up header properties:
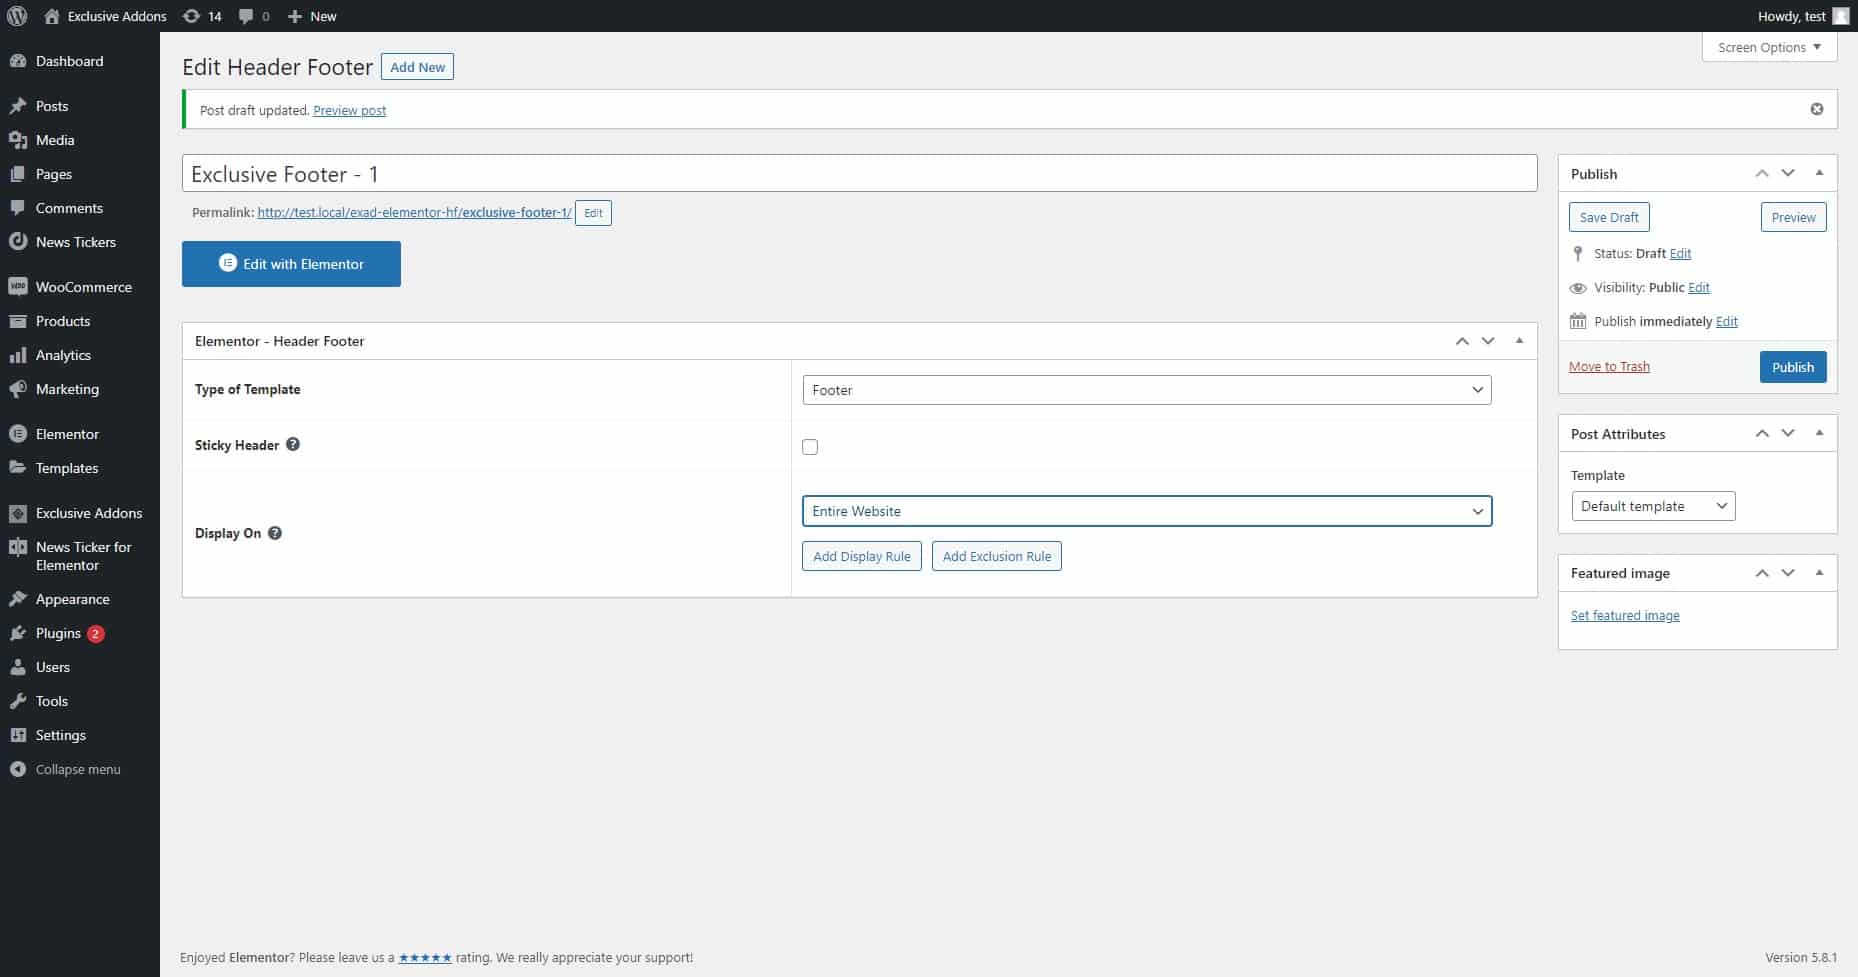
Setting up footer properties:
Once you are done setting up the header/footer properties, save it as a draft. Then click the Edit with Elementor button.
Step-2: Create Header Footer with Exclusive Addons
In this step, you can create eye-catchy headers and footers. Like Elementor, there are two ways of doing it. Either you can design a creative header/footer on your own or import templates from Exclusive Addons.
Designing a template with Exclusive Addons is the same as designing one with Elementor. Except for the fact that you have more than 85 additional widgets that come with Exclusive Addons. Therefore, you can add features like Mega Menu, or use beautiful icons from the Exclusive Icon Library.
Creating Exclusive Header:
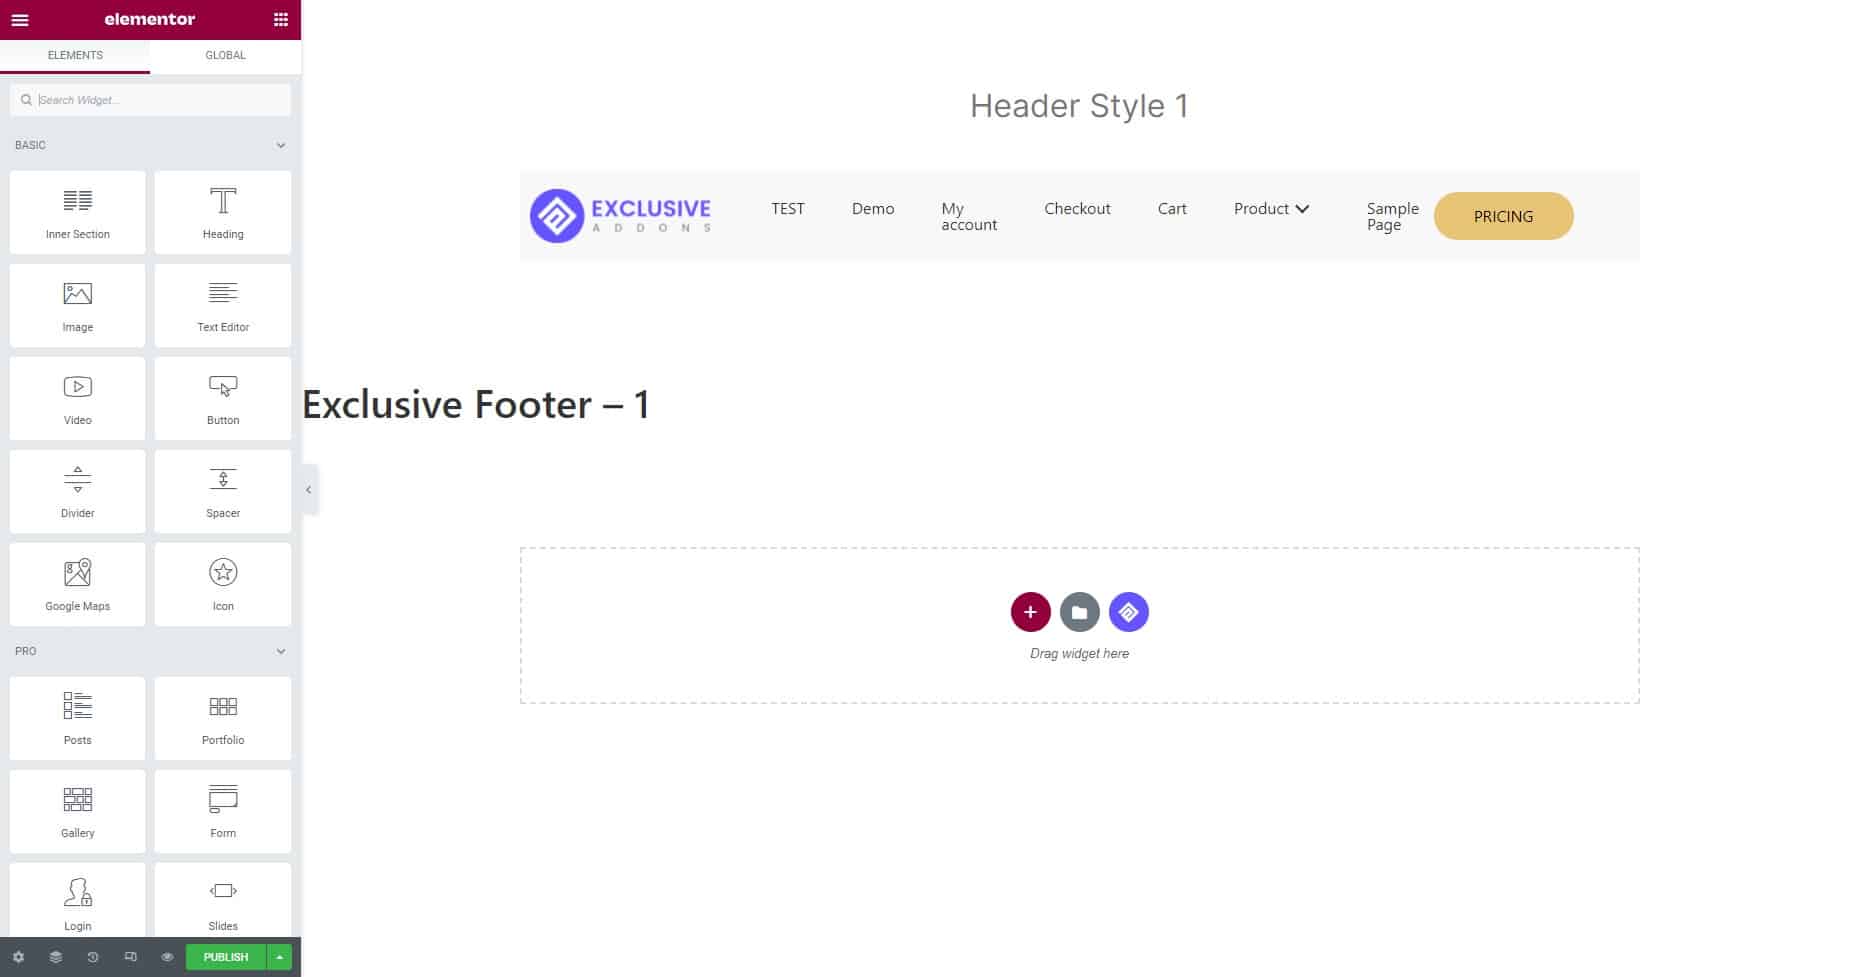
Creating Exclusive Footer:

Besides, you can import readymade section blocks for headers and footers. Exclusive Addons has over 700 section blocks, that include a bunch of header footer templates. So that you can get creative design ideas for your website’s header and footer. If you face any issue regarding template library, see the documentation on how to use template library of Exclusive Addons.
Final Thoughts
Now you know how to build a header and footer. You will be able to create Elementor header and footer on your own. Customized headers and footers enhance the user experience. It helps to make a great impression and draw instant attention from website’s visitors.
We hope this article served you well. If you liked the article,you might also find our other blogs useful. We have a good bunch of blogs on WordPress, Elementor, and industry-related topics. Visit the page and enrich your knowledge.