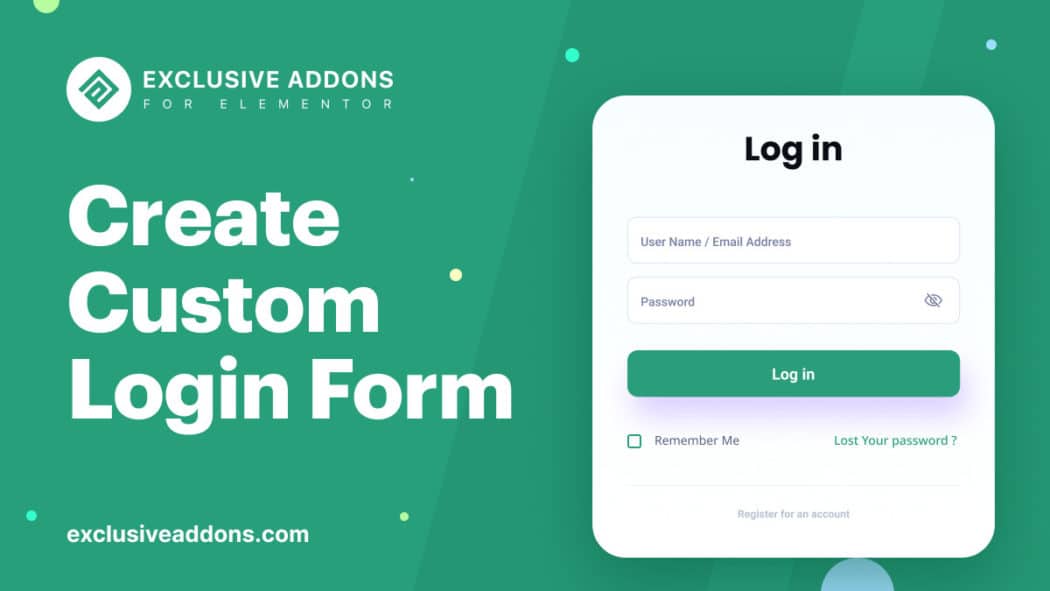
Customizing Login Form always boosts user experience. There are enough reasons you should customize the WordPress Login Form. That includes matching the brand style, enhancing user-experience, or improving navigation.
There are different ways to add a custom WordPress Login Form. You will find WordPress login plugin, also you can customize WordPress login page without plugin. Also wordpress login widget is available. But the method we are going to describe is using Elementor widget to create a custom login form.
Why to Create a Custom WordPress Login Form
Match to your brand style
You must the one conscious about your brand consistency. You have designed a beautiful website and must match pages and section styles to that design including Login page. A custom login form will allow you to match login pages design to your website design and help you maintain the brand consistency.
Pleasing User Experience
A big reason behind customizing login form is to improve the user experience. You can customize to provide a better view, design more accessible fields and add visible labels. You can redirect users to any page after they complete their login. The after-login page doesn’t always have to be a home page. You can take them to a more relevant page.
Improve Navigation
You can provide additional navigation to the login page. There you can promote special offers with campaign banners or can link social media profiles in login form.
How to Design A Custom Login Form with A Elementor Login Widget
You can create an eye-catchy and user-friendly WordPress login form to make things easy and pleasing for the users. So here is the step by step guide to create a custom Elementor login form.
The default Elementor Login widget is quite good. But for the sake of showing more customizable options, we will be using the Exclusive Addons Login widget as an example.
Step-1: Configure The Login Widget
Once you drag the widget into your web design, you can start customizing it from the editor panel. In the editor panel, go to the Content tab, and you will find the Settings section. There you can configure the widget.
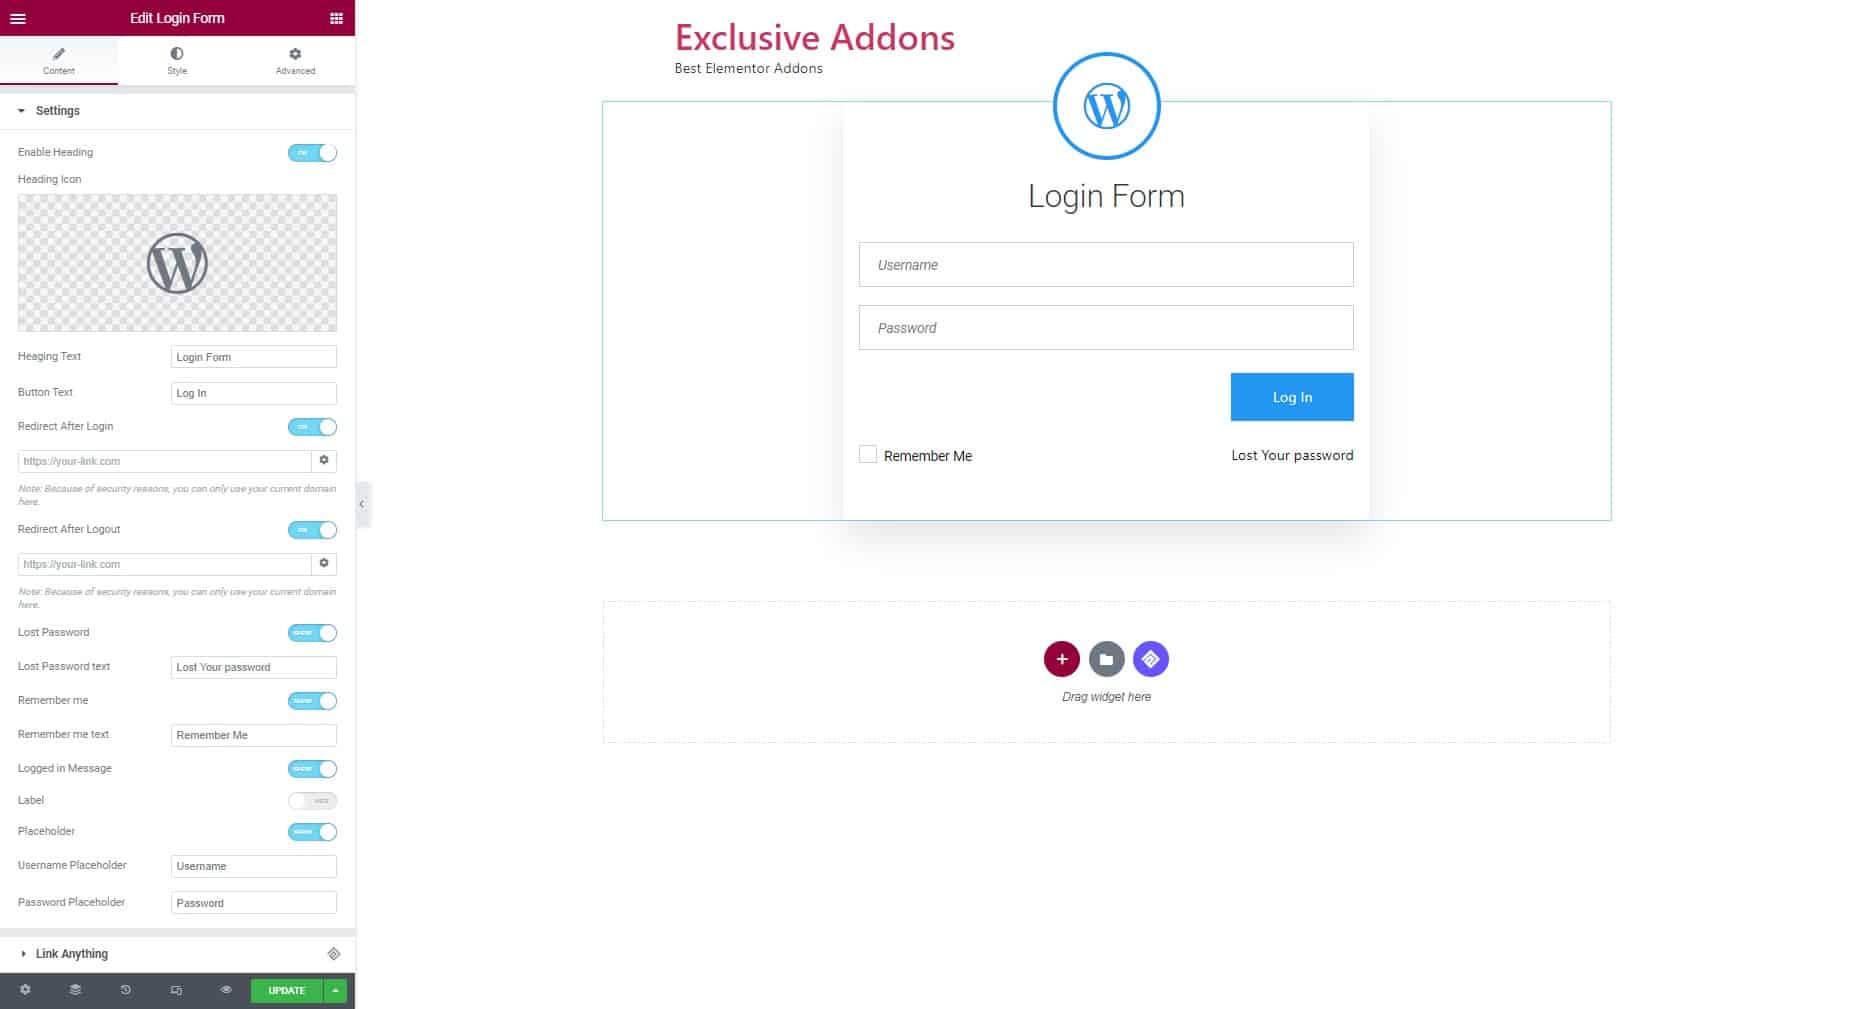
You have the option to enable headings. When enabled you can add a Heading Icon, and Heading Text. In terms of the login button, set a Button Text. You can set redirect after login and redirect after logout link by enabling those options individually.
With the widget, add password recovery feature in case users forgets the password. Also give an option to store login details so that they can login with one click next time. Placeholders and Labels are also editable with this widget.
Content tab is a bit different with the default Elementor Login widget. There you will find Form Fields, Button, and Additional Options section.
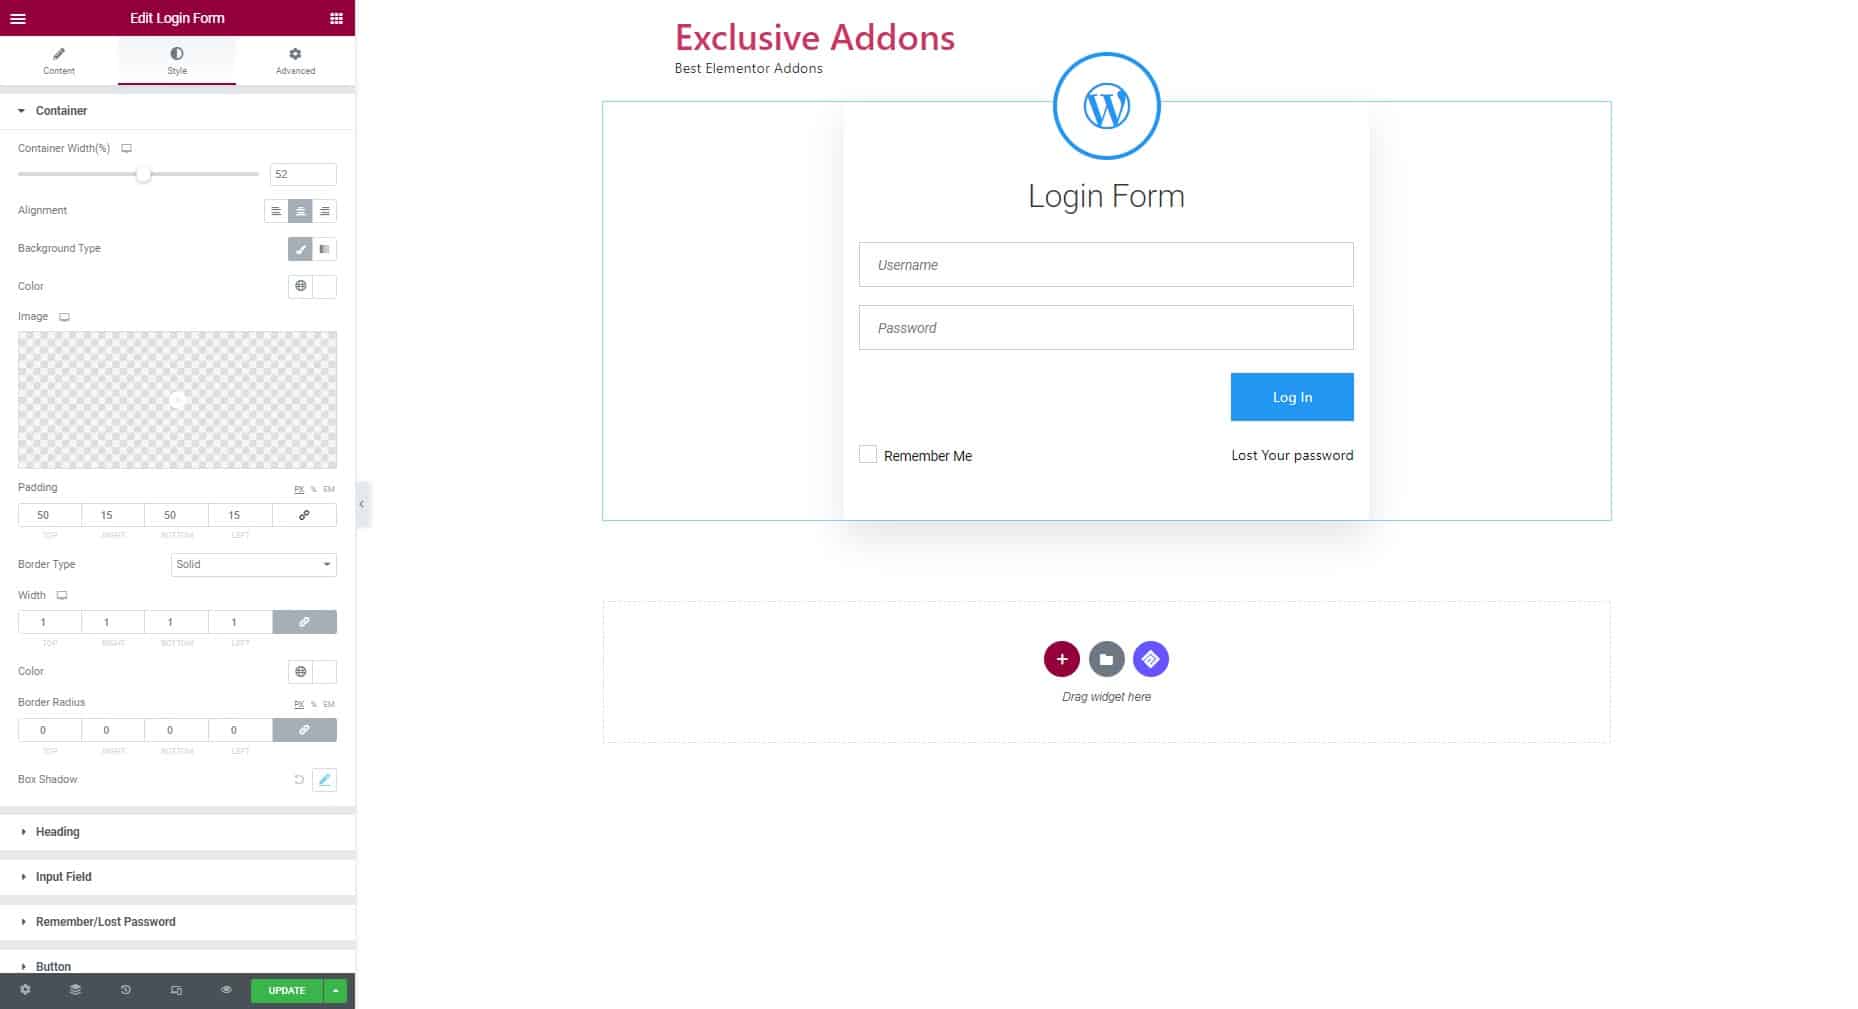
Step-2: Customize Container, Heading & Icon
Now switch to the Style tab. There you will see Container, Heading, Input Field, Remember/Lost Password, Button and Logged in Message. In the container section, adjust Container Width, Alignment, Background Type and other attributes.
The next step is Heading section. There you can set Alignment, then customize icon style. That includes Icon Size, and Icon Box attributes. Also, tailor the Heading Text with typography and text color and margin.
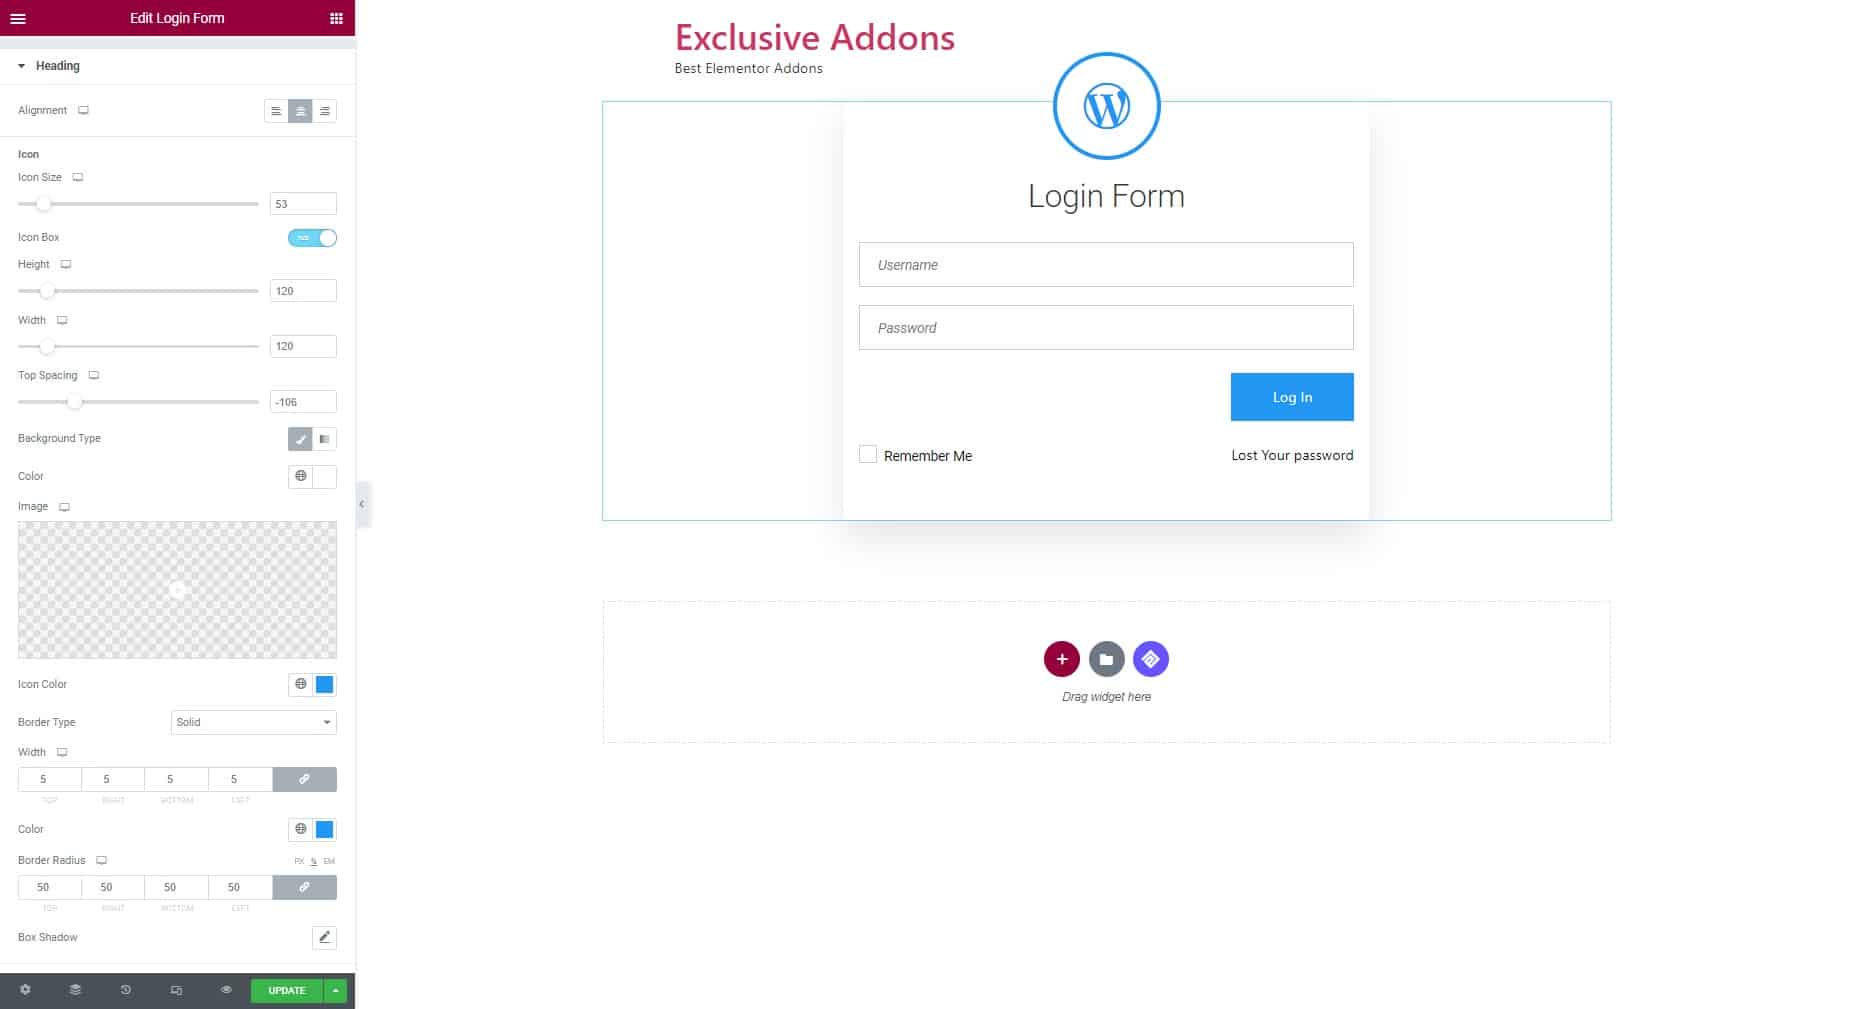
The next step is Heading section. There you can set Alignment, then customize icon style. That includes Icon Size, and Icon Box attributes. Also, tailor the Heading Text with typography and text color and margin.
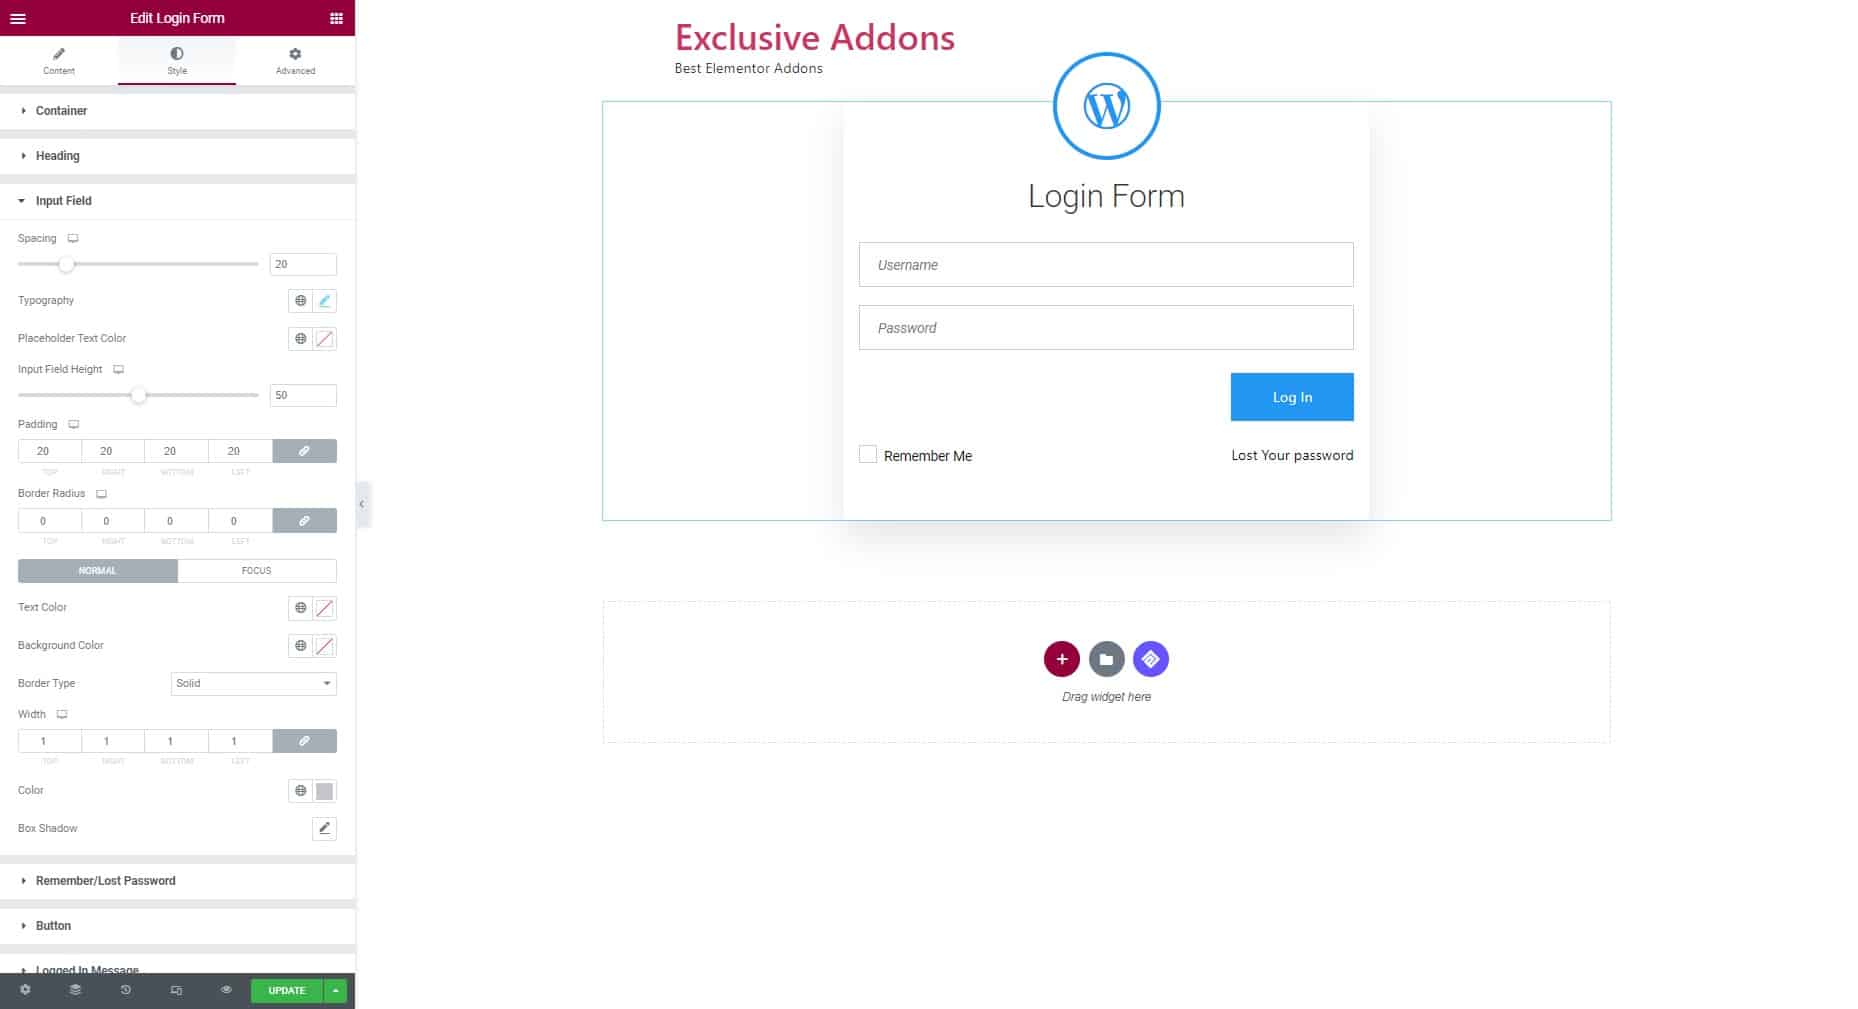
Step-3: The Input Field Section
Then comes the Input Field section. Spacing, Typography, Placeholder text color, Input Field, and Height are the attributes to customize in this section. You can set different styles for Normal and Hover states.
Step-4: Password Store & Recovery Section
This section, you will be customizing to sections actually. The Remember Me section and Lost Password section.
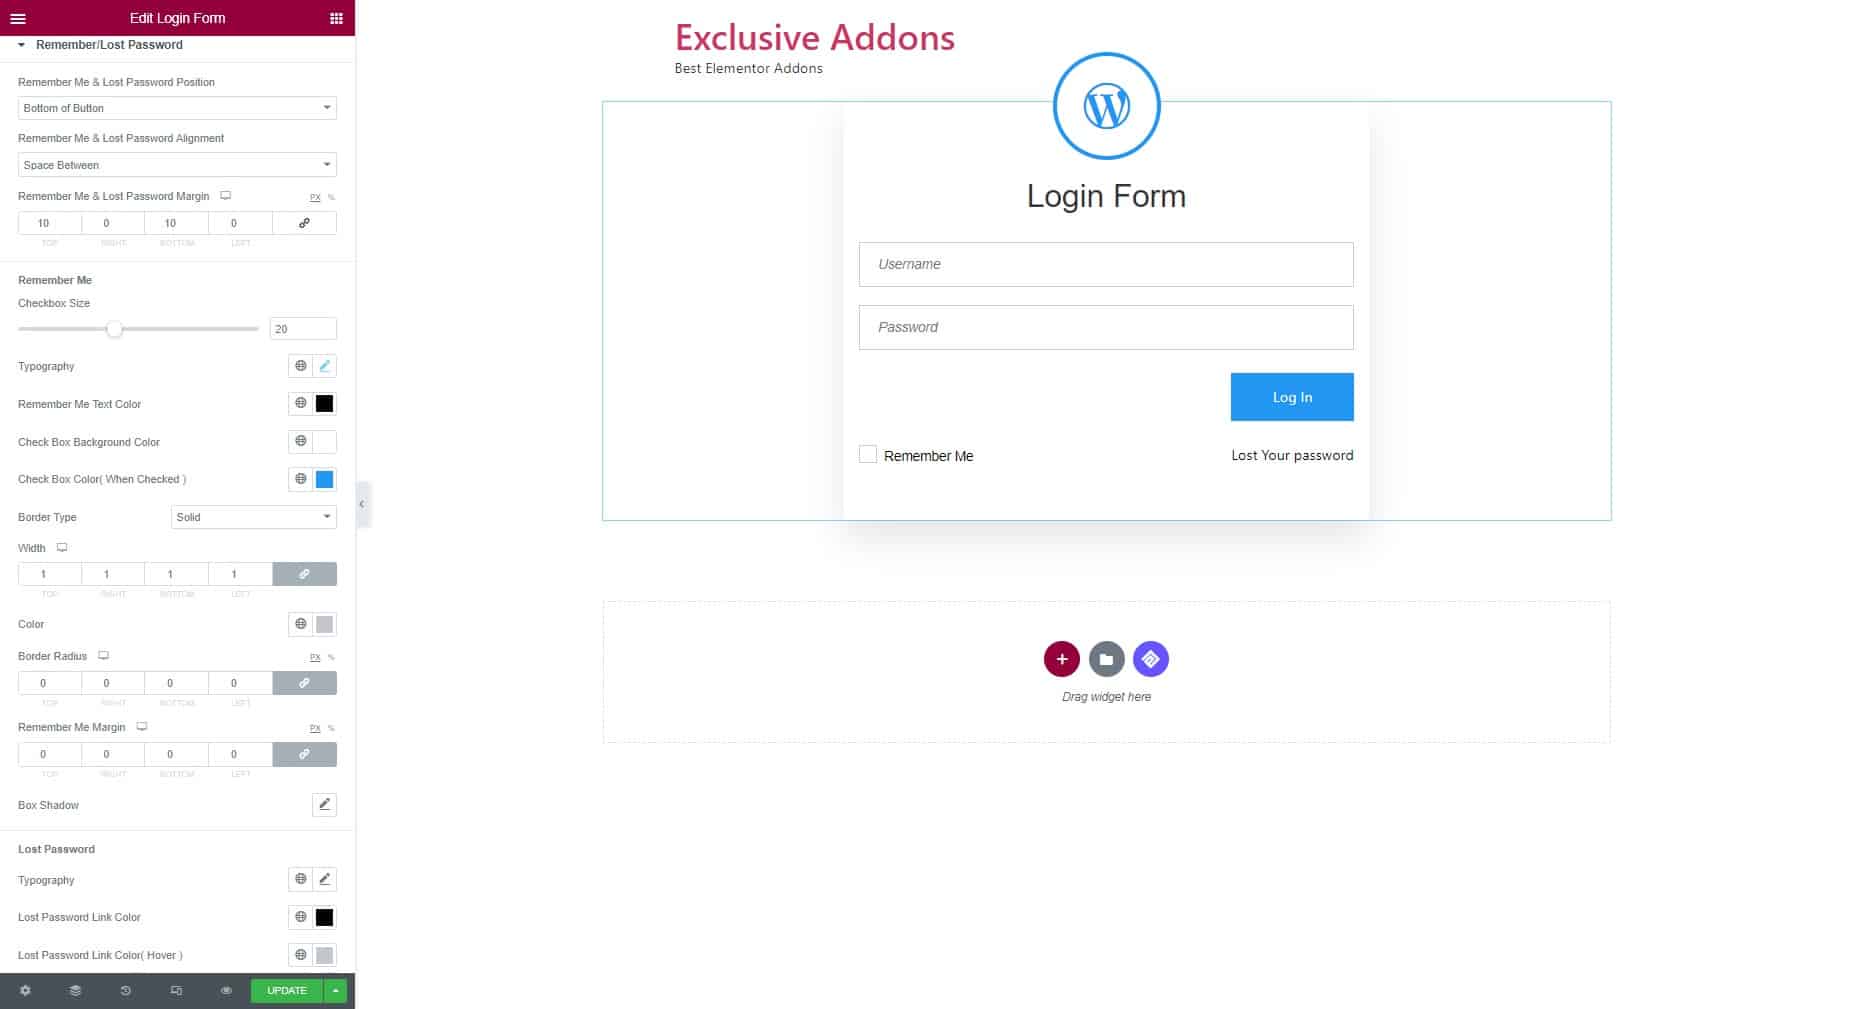
First set Remember Me & Lost Password position to Bottom of the Button or at the top of it. Also can set their Alignment and Margin. Now to customize the Remember Me section, you will find Typography, change text style there. Can change colors of text, checkbox background, and checkbox color. Checkbox size is adjustable too. As for the lost password text, typography and text color.
Step-5: Design the Button & Logged In Message Style
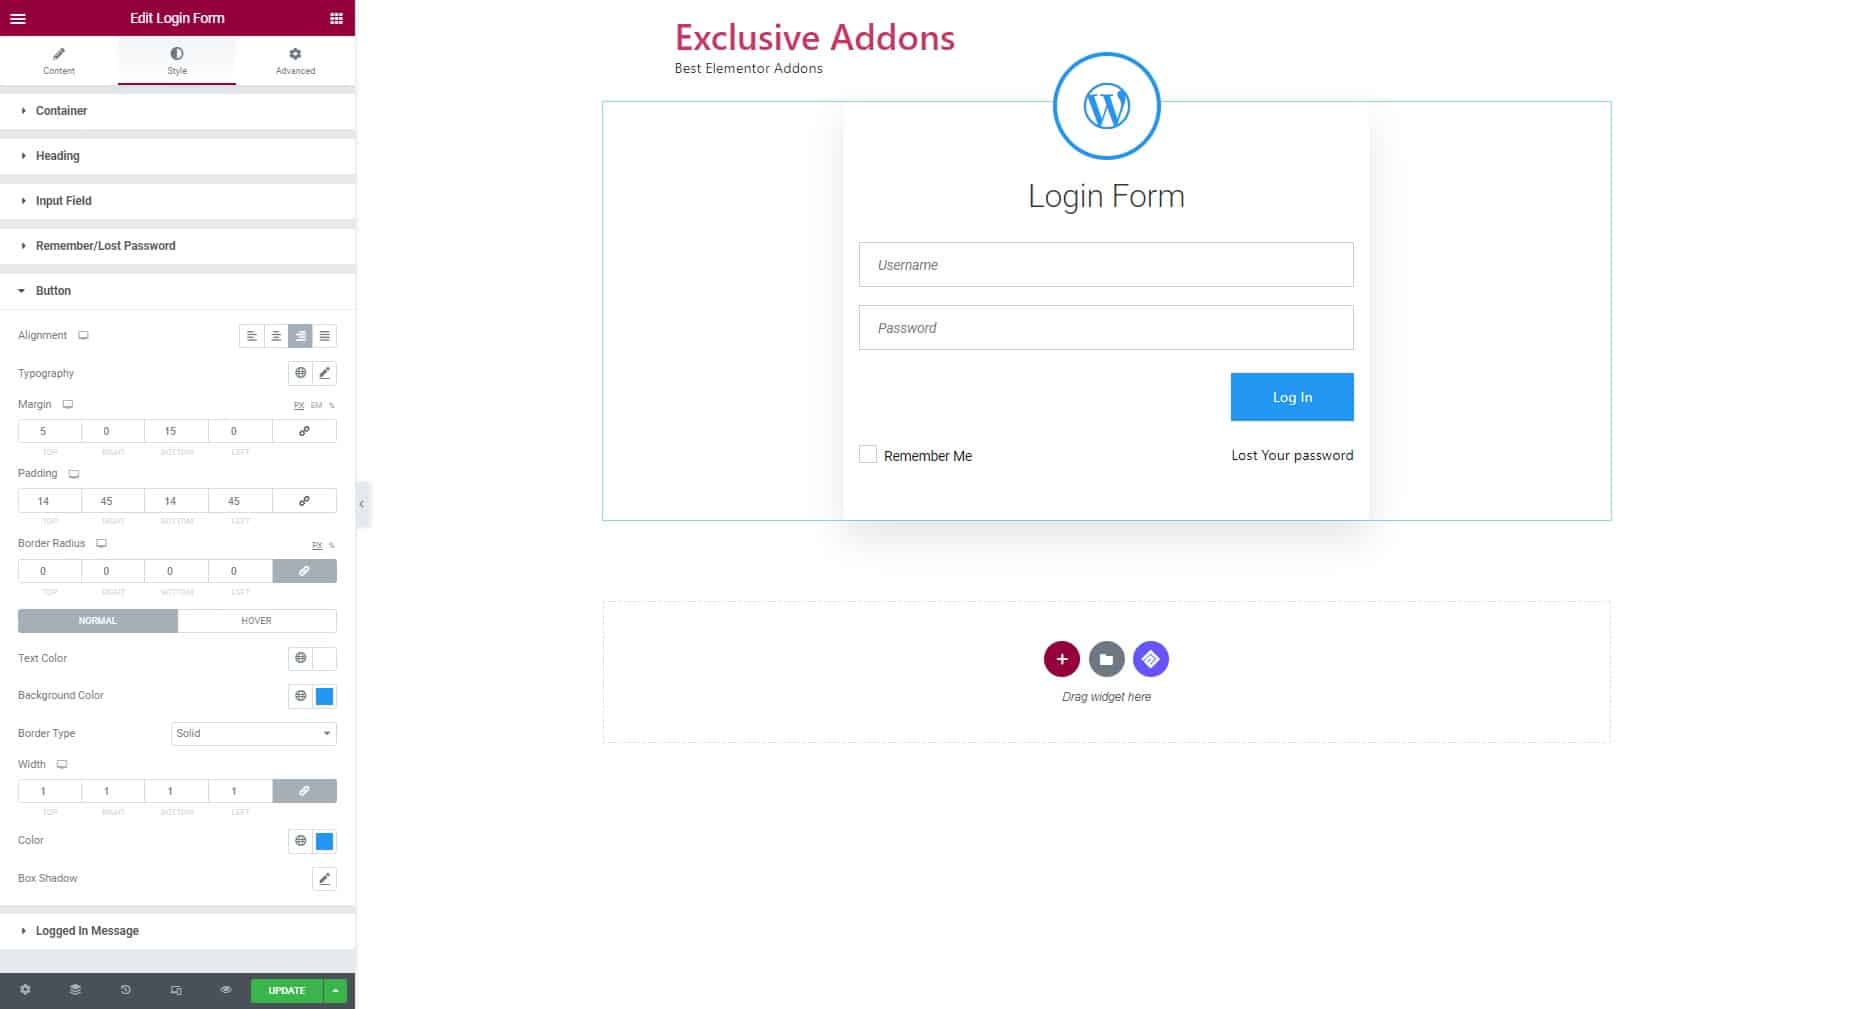
You can customize the login button, the way you customize other dianabol for sale buttons. Change Button styles and Logged In Message message style separately. Set button position by setting its Alignment. Margin, Padding, and Border Radius are the attributes to design the login button. You set individual styles for normal and hover styles. As for Logged In Message, change it’s typography, color, link color and link color for hover.
Rolling up
Paying attention to the login page is as important as other pages. Provide great user-experience and match your band style customizing the login form. Elementor Login widget will help you do so. And the endless customizable options help you go beyond your limits. This article explains a step by step guide to customize the Login Form of your website.