The world is becoming a smaller place. More people are traveling and seeking new experiences. With a website and the right sets of information, you can make the travel experience easier, and more organized for travelers around the world.
If you own a company that arranges trips for others, a website is definitely beneficial for you. With an automated travel website, you can provide trip details to travelers according to their destinations and dates. It will surely lead customers to your business.
So, in this article, you will show what pages should a travel website include and how you can create it in WordPress.
Why should you create a travel blog site?
Creating a travel blog can give you the opportunity to share your experiences with other travelers and provide valuable information about destinations and attractions. Travel blogs can help thousands of travelers to plan their trips and save money on travel expenses. You can share information on accommodation, activities, and food, and book tickets and tours with just a few clicks.
Moreover, if you have a travel company, a website allows you to create a one-stop shop for planning trips. You can provide comprehensive information on all the destinations travelers are considering, as well as advice on what to see and do. Plus, an automated travel website can act as a virtual travel agent, helping to make reservations, find deals, and connect with other travelers. With an automated travel website, you can provide travel plans and packages according to the customers’ convenience.
Then again, a travel website can be a valuable asset for travelers. Therefore, providing comprehensive information on the destinations they cover will make it easy to research before planning a trip. This can convert the website visitors into your client and ultimately lead to generating a good amount of revenue.
Why Choose Elementor for Your Travel Website?
Elementor is a powerful, user-friendly platform that enables users to create high-quality online travel websites quickly and easily. With Elementor, you can create a website in minutes that is both professional and attractive, perfect for promoting your travel business. Additionally, Elementor offers a wide range of powerful features to make creating and managing your travel website easy. From the simple task of creating a tour schedule to more complex functions like booking flights and hotels, Elementor has everything you need to get started. herefore, Elementor is an all-in-one travel agent website builder that makes it easy to manage all your travel information, from reservations to blog posts.
Besides, Elementor has third-party addons like Exclusive Addons, which extend the functionalities even further. Exclusive Addons comes with readymade Elementor templates for travel websites, and plenty of other widgets to help you build travel websites.
Get Travel Website Template
How do I create a travel website with WordPress and Elementor?
Lets now go through the steps that you should follow for creating a travel website. The following steps will describe the procedure of you can build the website.
Step 1: Choose your relevant domain name
Domain name selection is one of the most important decisions you will make when starting a new business. Choosing the wrong domain name can be costly and time-consuming to fix. Therefore you need to get a unique but easy-to-remember domain name, that must be relevant to travel and trips.
Step 2: Choose a web hosting
When choosing web hosting, you need to keep in mind the average traffic on your website. You must choose a hosting capable of choosing the traffic on your website. Therefore, check the services like uptime, security level, space allocation, customer support, scalability, reliability, and performance factors like CPU, Hard disk & RAM.
Check our article on 2022’s Best Hosting For WordPress to find the best match hosting for your travel website.
Step 3: Install a CMS (WordPress)
Next step is to install the WordPress CMS. If your hosting provides a WordPress dedicated plan, you may already have the CMS pre-installed. If not, follow the procedure below.
To install the WordPress first download the WordPress package and unzip the file. Download the WordPress package from here: https://wordpress.org/download/.
Then create a database for WordPress and a MySQL user on your hosting server. After that, you need to configure the wp-config.php file by renaming the file name from “wp-config-sample.php” to “wp-config.php” and editing the file to add your database information.
Finally, upload the WordPress files to the desired location and run the WordPress installation to complete the installation process.
Step 4: Install Elementor page builder and Exclusive Addons
Now you will install the page builder, Elementor. To install the Elementor plugin, download the plugin from wordpress.org and upload it to your WordPress. Follow the detailed instructions to install Elementor and how to use it.
To extend the Elementor’s functionality, use Exclusive Addons for Elementor. The best Elementor addon gives you flexibility to design websites with ample number of elements and templates. Exclusive Addons has both free and pro versions available. You can use the free version as well as an upgrade to the premium version if you want.
Step 5: Choose a WordPress travel template
Creating websites from scratch is good. But you won’t always have time or ideas to design a website from the beginning. Therefore, you can choose templates to make things easier for you.
Saying so, Exclusive Addons for Elementor comes with a couple of readymade templates for Travel websites. Those templates can help you create sophisticated travel website designs and build your site faster.
Step 6: Do the SEO part right
To get the best output SEO is a vital part of your travel website. You must optimize your website for the search engine so that travelers find you at the top when searching for travel-related topics and information.
Follow the instructions in our article Elementor SEO Tips: Optimize Your Website For Search Engine to get the best output from the search results.
Which pages does a travel website include?
Site structure completely depends on the site owner. You will finally decide on adding pages to the website. However, there are some common pages that a travel website usually includes. Let’s go through the pages that you should include on your travel website.
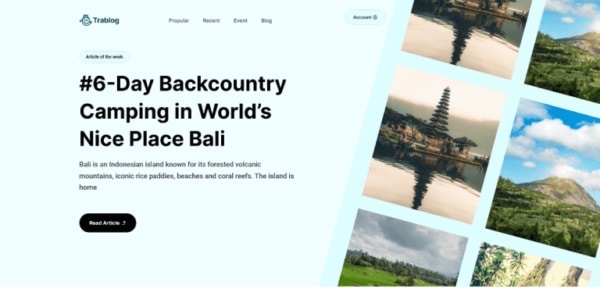
Home page
The first viewpoint of a travel web site’s home page typically contains an engaging hero section. This section includes a hero image with a catchy headline. You can also include a subheading that describes your business in brief.
Scrolling down on the tourism landing page, you can add a list of recent articles and upcoming events. Meanwhile, you can add an affiliate section, where travel essentials items are on show.
Travel blog
The travel blog page is designed to be a resource for travelers, and it provides information about destinations, transportation, food, and more. It also includes reviews of hotels and other accommodations, as well as tips for getting the most out of your travels.

To design a travel blog page, you can use the post grid widget to show the blogs on your site. You can include the upcoming events on this page too.
Gallery page
A big part of the travel is images. Show the images that you or your team have captured during previous trips. Use the Filterable Gallery widget to create a gallery that displays captivating images with category filters.
Travel Itinerary page
The Travel Itinerary page includes details of the travel plans and packages. This page includes an itinerary planner, a map feature, and a trip notes section. The advantage of using an Itinerary is that customers can keep track of their progress and stay organized while on their travels. The website also provides tips for traveling to different destinations, as well as contact information for local tour operators.
For an automated travel website, you can provide an option where the travelers will simply enter the destination, dates, and preferences and get automated suggestions for flights, hotels, and other vacation activities.
Testimonials page
The testimonials page on a travel website is important for two reasons. First, it provides potential customers with a snapshot of what other travelers have had to say about the site and its services. Second, it helps to reinforce the company’s reputation and brand image with potential customers. The testimonials should be genuine and from people who have actually used the site’s services. Use the widgets like Testimonial and Testimonial Carousel to show the testimonials on the website.
FAQ page
Answer the frequently asked questions of the travelers. FAQ page for a travel website is a collection of Frequently Asked Questions (FAQ) that can help travelers make better decisions about where to go and what to do while on vacation. The FAQ page includes tips on planning your trip, advice for budget travelers, information about specific destinations, safety and security tips, and more. The FAQ page is designed to help customers find the answers to their questions quickly and easily. You can use the Accordion widget to show the FAQs on the page.
Contact Us page
Provide your contact details on this page. On the “Contact US page” add a contact form so that visitors can send their queries in detail. This can improve the traveler experience by connecting them with the best possible resources for their destination.
In conclusion
Creating a travel website can be an excellent way to promote your business and attract more customers. By creating an automated travel website that is user-friendly and informative, you can target potential travelers and help them plan their vacations. You’ll also need to keep in mind the various travel websites that are popular among travelers, as well as the latest trends in the industry.

5 replies on “How To Create Automated Travel Website With WordPress & Elementor”
It was a very knowledgeable and informative article.
Thanks for sharing the insights on the travel website for a business.
The points you covered here are very much relatable; anyone can quickly execute them for their business.
Thanks for sharing this information!
Hi Janvi Arora,
Thank you for your comment.
Your point makes good sense.
Thanks for sharing this amazing content which is actually really helpful. By following up these step and with these advice a person could have perfect online set up for online business content management.
Hello Lara,
Thanks for your Comment.
You are most welcome.