
We've all been there. That heart-sinking moment when your beautiful WordPress site is suddenly replaced by a stark white screen or a cryptic error message. Don't panic. This is what's known as a WordPress fatal error, and while it looks scary, it's usually something you can fix.
What a WordPress Fatal Error Actually Is
Think of your website's PHP code as a detailed recipe the server follows to build your pages. A fatal error happens when the server hits a step in that recipe it just can't execute. Maybe a key ingredient (a function) is missing, or a step is written so poorly that the whole process grinds to a halt.
This isn't a sign that your site is gone for good. It's actually WordPress's self-preservation instinct kicking in. Rather than trying to load a broken page and potentially causing more damage, it just stops everything. The result is often the infamous White Screen of Death (WSOD) or a critical error notification.
Demystifying the Dreaded White Screen
The WSOD is particularly frustrating because it gives you absolutely zero clues. It’s just a blank canvas where your vibrant website used to be. This usually points to a PHP error or a server memory issue—the server tried to do something, failed, and gave up without being told to display an error message.
Thankfully, newer versions of WordPress have started replacing the WSOD with a slightly more helpful message: "There has been a critical error on this website." This is a huge improvement. It often sends an email to the site administrator with details about what went wrong, giving you an immediate lead to chase down.
The Usual Suspects Behind Fatal Errors
Fatal errors can feel random, but after you've seen a few, you start to notice a pattern. Most of the time, the problem traces back to one of a few common culprits. Knowing these will give you a clear roadmap for troubleshooting instead of just clicking around in the dark.
- Plugin Conflicts: This is a big one. A plugin might be poorly coded, clash with another plugin, or become incompatible after you update it or WordPress core.
- Theme Issues: Just like plugins, your active theme can contain faulty code or have a falling out with a new WordPress version or a specific plugin.
- Exhausted PHP Memory Limit: Your site might be trying to perform a task—like activating a heavy-duty plugin—that requires more memory than your hosting server has allocated.
- Corrupted Core Files: This is less common, but sometimes a core WordPress file can get mangled during an update, causing everything to break.
With WordPress powering over 40% of the world's websites, these issues are more common than you'd think. In fact, some statistics suggest that a staggering 85% of all WordPress errors are related to PHP—many of which are the very fatal errors that knock sites offline. You can learn more about the prevalence of WordPress errors and their causes.
The key is to shift your mindset from panic to a methodical process. By recognizing the type of error and knowing the likely causes, you can confidently start digging in to find and fix the problem.
Common Fatal Error Clues and Their Likely Causes
To get you started even faster, I've put together this quick-glance table. Match the symptom you're seeing with the most probable cause to get a strategic starting point for your fix.
| Symptom You Are Seeing | Most Common Cause | Where to Start Looking |
|---|---|---|
| The "White Screen of Death" (WSOD) | PHP Error or Memory Exhaustion | Your plugins folder (for conflicts) or wp-config.php (for memory limit). |
| "There has been a critical error…" message | Plugin or Theme Conflict | Your email inbox for the error details, then your plugins or themes folder. |
| Error only happens on a specific page | Plugin Conflict or Corrupted Page | Deactivate plugins one-by-one; check the page in the editor. |
| Error appears after an update | Incompatibility | The plugin/theme you just updated, or the WordPress core update itself. |
| "Allowed memory size of… exhausted" | Insufficient PHP Memory | Your wp-config.php file or your hosting provider's PHP settings. |
This table isn't exhaustive, but in my experience, it covers the vast majority of fatal error scenarios you'll run into. It's all about knowing where to aim your flashlight first.
Finding the Root Cause with Debug Mode
Trying to fix a WordPress fatal error without knowing what's actually causing it is a total shot in the dark. It's like trying to find your way out of a maze blindfolded. You'll probably bump into a lot of walls and get incredibly frustrated before you find the exit.
This is where WordPress’s built-in debug mode comes in. It’s easily the most powerful tool in your arsenal for these situations. It lifts the veil on that generic "critical error" screen and shows you the specific PHP issue that’s making your site crash.
To get it working, you'll need to make a quick edit to a core WordPress file: wp-config.php. This file sits in the root directory of your WordPress installation and holds all the essential configuration details for your site, like how it connects to the database.
Accessing Your wp-config.php File
You have a couple of ways to get to this file. For many, the most straightforward path is through the File Manager in your hosting account's control panel (think cPanel or Plesk). Just navigate to your site's main folder—it's usually called public_html or named after your domain—and you'll spot wp-config.php right there.
The other common method is using an FTP (File Transfer Protocol) client. Tools like FileZilla or Cyberduck work great. You’ll use the FTP login details from your web host to connect to your server. Once you're in, you'll see the same file structure as the File Manager, and you can find wp-config.php in that root directory.
Crucial First Step: Before you touch a single line of code, always, always make a backup of your
wp-config.phpfile. Just right-click on it and download a copy to your computer. If a typo or mistake happens, you can immediately upload this original version and undo any damage.
Enabling Debug Mode Safely
Okay, once you have wp-config.php open in a text editor, scroll down toward the bottom until you see a comment that says /* That's all, stop editing! Happy publishing. */. We're going to add a few lines of code just above that.
You should see this line somewhere in the file:
define( 'WP_DEBUG', false );
Your first instinct might be to just change false to true. While that does turn on debug mode, it also splashes every error across the front of your website for all to see. That’s a huge security no-no.
A much smarter and safer way is to tell WordPress to log the errors to a private file instead.
To do this, first change that line to true. Then, right underneath it, add these two lines:
define( 'WP_DEBUG_LOG', true );
define( 'WP_DEBUG_DISPLAY', false );
Here's what this little trio actually does:
define( 'WP_DEBUG', true );– This is the main switch that activates debugging.define( 'WP_DEBUG_LOG', true );– This tells WordPress to create a file nameddebug.logand write all errors to it.define( 'WP_DEBUG_DISPLAY', false );– This critical line hides the errors from your site’s visitors, keeping any sensitive information private.
After you've added the code and saved the changes to your wp-config.php file, go back and reload your broken website. It will probably still show the same error screen, but don't worry. The magic is happening behind the scenes.
Reading the Debug Log
Head back to your File Manager or FTP client. Now, look inside the /wp-content/ folder. You should see a brand new file in there: debug.log.
Open it up. It might look a bit technical at first, but you're hunting for a specific phrase: "Fatal error."
This log entry is the smoking gun. It gives you a timestamped record of what went wrong, and it will point directly to the file and even the exact line of code causing the crash. For example, you might see an entry like this:
PHP Fatal error: Cannot redeclare some_function() in /public_html/wp-content/plugins/some-plugin/some-file.php on line 52
This message tells you everything you need to know. The problem is in a plugin named "some-plugin," inside a file named "some-file.php," specifically on line 52.
Armed with this clue, you now have a clear direction. You’re no longer guessing; you’re diagnosing the problem with real data and can take targeted action to fix the WordPress fatal error.
Resolving Common Plugin and Theme Conflicts
If your debug.log file points a finger at a specific plugin or theme, you’ve already done most of the heavy lifting. This is easily the most common reason for a WordPress fatal error. An update can introduce a weird incompatibility, or two plugins that once played nicely together might suddenly decide to start a digital turf war.
The trick now is to methodically track down the exact source of the conflict.
The good news? You don’t even need your WordPress admin dashboard for this. We can manage the whole process right from your hosting File Manager or an FTP client, giving you total control even when the front end of your site is down.
This flow chart gives a good visual overview of the troubleshooting steps you'll be taking. It's a simple process of elimination.
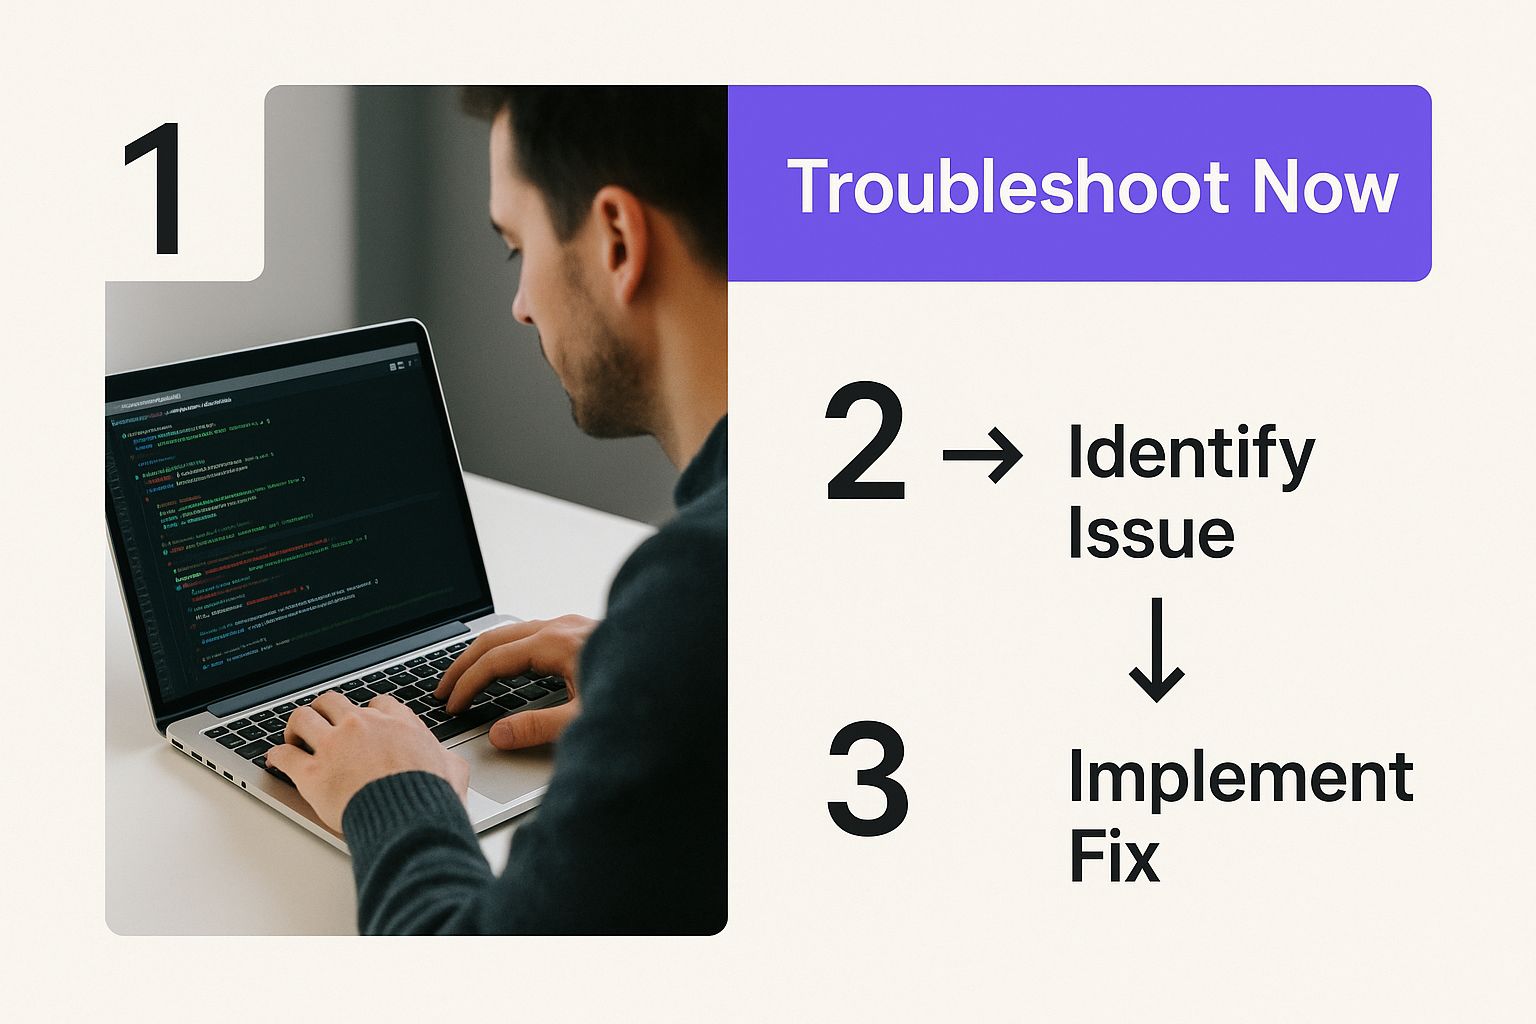
As you can see, it all starts with identifying the error and then moves through deactivating potential culprits one by one until your site is back online.
How to Isolate a Problem Plugin
Let's say your debug log has a line mentioning something like /wp-content/plugins/some-plugin/. That's your prime suspect. The fastest way to confirm if it’s the problem is to simply deactivate it.
Since you probably can't get into your dashboard, you'll do this by renaming the plugin's folder directly.
- Use your hosting's File Manager or an FTP client to navigate to your
/wp-content/plugins/directory. - Hunt down the folder that matches the plugin from your error log (e.g.,
some-plugin). - Just right-click the folder and rename it. Something simple like
some-plugin-disabledis perfect.
By renaming the folder, you've instantly deactivated that plugin because WordPress can no longer find its files. Go ahead and reload your website. If it pops back up, congratulations! You’ve found the cause of your WordPress fatal error.
What to Do When the Cause Is Unclear
But what if the debug log is vague and doesn't name a specific plugin? In that case, you'll need to test all of them at once. Don't worry, there's a quick way to handle this.
Go to your /wp-content/ directory and just rename the entire plugins folder to something like plugins-deactivated. This one simple action will force-deactivate every single plugin on your site.
Now, reload your website. If it loads properly, you know for sure the problem is one of your plugins. The next job is to figure out which one.
- Change the
plugins-deactivatedfolder name back toplugins. - Now, go inside the
pluginsfolder. - Start renaming each individual plugin folder one-by-one, just like we did before. After each rename, reload your site.
- The moment your site breaks again, you've found your culprit—it's the last plugin you reactivated.
A Real-World Plugin Conflict Scenario
Let's walk through a common situation. Imagine you run a portfolio site built with Elementor and have spruced it up with Exclusive Addons. You also rely on a popular security plugin. After a routine update to that security plugin, your site suddenly crashes with a critical error.
By following the debug process, you discover the error log points to a function conflict. So, you connect via FTP, rename the security plugin's folder, and just like that, your site comes back online. This tells you the latest update created an incompatibility, likely with Elementor or Exclusive Addons. Your next move is to roll the security plugin back to its previous version and shoot a message to their support team with what you found.
When you're dealing with these issues, a solid understanding WordPress plugins is invaluable for quickly spotting which ones might be causing trouble.
Testing for Theme-Related Conflicts
If you disable all your plugins and the fatal error is still there, your active theme is the next logical suspect. The process for checking this is almost identical to what we did with the plugins.
You'll need to force WordPress to fall back to one of its default themes.
- Connect to your site with FTP or your File Manager.
- Head over to the
/wp-content/themes/directory. - Find the folder for your active theme and rename it (for example,
mytheme-disabled).
As long as you have a default theme like 'Twenty Twenty-Four' installed, WordPress will automatically switch to it since it can no longer find your custom theme. Reload your site. If the error is gone, you've confirmed the problem lies somewhere in your theme's code.
Next Steps After Identifying the Offender
Once you've cornered the faulty plugin or theme, you've got a few clear paths forward:
- Check for Updates: The developer might have already pushed a fix. If so, you can delete the old version and install the new, patched one.
- Roll Back: If the error appeared right after an update, you can often find and install the previous, stable version of the plugin or theme.
- Contact Support: This is a big one. Report the issue directly to the developer and provide the exact error message from your debug log. This helps them fix the bug for everyone, not just you.
- Find a Replacement: If the plugin or theme seems abandoned or the developer is unresponsive, it’s probably time to start looking for a better, more reliable alternative.
If you've already tried deactivating your plugins and switching to a default theme but that dreaded WordPress fatal error is still there, it's time to look under the hood. We need to move past your site's files and investigate its engine: the server environment.
Don't let the term "server-side" intimidate you. While these errors can feel more technical, the fixes are often surprisingly simple. Most of the time, it just involves adding a single line of code to a configuration file.
Usually, these problems come down to two things: your PHP memory limit or your PHP version. Think of it like a car—it needs enough oil (memory) and the right kind of fuel (PHP version) to run. If either is off, your site can stall out completely.
Solving the "Allowed Memory Size Exhausted" Error
One of the most common server-side issues I see is the infamous “Fatal error: Allowed memory size of… exhausted” message. This is just WordPress's way of telling you it tried to do something but ran out of the operational memory (or RAM) it needed to finish the job.
It’s like trying to open a massive, high-resolution photo on a ten-year-old computer. At some point, the machine just throws its hands up and quits. This error pops up frequently when you activate a complex plugin, fire up a resource-hungry page builder like Elementor, or try to run a big import.
Your hosting provider sets a default PHP memory limit, often somewhere around 128M or 256M. For a modern website with a handful of plugins, that's often not enough.
The good news? You can usually increase this limit yourself. There are a couple of ways to do it.
Editing Your wp-config.php File
For my money, this is the most direct and reliable method. By adding one simple line to your wp-config.php file, you tell WordPress directly to use more memory.
- First, connect to your site using an FTP client (like FileZilla) or your host’s built-in File Manager.
- Find the
wp-config.phpfile. It's sitting in your site's main root directory. - Open the file and scroll down until you see the line:
/* That's all, stop editing! Happy publishing. */. - Right before that line, paste in the following code:
define( 'WP_MEMORY_LIMIT', '256M' );
You can set the value higher, say to 512M, if 256M doesn't do the trick. But 256M is a solid starting point that solves the problem for most sites. Save the file, upload it back to your server, and refresh your website. If the error is gone, you’ve found your culprit.
Sometimes, cheaper shared hosting plans will block this change. If that's the case, it's time for option two.
Using the .htaccess File
Another way to tackle this is by modifying your .htaccess file, which also lives in your site's root directory. This file handles all sorts of server rules.
Just add this line to the very bottom of your .htaccess file:
php_value memory_limit 256M
Save it and check your site again. This method can work, but I've seen it cause other server issues if edited incorrectly, and some hosts disable it entirely. That’s why I always recommend the wp-config.php method first.
Key Takeaway: Bumping up the PHP memory limit is a go-to fix for WordPress fatal errors, especially on sites loaded with plugins or heavy builders. Always start with the
wp-config.phpfile—it's the cleanest, most WordPress-native solution.
The Critical Importance of Your PHP Version
The other major server-side villain is an outdated PHP version. PHP is the programming language that makes WordPress tick. Just like any software, it gets regular updates that bring performance boosts, new features, and—most importantly—critical security patches.
Running an old version of PHP isn't just a security gamble; it's a primary cause of fatal errors. As the WordPress core, themes, and plugins evolve, they start using newer PHP functions. If your server is stuck on an old version that doesn't understand these new functions, your site will simply crash.
For instance, PHP 8.1 introduced much stricter coding standards. A plugin that ran perfectly on PHP 7.4 might suddenly trigger a fatal error on 8.1 because its old code is no longer considered valid.
Checking and Upgrading Your PHP Version
So, how do you know what you're running? If you can get into your dashboard, navigate to Tools > Site Health, click the Info tab, and expand the Server section. Your PHP version will be listed right there.
If you're locked out, your hosting control panel is the next stop. Look for an icon named "MultiPHP Manager" or "Select PHP Version" (this is common in cPanel). This tool not only shows your current version but also lets you change it with a dropdown menu.
WordPress officially recommends at least PHP version 7.4, but for the best performance and security, you should really be on the latest stable version your host offers, like PHP 8.1 or 8.2.
Upgrading is usually as simple as picking a new version from the list and hitting "Save." Your host handles all the technical stuff behind the scenes. I've seen this one simple action fix a surprising number of mysterious fatal errors.
If you're curious about what makes a good hosting setup that prevents these issues, check out our guide on the best hosting for WordPress. A quality host gives you the tools to manage your environment easily, helping you prevent problems before they ever start.
How To Prevent WordPress Fatal Errors In The Future
Fixing a WordPress fatal error is a huge relief, but the real victory is preventing them from ever happening again. It’s all about shifting from a reactive, panicked mindset to a proactive one. That’s the key to long-term website stability and, frankly, your own peace of mind.
This doesn't mean you need to become a coding guru. It's about building a simple, effective maintenance routine that acts as your first line of defense. By adopting a few professional-grade habits, you can dramatically cut down your risk of seeing that dreaded white screen.
Embrace A Staging Environment
If there's one golden rule to avoid a self-inflicted disaster, it’s this: never test on your live site. A staging environment is an exact clone of your website where you can safely test updates to plugins, themes, and even WordPress core before they ever touch your public-facing site.
Think of it as a dress rehearsal. If an update causes a conflict or throws a fatal error, it happens on a private copy that no one else sees. You can troubleshoot without any pressure. Thankfully, many modern hosting providers offer one-click staging site creation, making this powerful tool more accessible than ever.
Develop Strong Plugin and Theme Hygiene
Let's be honest: not all plugins are created equal. I've seen countless fatal errors stem from poorly coded or, even worse, abandoned plugins. Adopting a strict "plugin hygiene" policy is absolutely crucial.
- Choose Wisely: Before you click "Install," do your homework. Look for recent updates, solid reviews, active support forums, and confirmed compatibility with the latest WordPress version.
- Audit Regularly: At least once a quarter, go through your plugin list. If you aren't using something, deactivate and delete it. Every piece of unused code is an unnecessary security risk and a potential source of future conflicts.
- Avoid Nulled Plugins: Seriously, don't do it. Never install "nulled" or pirated versions of premium plugins. They are almost always riddled with malware that will cause you far bigger headaches than a simple fatal error.
A well-maintained site is a secure site. Integrating these practices not only prevents errors but also hardens your website against attacks. For a deeper dive, our guide on how to secure your WordPress site offers more actionable security tips.
Automate Your Backups
This is the non-negotiable rule of website ownership. Regular, automated backups are your ultimate safety net. If a fatal error does strike and you can't quickly pinpoint the cause, restoring your site from a recent backup is the fastest way to get back online.
Most quality hosting providers offer daily automated backups as part of their service. If not, dedicated backup plugins like UpdraftPlus or WPvivid can automatically save copies of your site to an off-site location like Google Drive or Dropbox.
Preventing errors also means maintaining a healthy server environment. Actively optimizing server performance can significantly reduce the chances of resource-related issues like memory exhaustion, a very common trigger for these critical errors. When you combine a healthy server with smart maintenance habits, you build a resilient website that's ready for anything.
Common Questions About WordPress Fatal Errors
Once you’ve put out the fire and fixed a WordPress fatal error, you're often left with some nagging questions. It’s totally normal to feel a bit shaky and wonder what just happened, or what might happen next time. Let's tackle those common concerns so you can move forward with confidence.
Think of this as your post-incident debrief. The immediate crisis is over, and now it's time to understand the why and shore up your defenses for the future.
Will A Fatal Error Delete My Website Content?
This is usually the first wave of panic, but you can take a deep breath. A fatal error does not delete your content. Your posts, pages, images, and user data are all tucked away safely in your WordPress database. That database is completely separate from the PHP files that actually run your site.
The error is a problem with the code, not your data. It’s like having the wrong key for your car—the car is still there, perfectly intact, you just can't start it. Once you fix the plugin conflict or server setting that’s causing the breakdown, your content will be right there, just as you left it. The only real danger is making a careless mistake while you're trying to fix things, which is why having a recent backup is your ultimate safety net.
Key Insight: WordPress smartly separates its code (the PHP files) from its content (the database). A fatal error breaks the code's ability to show the content, but the content itself remains safe and sound.
What If I Find the Bad Plugin?
Okay, so you deactivated a plugin and poof—your site came back to life. You've pinpointed the culprit. Now, it can be tempting to just flip it back on and hope it plays nice, but that's a risky bet. You need to do a little more digging to prevent this from happening again.
First off, check if there's an update for that plugin. Developers are constantly pushing out fixes for conflicts that can trigger a WordPress fatal error. If the plugin is already on the latest version, you're likely dealing with a conflict between it and another part of your site.
Here’s the process I follow to hunt down the second half of the problem:
- Keep the problem plugin active, but deactivate all of your other plugins.
- If the site still works, you know the plugin is okay by itself.
- Now, start reactivating your other plugins one by one. Check your site after each activation.
- The moment that fatal error screen pops up again, you’ve found the plugin that’s clashing with the first one.
Once you know which two components are fighting, your best bet is to contact the support team for one or both plugins with your findings. Or, you might just need to find an alternative. Big WordPress updates can also stir up new conflicts. It's always a good idea to stay informed, like reading up on how the WordPress 5.9 update changed the game for themes and blocks.
When Is It Time to Hire a Professional?
While this guide gives you the tools to handle most common issues, there are absolutely times when calling in a pro is the smartest play. You don't have to be a hero and solve every single problem yourself. Knowing when to tag in an expert is a skill.
You should seriously consider hiring a WordPress developer if you run into any of these brick walls:
- You're Plain Stuck: You've gone through all the steps—checking plugins, themes, memory limits—and you’re still staring at the error screen.
- Core File Errors: The debug log is pointing a finger at a core WordPress file (anything inside
/wp-admin/or/wp-includes/). Messing with these files is like performing surgery without a license; it’s best left to an expert. - The Error is a Ghost: It’s an intermittent issue, popping up randomly. These are notoriously difficult to diagnose because you can't reliably reproduce the problem.
- You're Out of Your Comfort Zone: If editing files via FTP or poking around in your server settings makes your palms sweat, that's a perfectly good reason to hand the keys to someone else.
A few hours of professional help can save you a mountain of stress, keep you from making a small problem much worse, and get your business-critical site back online quickly and safely.
At Exclusive Addons, we believe that building a powerful website with Elementor shouldn't be a struggle. Our suite of 108+ widgets and extensions is designed to be lightweight and stable, giving you the creative freedom you need without the risk of conflicts. Build faster, smarter, and with more confidence. Explore Exclusive Addons for Elementor today!